For many users around the world, the default word processor app is Microsoft Word. However, your Mac also has one available for free with every purchase called Pages. This is part of Apple’s suite of productivity apps formerly known as iWork, and has been around for years. Unfortunately, partly due to Apple’s lack of attention, Pages was left pretty stagnant for a while. That’s no longer the case and Pages is a pretty robust and powerful word processing app for the Mac. Today, we’re going to run through the necessary steps you need to take if you want to highlight text in Pages for Mac.
There are two different methods if you want to highlight text in Pages for Mac. The first method is the easiest, and most common option, as it doesn’t require a bunch of extra steps if something needs to be highlighted.
Open the Pages app on your Mac.
Load or create a Pages text document.
Select the text that you want to highlight in the document.
In the Menu Bar, click Insert.
Select Highlight from the drop-down menu.
That’s it!
Some may not know this, but you can actually change the color of the highlight used, and here’s how you can do it:
Highlight text in the Pages document following the steps provided above.
In the Menu Bar, click View.
Hover your cursor on Comments & Changes from the drop-down menu.
Hover your cursor over Author Color from the pop-out menu.
Select one of the colors offered from the pop-out menu.
There is a catch for those who want to highlight text in Pages using the method above. Unfortunately, if you find yourself needing to print the document, the highlights will not be saved and don’t appear on the printed version.
Add A Highlight Effect To Text
Because of the fact that the above method doesn’t leave the text highlighted when printed, Apple has implemented another method. By adding a Highlight Effect to the text, the highlight will remain if you end up needing to print out the document from the Pages app. Here’s how you can add a Highlight Effect to text in the Pages app:
Open the Pages app on your Mac.
Load or create a Pages text document.
Select the text that you want to highlight in the document.
From the Format sidebar, click the Style button.
Under the Font section, click the Gear icon to open the Settings.
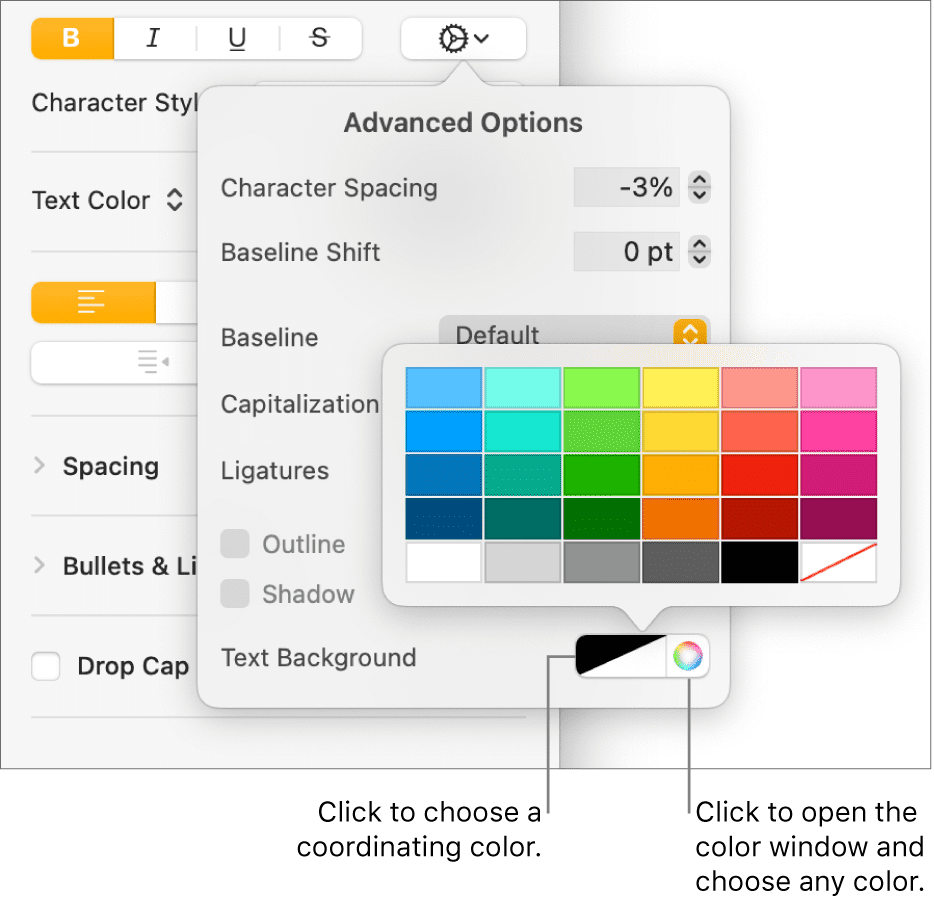
From the Advanced Options pop-out box, click the color well or color wheel next to Text Background.
Select a color that you wish to use for the highlights.
Click anywhere inside the document to close the control panel.
After the control panel is closed, the Highlight Effect will automatically be applied. And of course, you can follow the steps above to go through and change the color of the highlight if you need to.
Andrew Myrick is a freelance writer based on the East Coast of the US. He enjoys everything to do with technology, including tablets, smartphones, and everything in between. Perhaps his favorite past-time is having a never-ending supply of different keyboards and gaming handhelds that end up collecting more dust than the consoles that are being emulated.


Write a Comment