Modern Apple smartphone users increasingly pay attention to privacy settings and methods for optimizing network traffic. Using an iPhone proxy allows you to redirect device requests through an intermediate server, increasing your security level when working on public networks. Whether you want to hide your IP address or need a setup similar to managing other external devices like when using Apple’s Magic Trackpad on Windows, getting your network parameters right is essential.
Correct configuration guarantees the stable operation of all iOS ecosystem applications while safeguarding your digital privacy.
Before you can configure a proxy, you need to access the advanced parameters of your current wireless network.
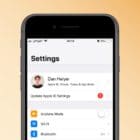
Open the Settings app on your iPhone.
Tap on Wi-Fi and ensure you are connected to your wireless network.
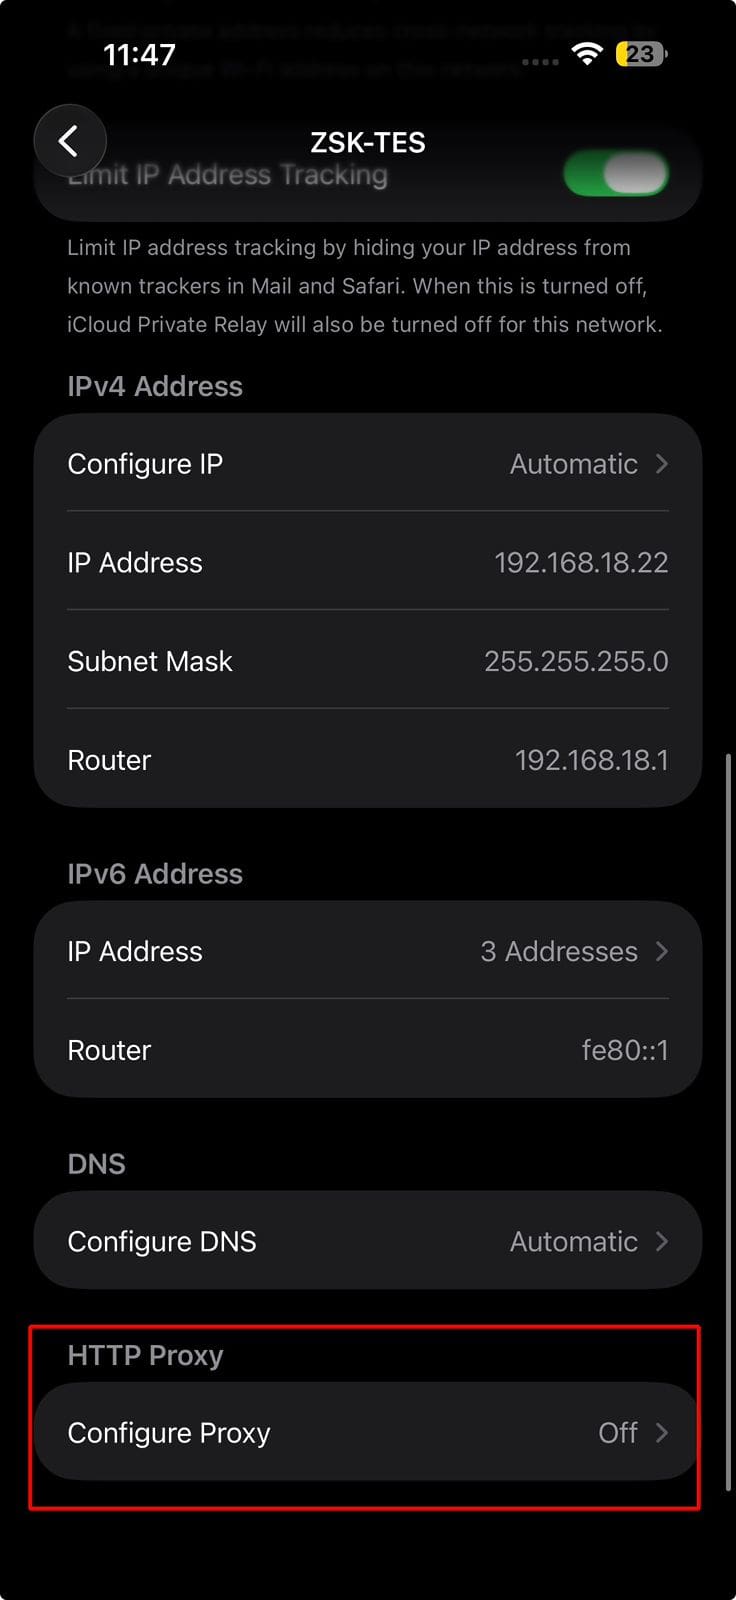
Tap the “i” (info) icon next to your active network’s name to open its detailed configuration panel.
Scroll down to the bottom of the page to find the HTTP Proxy section.
For more information on digital safety practices and baseline cybersecurity standards, you can review guidelines provided by organizations like the Cybersecurity and Infrastructure Security Agency (CISA).
Step 2: Choose Your Configuration Mode (Manual vs. Automatic)
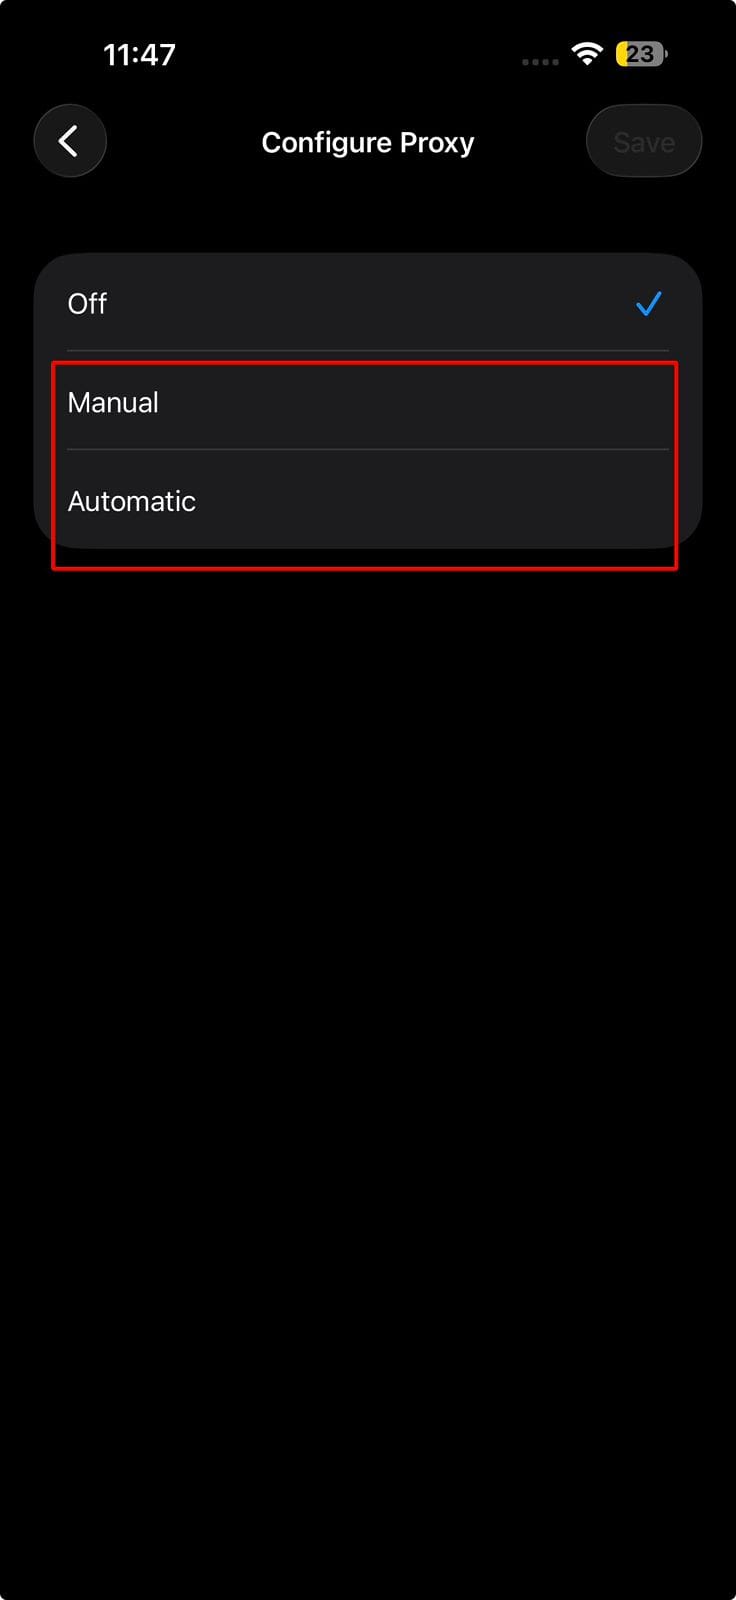
iOS gives you two main methods for configuring your server parameters depending on how your network administrator or provider set it up.
Automatic: Requires a URL pointing to a PAC (Proxy Auto-Configuration) file. Your iPhone will automatically fetch the correct server settings.
Manual: Gives you complete, hands-on control over data routing by letting you input exact server digits.
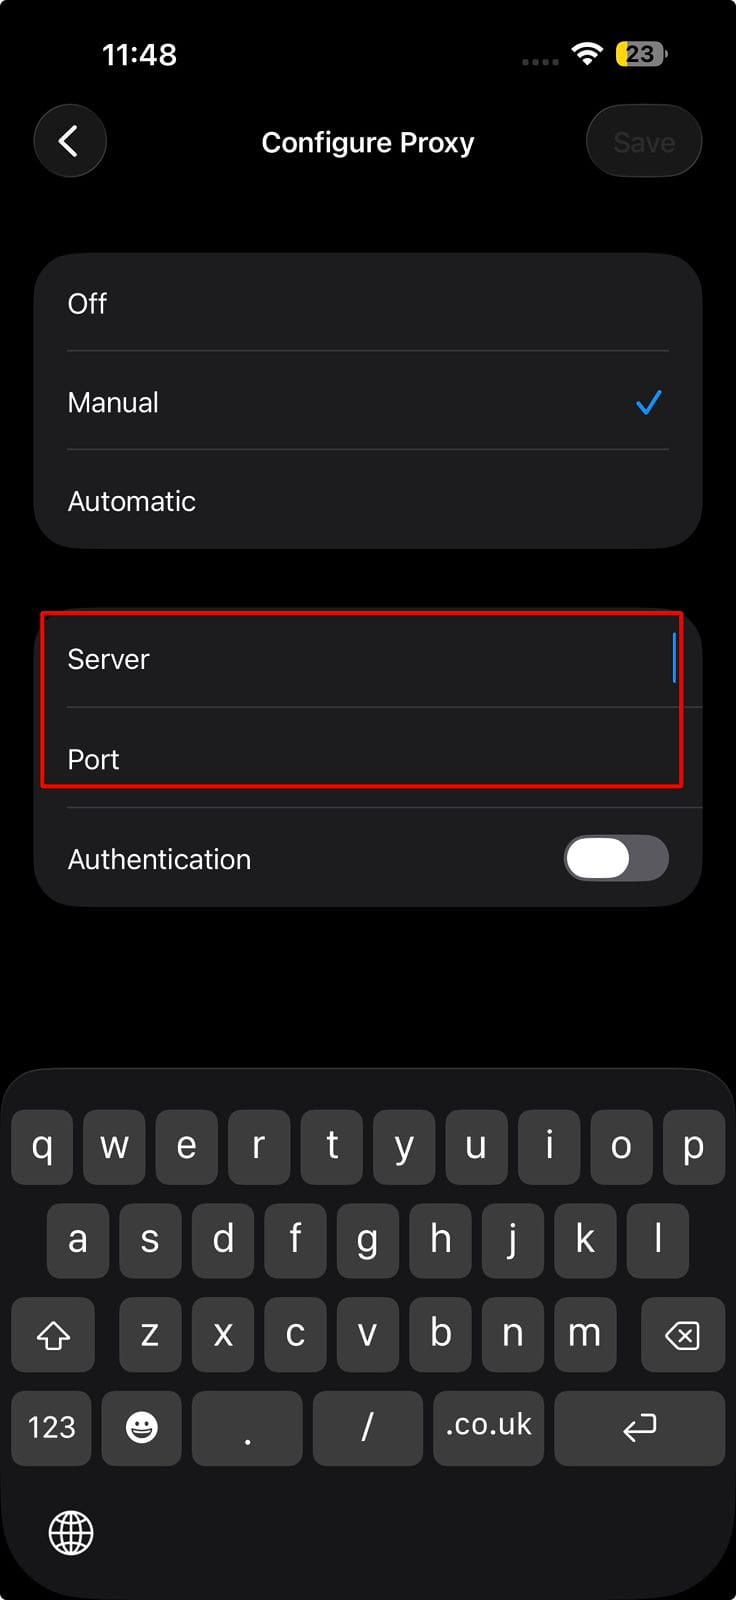
If you select Manual, additional entry fields will appear on your screen for server details, port numbers, and authentication. For broader context on how data packets are handled and secured across different environments, academic resources such as Stanford University’s Computer Science Department offer great foundational networking overviews.
Step 3: Enter Server Credentials and Save
Once you have selected your preferred configuration mode, it is time to input your server information.
Tap Manual.
In the Server field, enter your provider’s IP address or hostname (e.g., if you are using a specific regional node like a Canada proxy, enter that exact address).
In the Port field, input the assigned port number.
If your provider requires login credentials, toggle Authentication to On and enter your username and password.
Tap Save in the top right corner to instantly apply the changes.
Tip: Just as you might look for seamless cross-platform utilities, much like finding the best open-source AirDrop alternative for iPhone and Windows always double-check every single digit of your proxy server address to prevent internet connection dropouts.
Step 4: Verify Your Connection and Troubleshoot
After saving your settings, you need to make sure everything is running smoothly and that your traffic is successfully being routed.
Open Safari and visit a specialized IP-checking website to confirm your virtual location or IP has changed.
Open a few popular web pages to test overall connection speed.
Check key applications that require network access to ensure they function normally.
What to Do If the Internet Stops Working
Check Details: Re-verify that your port and server address were typed in without typos.
Toggle Connections: Briefly turn Airplane Mode on and off, or toggle your Wi-Fi switch to refresh the handshake.
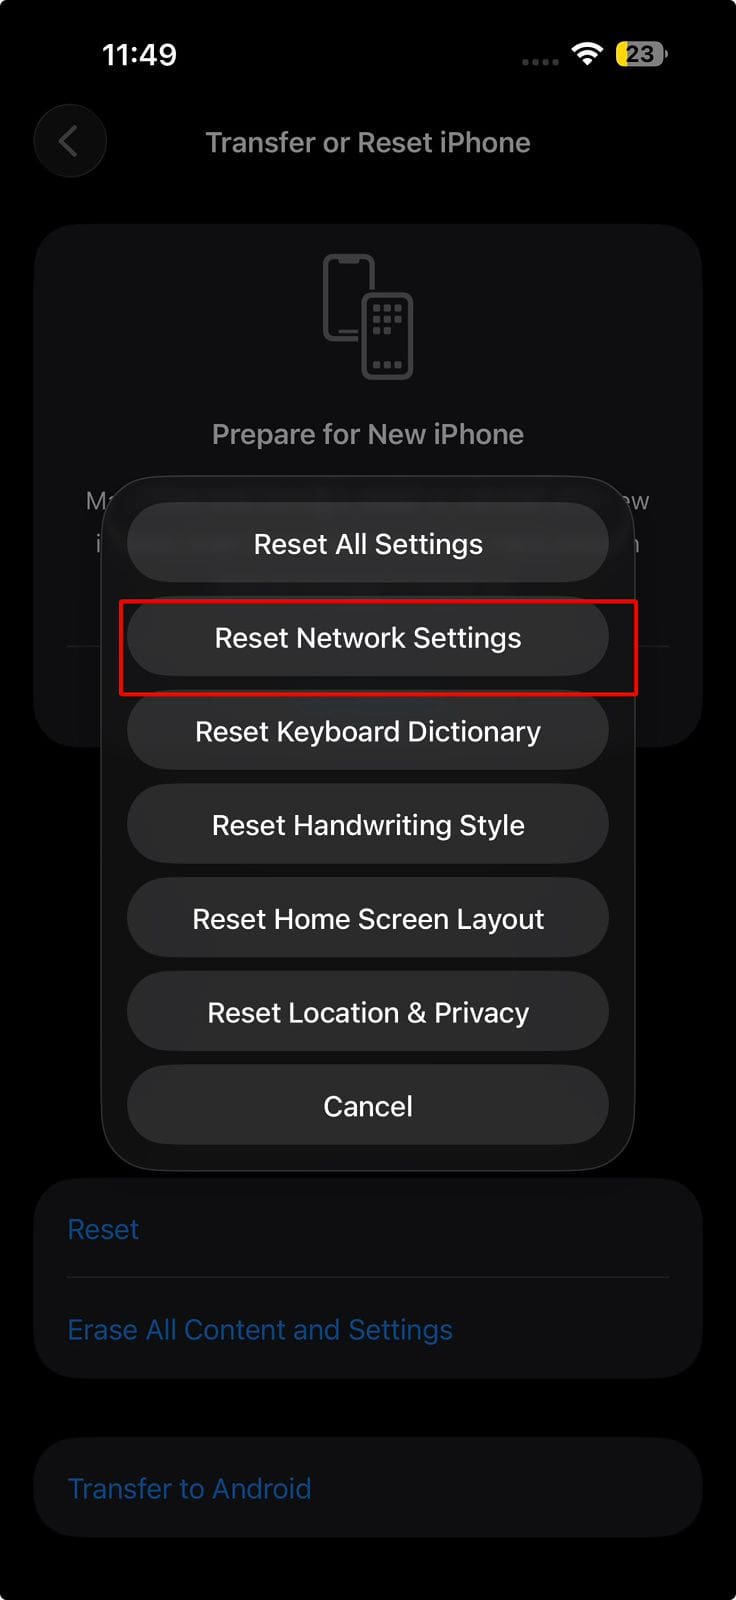
Reset Network Settings: If persistent conflicts arise, navigate to Settings > General > Transfer or Reset iPhone > Reset > Reset Network Settings. Note that this will erase saved Wi-Fi passwords, so you will need to reconnect to your network afterward.
As an avid gamer, I’ve run into my fair share of error codes and weird faults that have forced me to find fixes to problems I never anticipated. That gave me a passion for sharing those fixes with others so we can all game without feeling like our hardware is rebelling against us.











Write a Comment