While it’s absolutely wonderful to be constantly connected with our friends, family, and loved ones, the truth is that sometimes you just need a break. Whether it’s because you’re trying to get some work done, or if you just don’t feel like having an uncomfortable conversation at that moment, you might want to know how to silence text notifications on iPhone.
Thankfully, there are quite a few different options if you want to take a break from text notifications. And it all starts with the most obvious one, as you can simply toggle the switch on the side of your iPhone. Of course, this won’t actually silence the notification altogether, but instead, puts your iPhone into Vibrate mode.
How to Silence Text Notifications on iPhone: Enable Do Not Disturb
Outside of flipping the hardware switch on your iPhone, the next easiest way to silence text notifications on iPhone is to enable Do Not Disturb. This is a feature that has been around forever on our smartphones, as you’ll be able to stop your phone from buzzing, beeping, or doing anything to distract you when Do Not Disturb is activated.
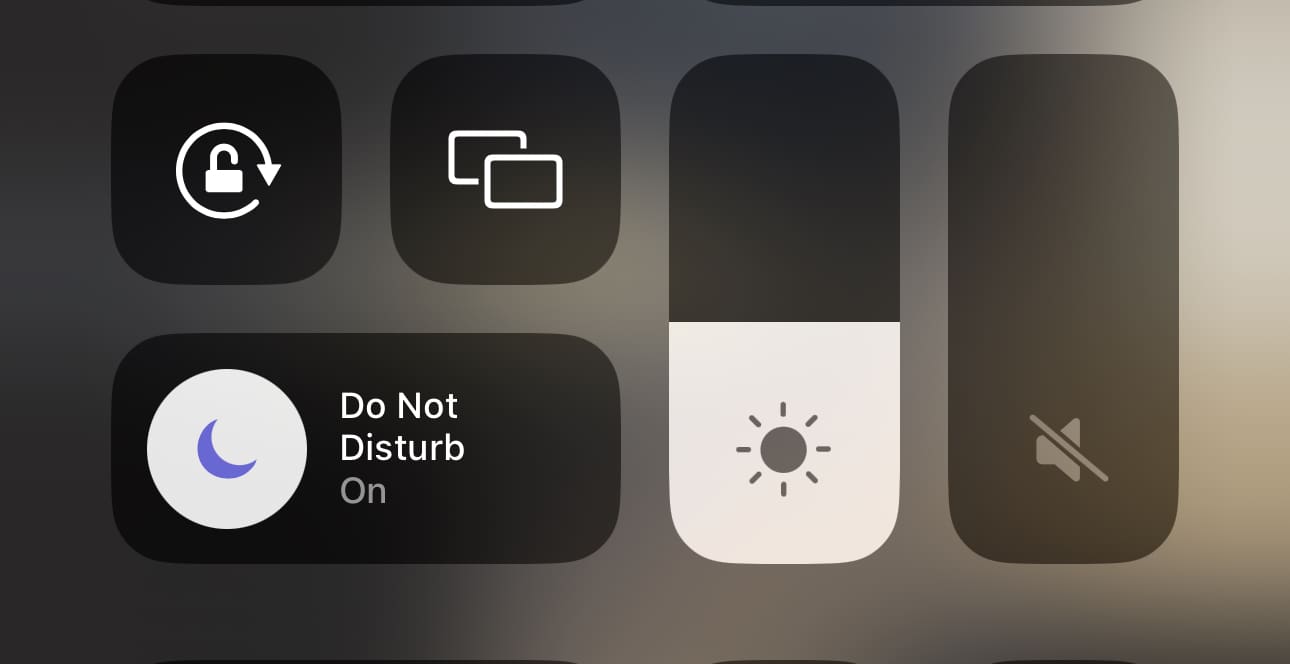
Swipe down from the top right corner of your iPhone to reveal Control Center.
Tap the Focus button.
Select Do Not Disturb from the list of options.
Swipe up from the bottom to exit Focus Mode selection and close Control Center.
Before iOS 14 and the introduction of Focus Modes, Do Not Disturb used to simply be a button on its own within Control Center. However, your iPhone’s software has changed quite a bit in recent years, but we’re thankful to still have good ole’ Do Not Disturb at our disposal.
How to Silence Text Notifications on iPhone: Turn Off Notifications
What if you want to silence text notifications on iPhone, but want to keep notifications enabled for all of your other apps and services? Well, this is also possible, and you’ll need to jump into the Settings app in order to do so.
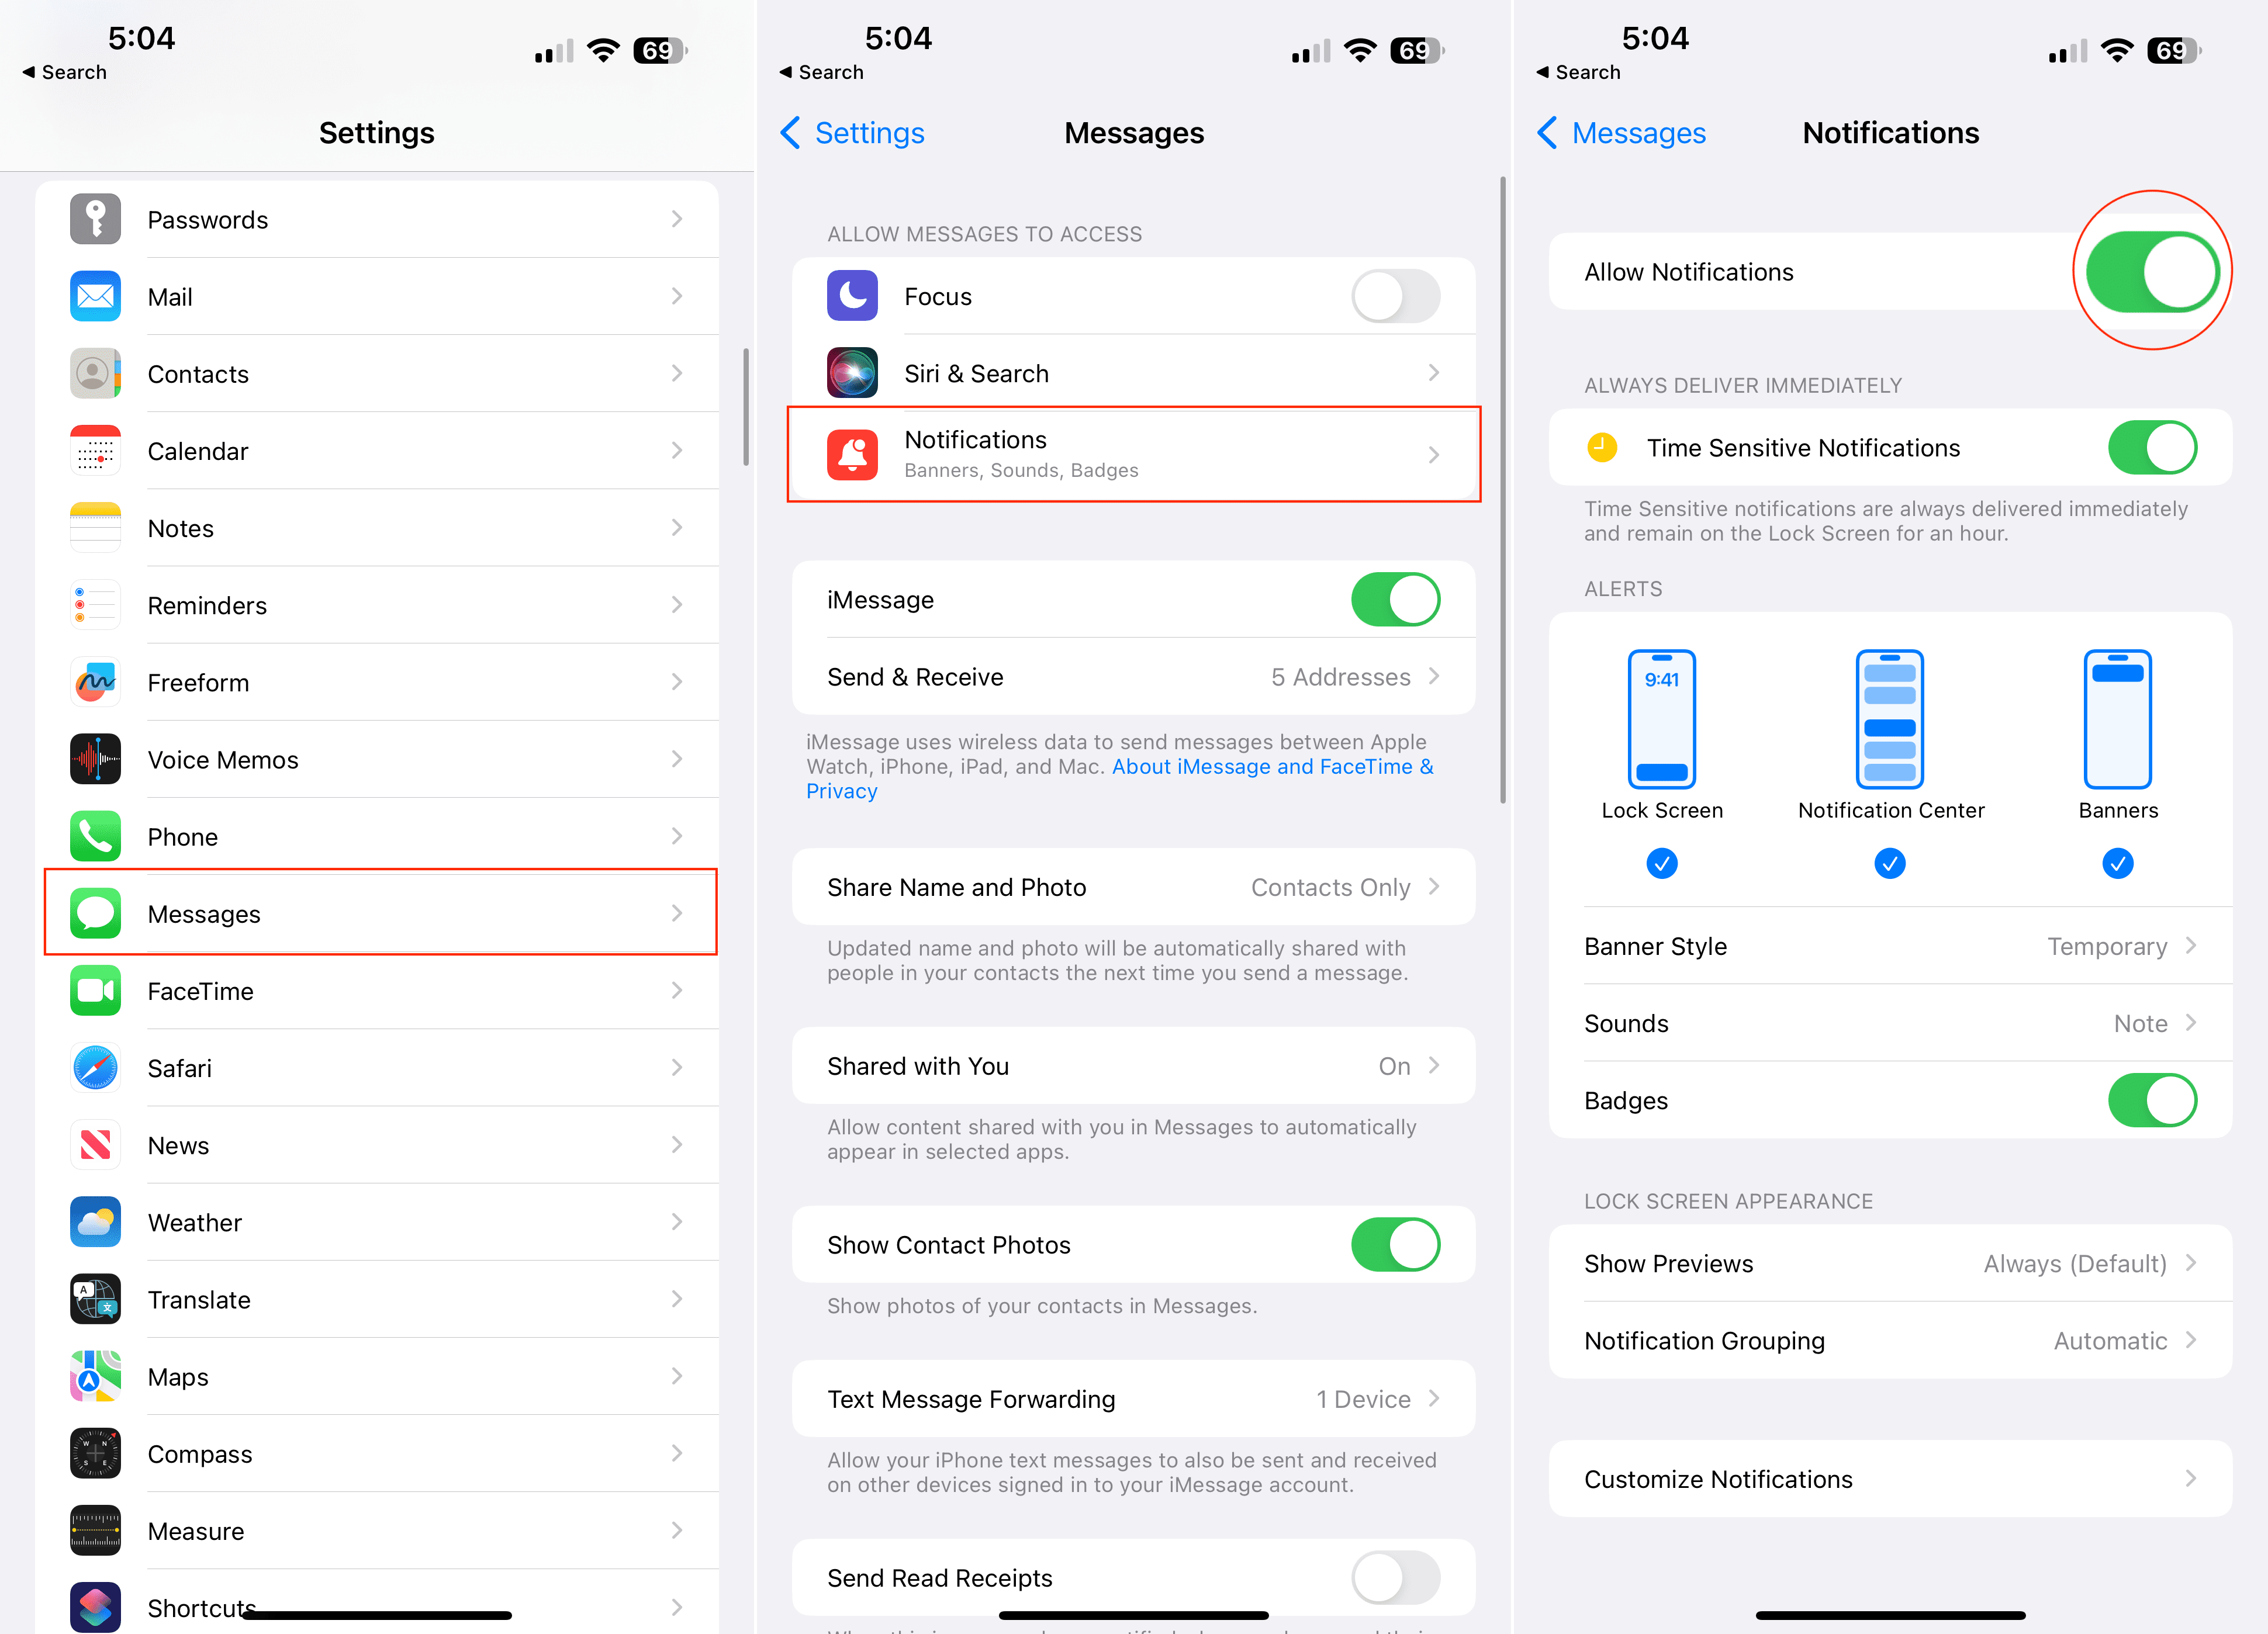
Open the Settings app on your iPhone.
Scroll down and tap Messages.
Under the top section, tap Notifications.
Tap the toggle next to Allow Notifications to the Off position.
Something to keep in mind is that you might want to set a reminder to go back and turn text notifications back on. This way, you won’t have to worry about missing any important text notifications in the future. Or you can just keep them off for as long as you want.
How to Silence Text Notifications on iPhone: Use Focus Modes
As we mentioned previously, Focus Modes were introduced as a unique way to supercharge your iPhone and make it work for you. Instead of just being shown all of the apps on your Home Screen and all the notifications that bother you throughout the day, Focus Modes can be created and customized to your liking. You can even go so far as to link your Lock Screen and Home Screen to a Focus Mode, and then switch between them right from your Lock Screen.
Apple has also provided enough customization that you can even create custom notification settings based on the active Focus Mode, meaning that you can silence text notifications on iPhone when in a specific Focus Mode. Here’s how you;’ll want to go about setting up custom notifications for texts when creating a new Focus Mode.
Open the Settings app on your iPhone.
Scroll down and tap Focus.
Tap the + button in the top right corner.
Select from one of the following options:
Custom
Driving
Fitness
Gaming
Personal
Reading
Work
On the next screen, tap the Customize Focus button.
Under the Allow Notifications section, tap People.
Tap the Add People button.
Select the contacts that you want to allow notifications for.
Tap the Done button in the top right corner.
Continue setting up the Focus Mode based on your preferences.
Whether you choose one of the pre-created Focus Modes or set one up from scratch, Apple also makes it possible for you to go back and make any necessary adjustments or changes. This means that you can go through and allow some text notifications to come through based on your contact list, or you can remove them altogether.
How to Silence Text Notifications on iPhone: Mute Specific Conversations
We’ve all been there before. You’re in a group chat with a bunch of friends, and they just won’t stop talking about absolute nonsense. It’s something that can really make you feel like you’re going crazy, especially if it’s a constant barrage of messages that never seem to end. On the bright side, at least with the Messages app, you can go through and mute specific conversations.
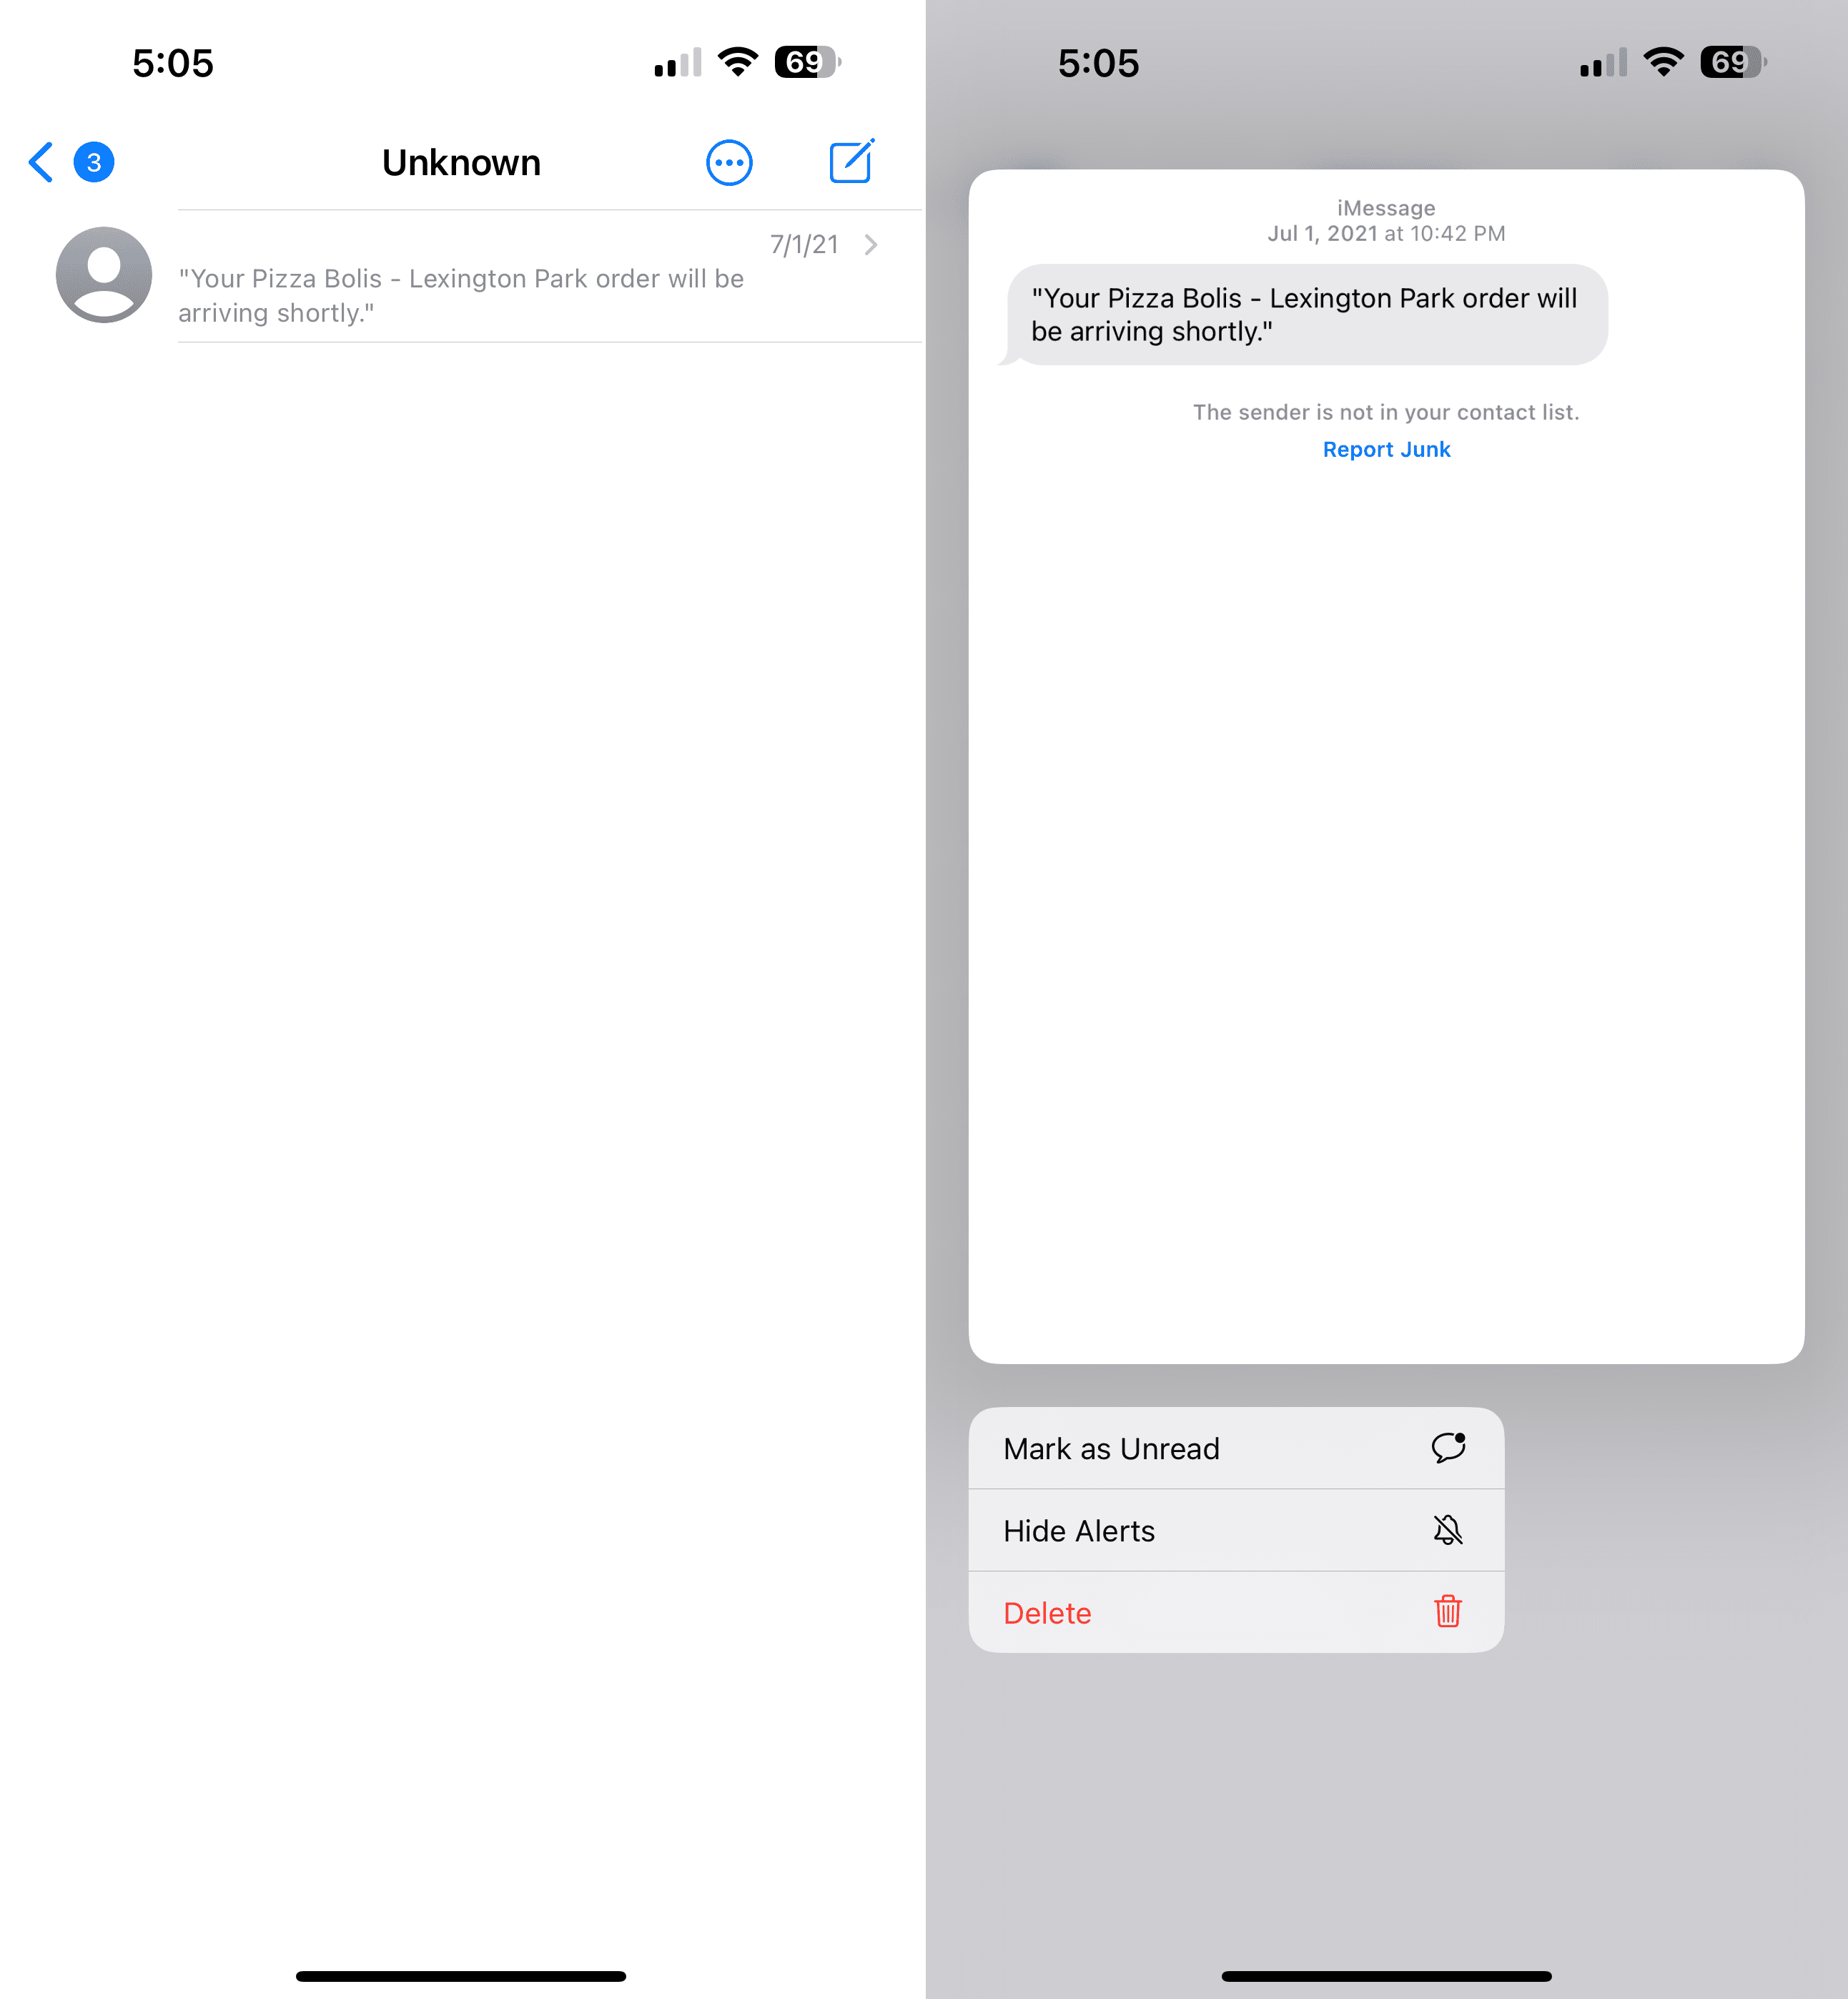
Open the Messages app on your iPhone or iPad.
Locate the Conversation that you want to silence text notifications on iPhone for.
Touch and hold the conversation.
From the context menu that appears, tap Hide Alerts.
Of course, the steps above don’t only apply to group conversations, as you can also mute conversations with specific people too. But as we’ve mentioned previously, it wouldn’t hurt to set a reminder to change those settings, or you could just leave the group chat altogether and not worry about any future notifications. Until the next group message gets started up.
Andrew Myrick is a freelance writer based on the East Coast of the US. He enjoys everything to do with technology, including tablets, smartphones, and everything in between. Perhaps his favorite past-time is having a never-ending supply of different keyboards and gaming handhelds that end up collecting more dust than the consoles that are being emulated.


")


Write a Comment