Apple introduced quite a few camera improvements to the entire iPhone 13 lineup this year. In addition to getting upgraded camera sensors, there are a few software tweaks and effects that have been added. One of which was Cinematic Mode, which allows you to rack the focus of a video while recording or even after you’re finished. But another one is for those who love taking pictures, and it’s called Photographic Styles.
At first glance, you may think that Photographic Styles is just a fancy “buzzword” Apple is using for “filters”. Admittedly, we thought the same, until it was actually explained on stage. Here’s Apple’s official explanation from the iPhone 13 announcement:
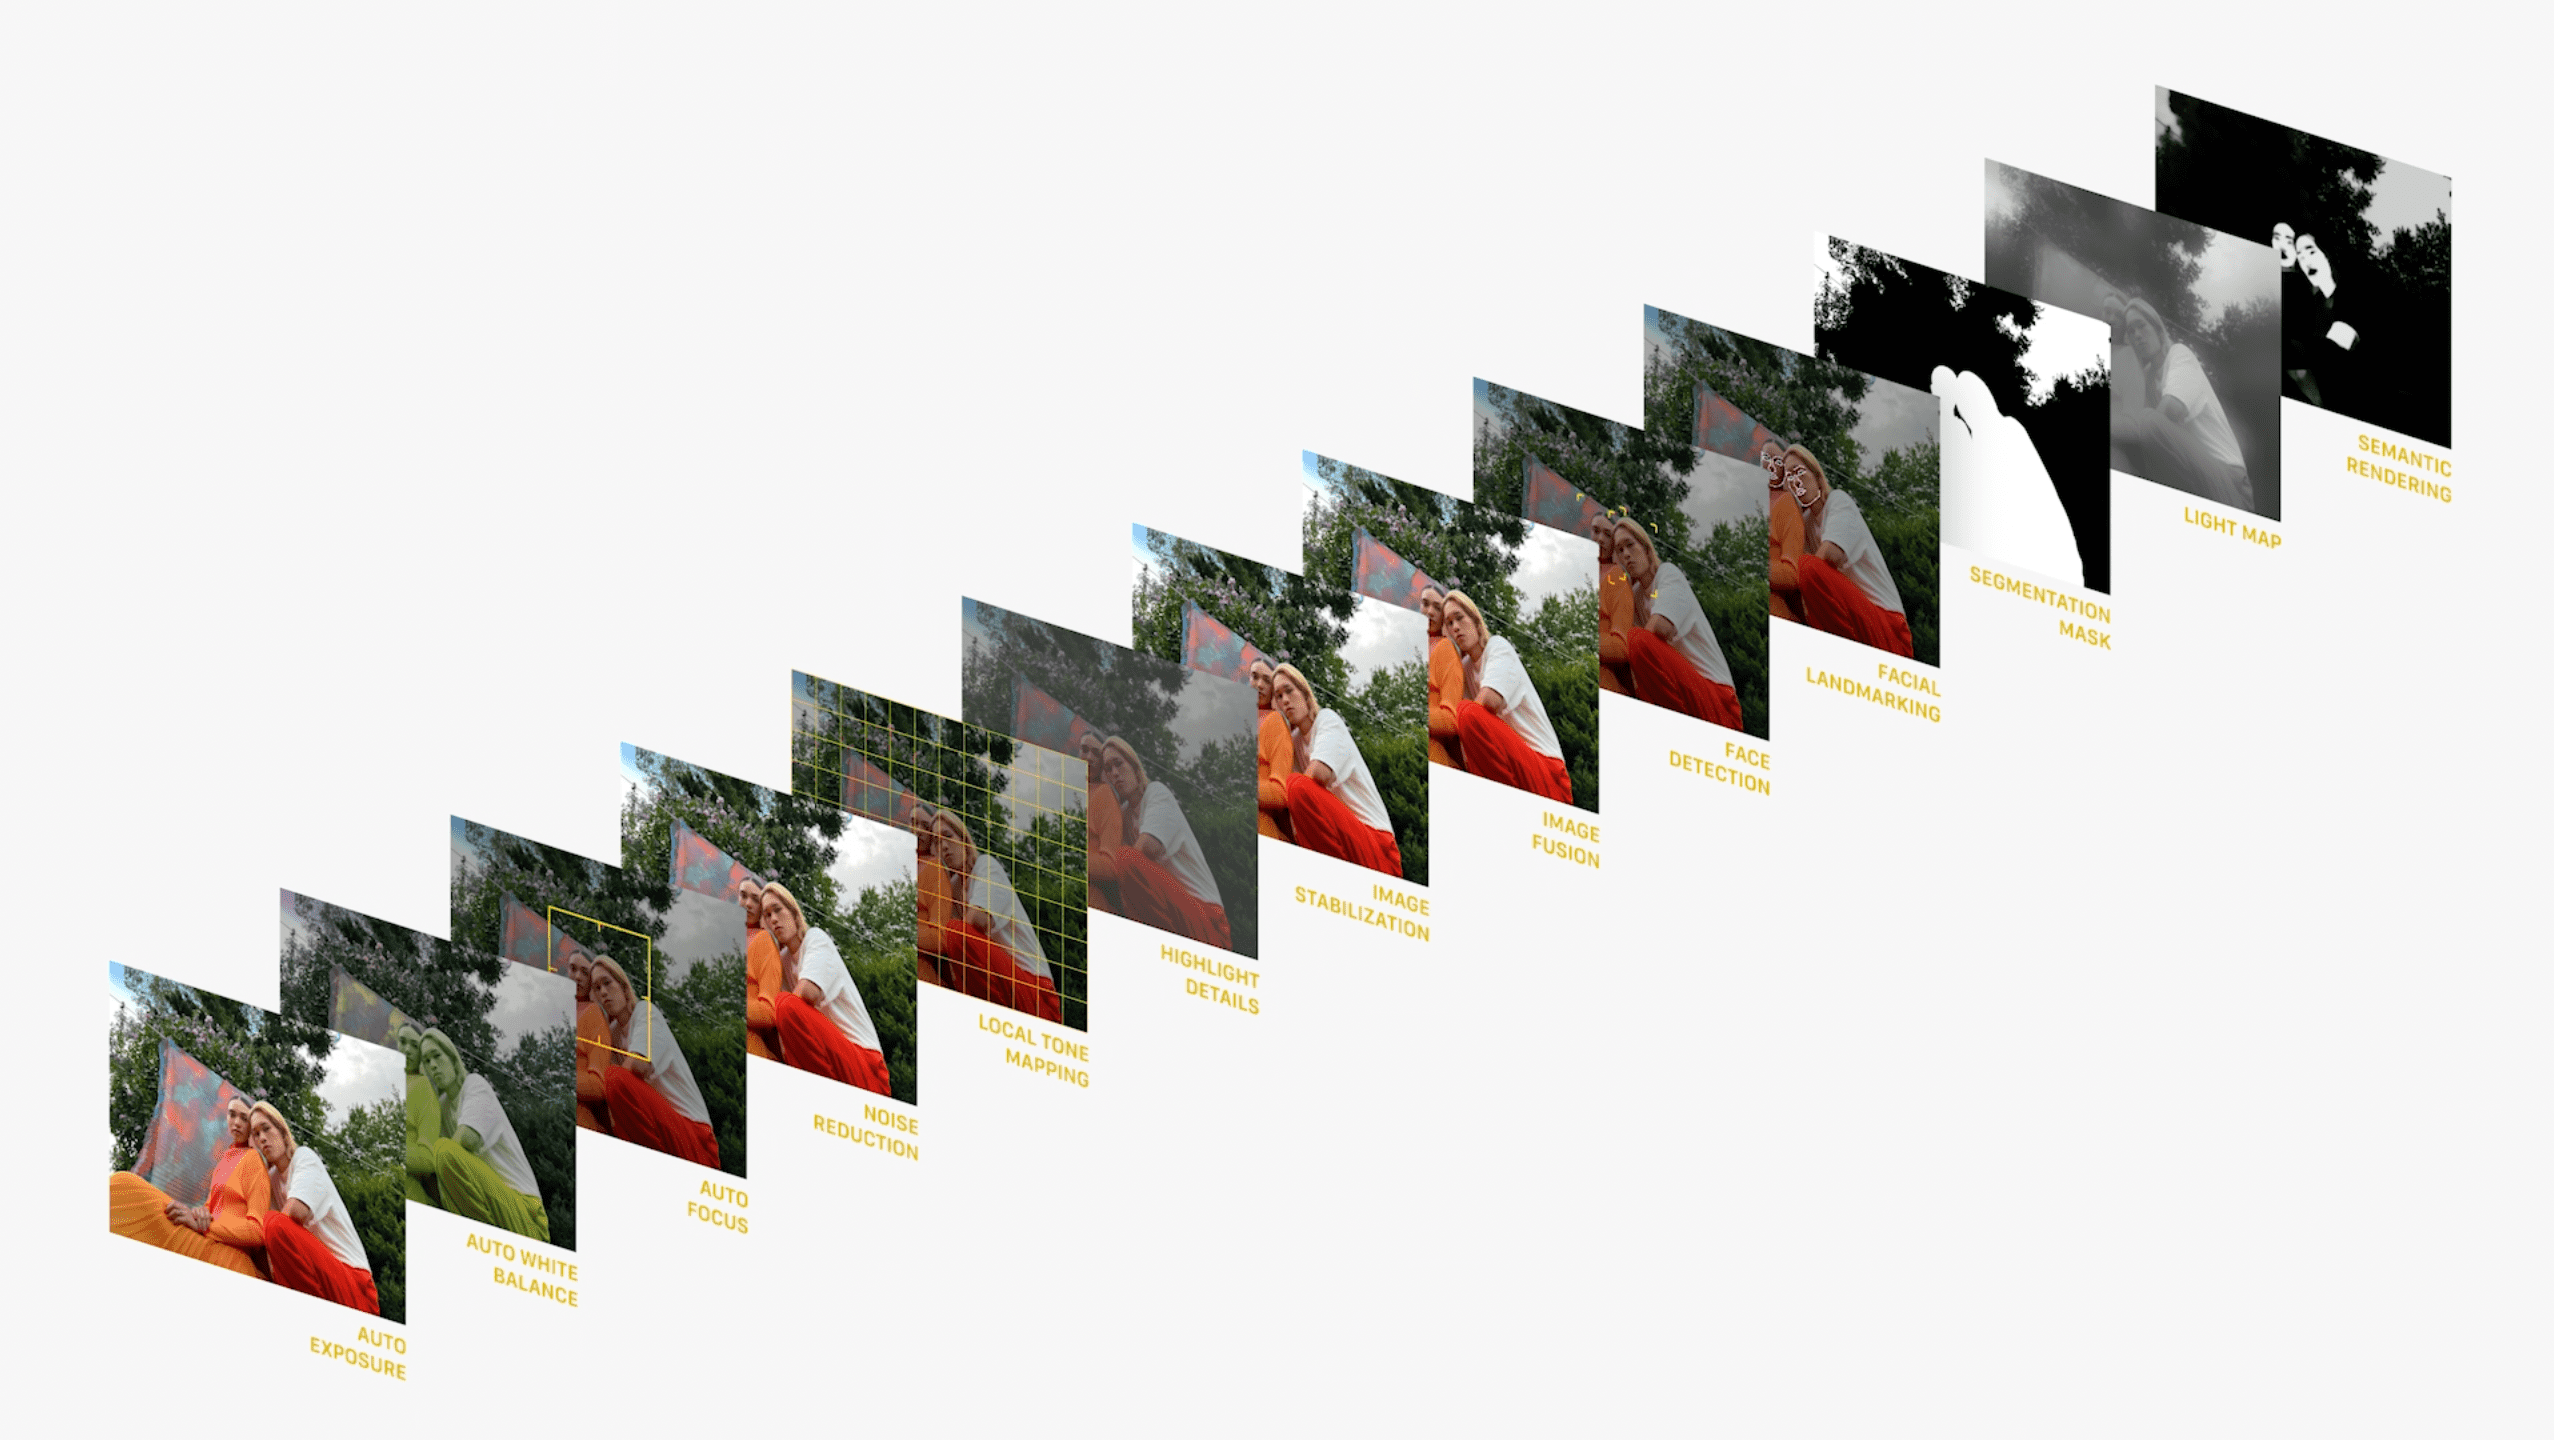
Photographic Styles allows users to bring their personal photo preferences to every image while still benefitting from Apple’s multiframe image processing. Preset and customized preferences work across scenes and subjects, and unlike a simple filter, intelligently apply the right adjustments to different parts of the photo to ensure the important elements, like skin tones, are preserved.
In addition to the magic provided by computational processing, there’s something truly special about Photographic Styles. Instead of needing to adjust the settings every time you unlock your iPhone, whatever option you select remains the “default” even after closing the Camera app altogether. This helps you to unlock your personal style of photography, and create images that nobody else would be able to.
The biggest “catch” for those who use Photographic Styles is a pretty minor one. Unlike filters, that can be applied before and after an image is captured, the same cannot be said about this new iPhone 13 feature. If you snap a series of pictures using one style, you are not able to change that style after it has been captured.
How To Use Photographic Styles
When you open the Camera app for the first time on your iPhone 13, you’ll see a prompt to set up your Photographic Styles. However, this is something that you might not be expecting and just want to snap a picture quickly. Luckily, if you skipped or bypassed the splash screen on the first launch, you can still create these Styles. Here’s how to set up and use Photographic Styles on your iPhone.
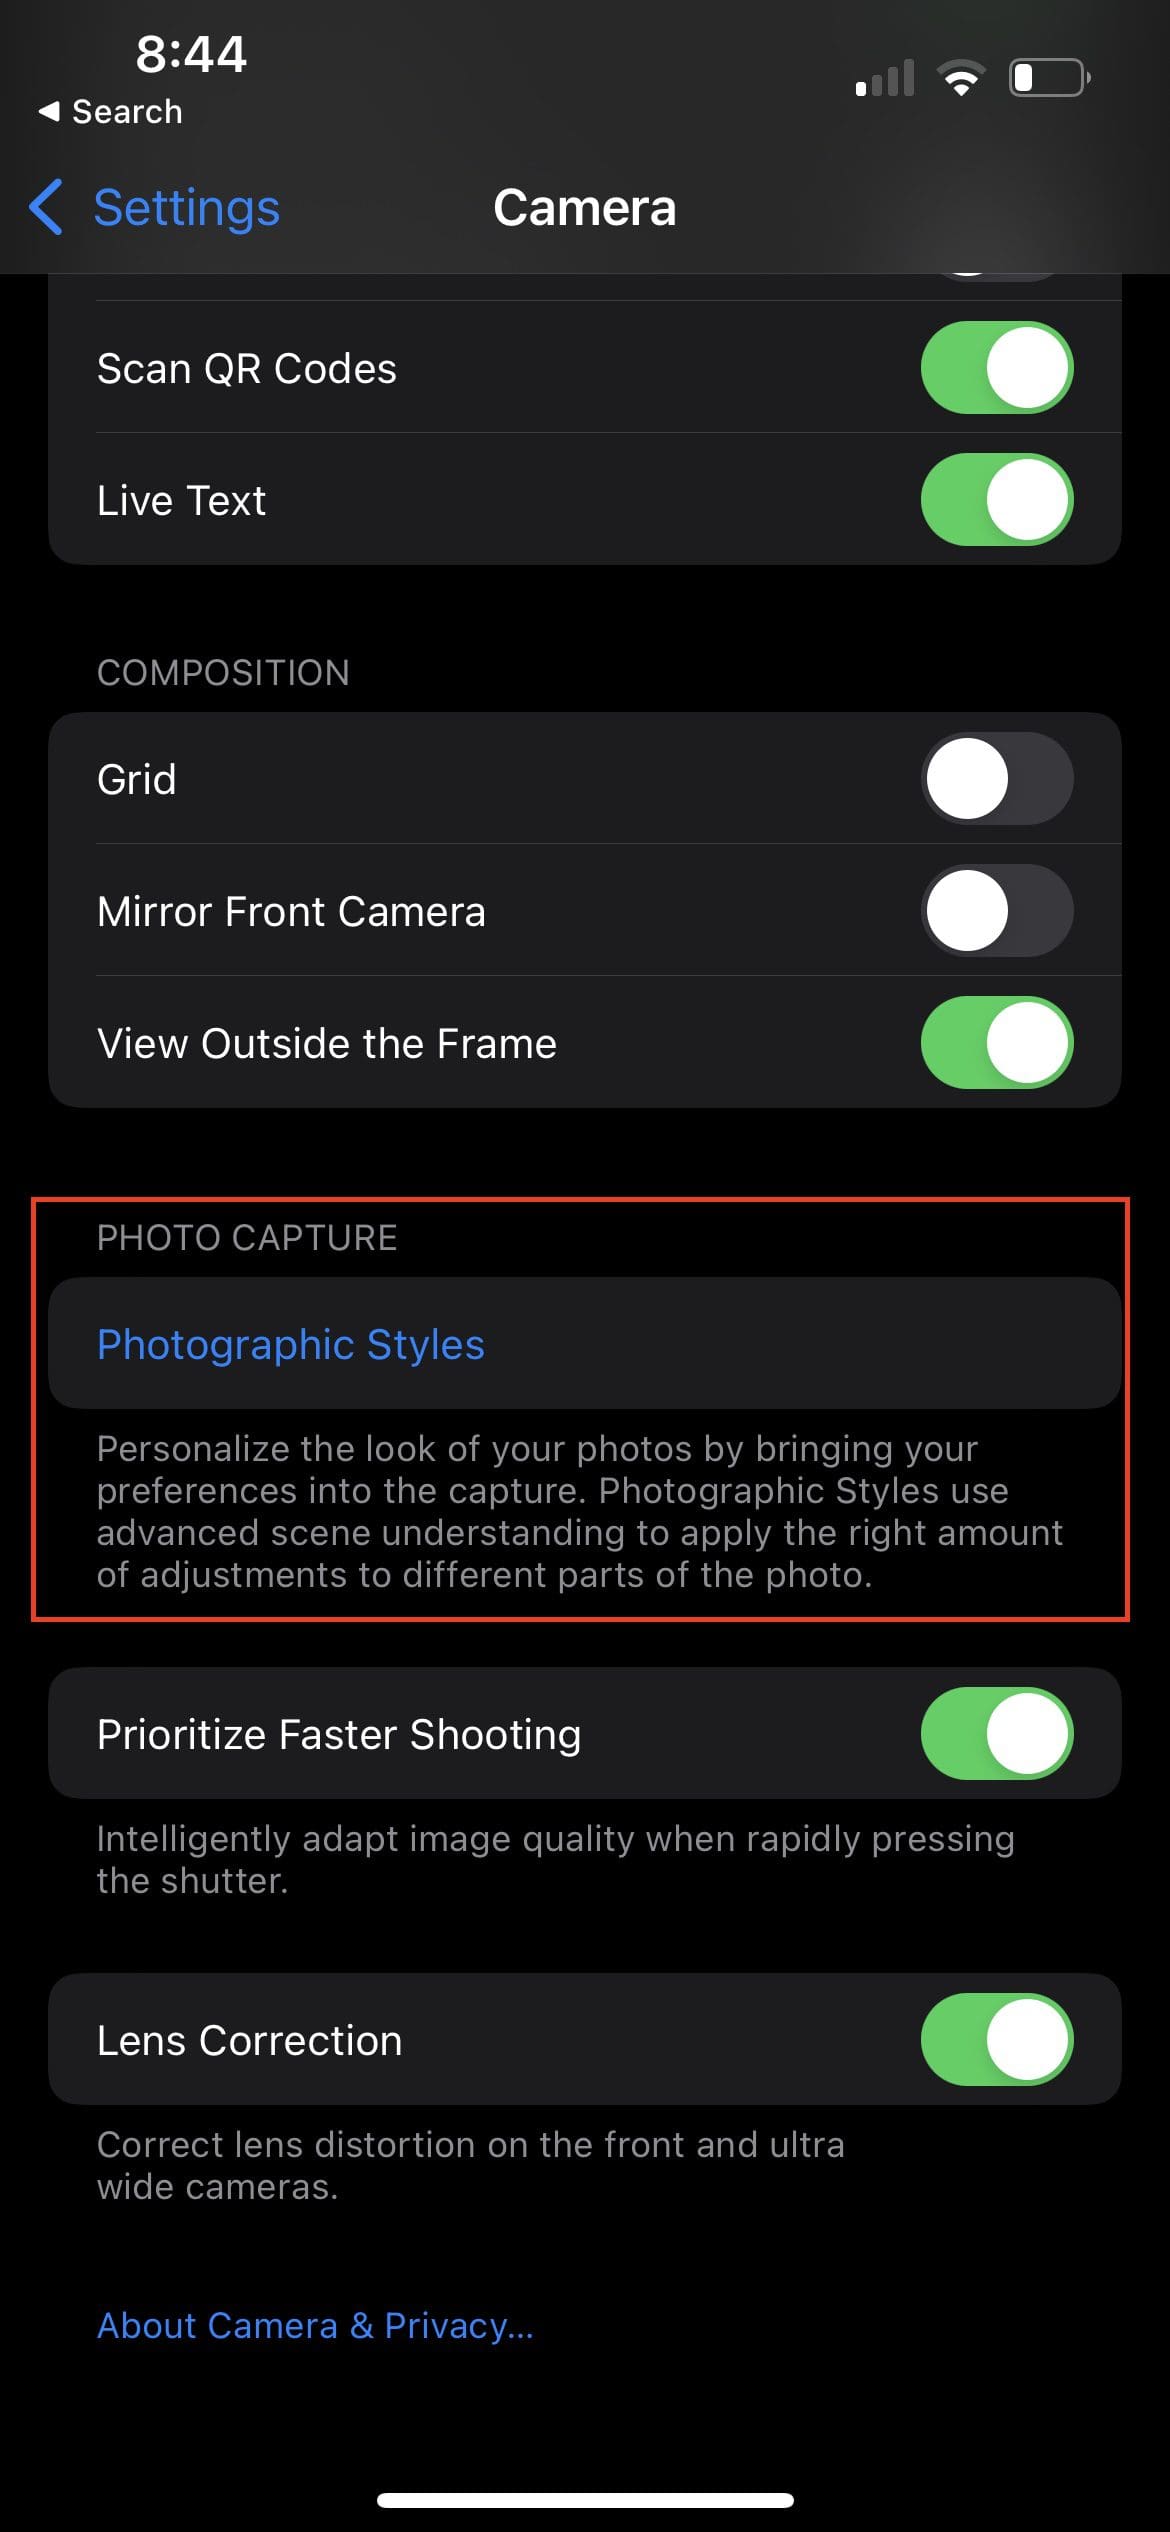
Open the Settings app on your iPhone.
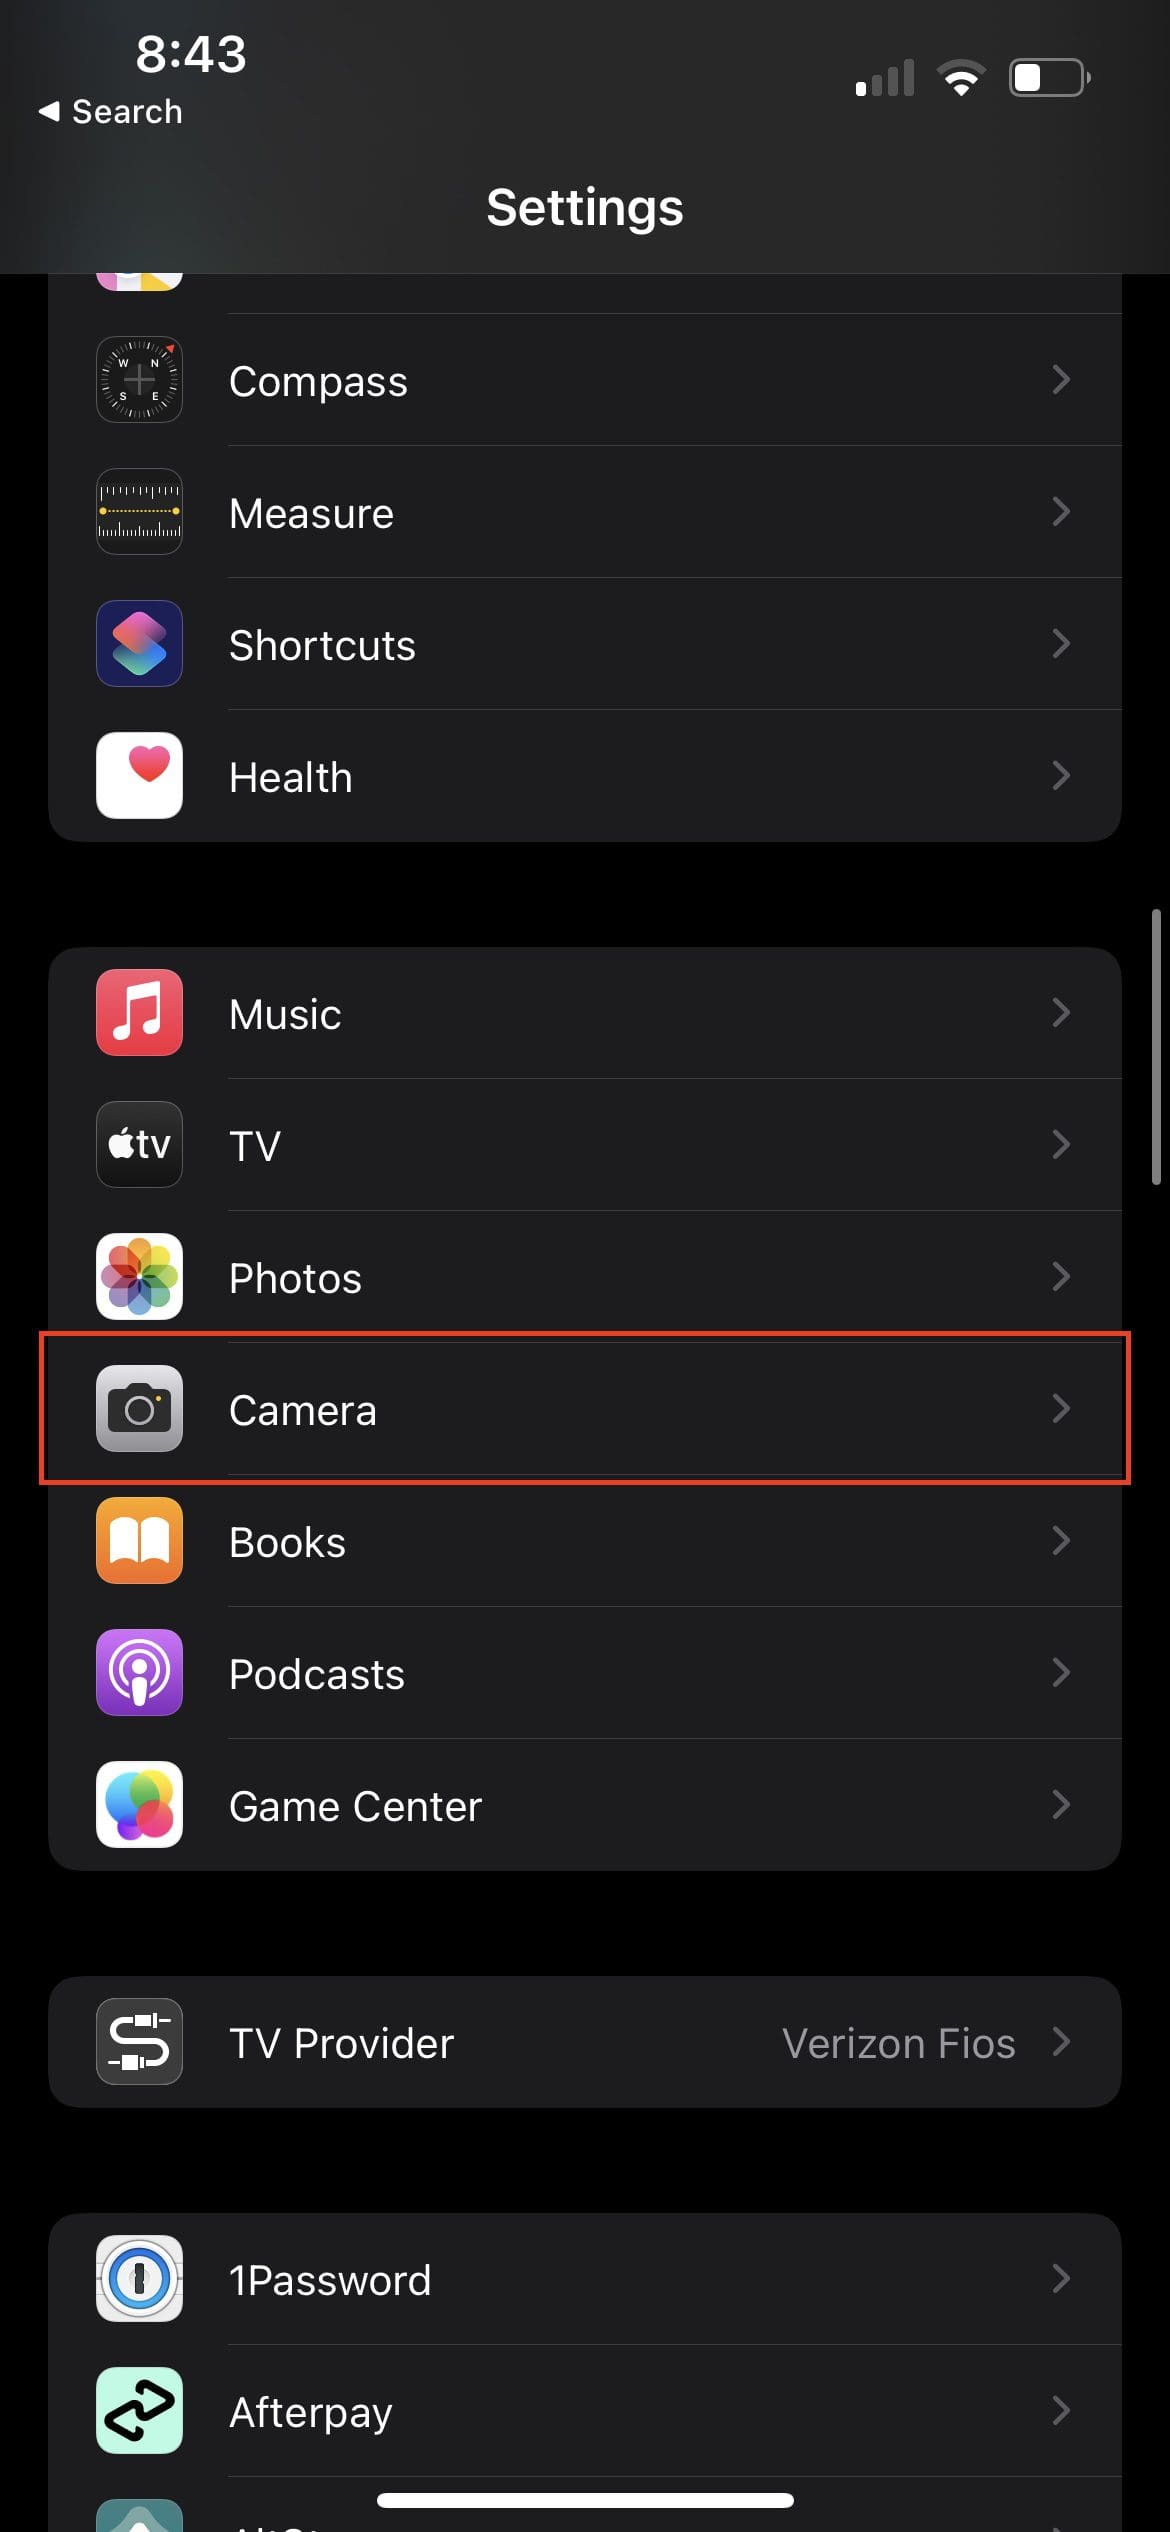
Scroll down and select Camera from the list of apps.
Under the Photo Capture section, tap Photographic Styles.
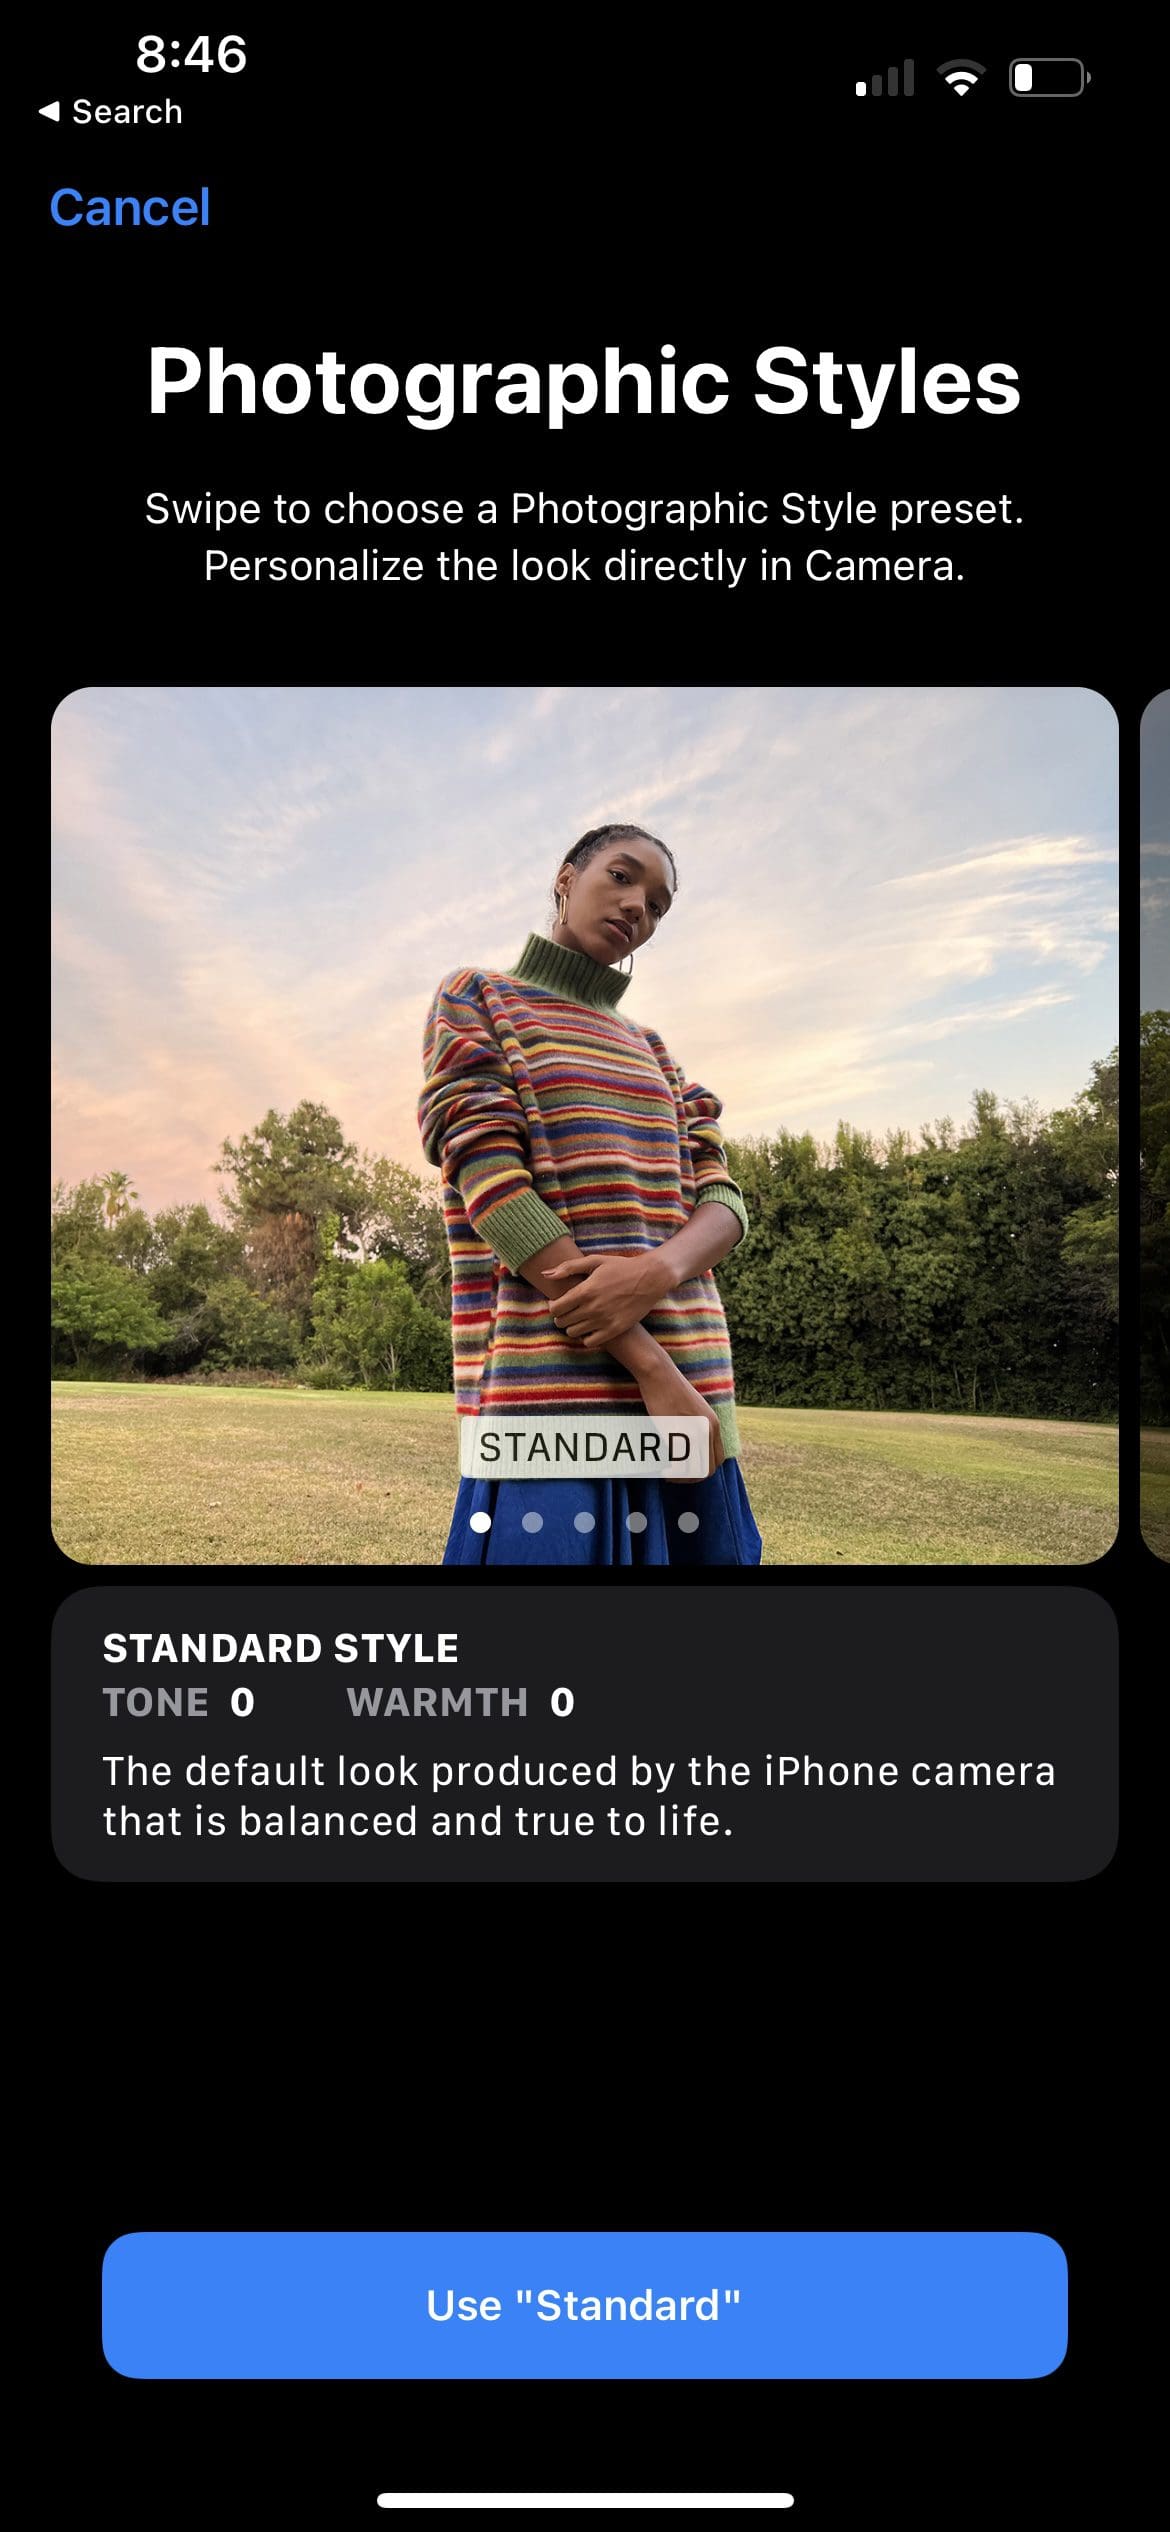
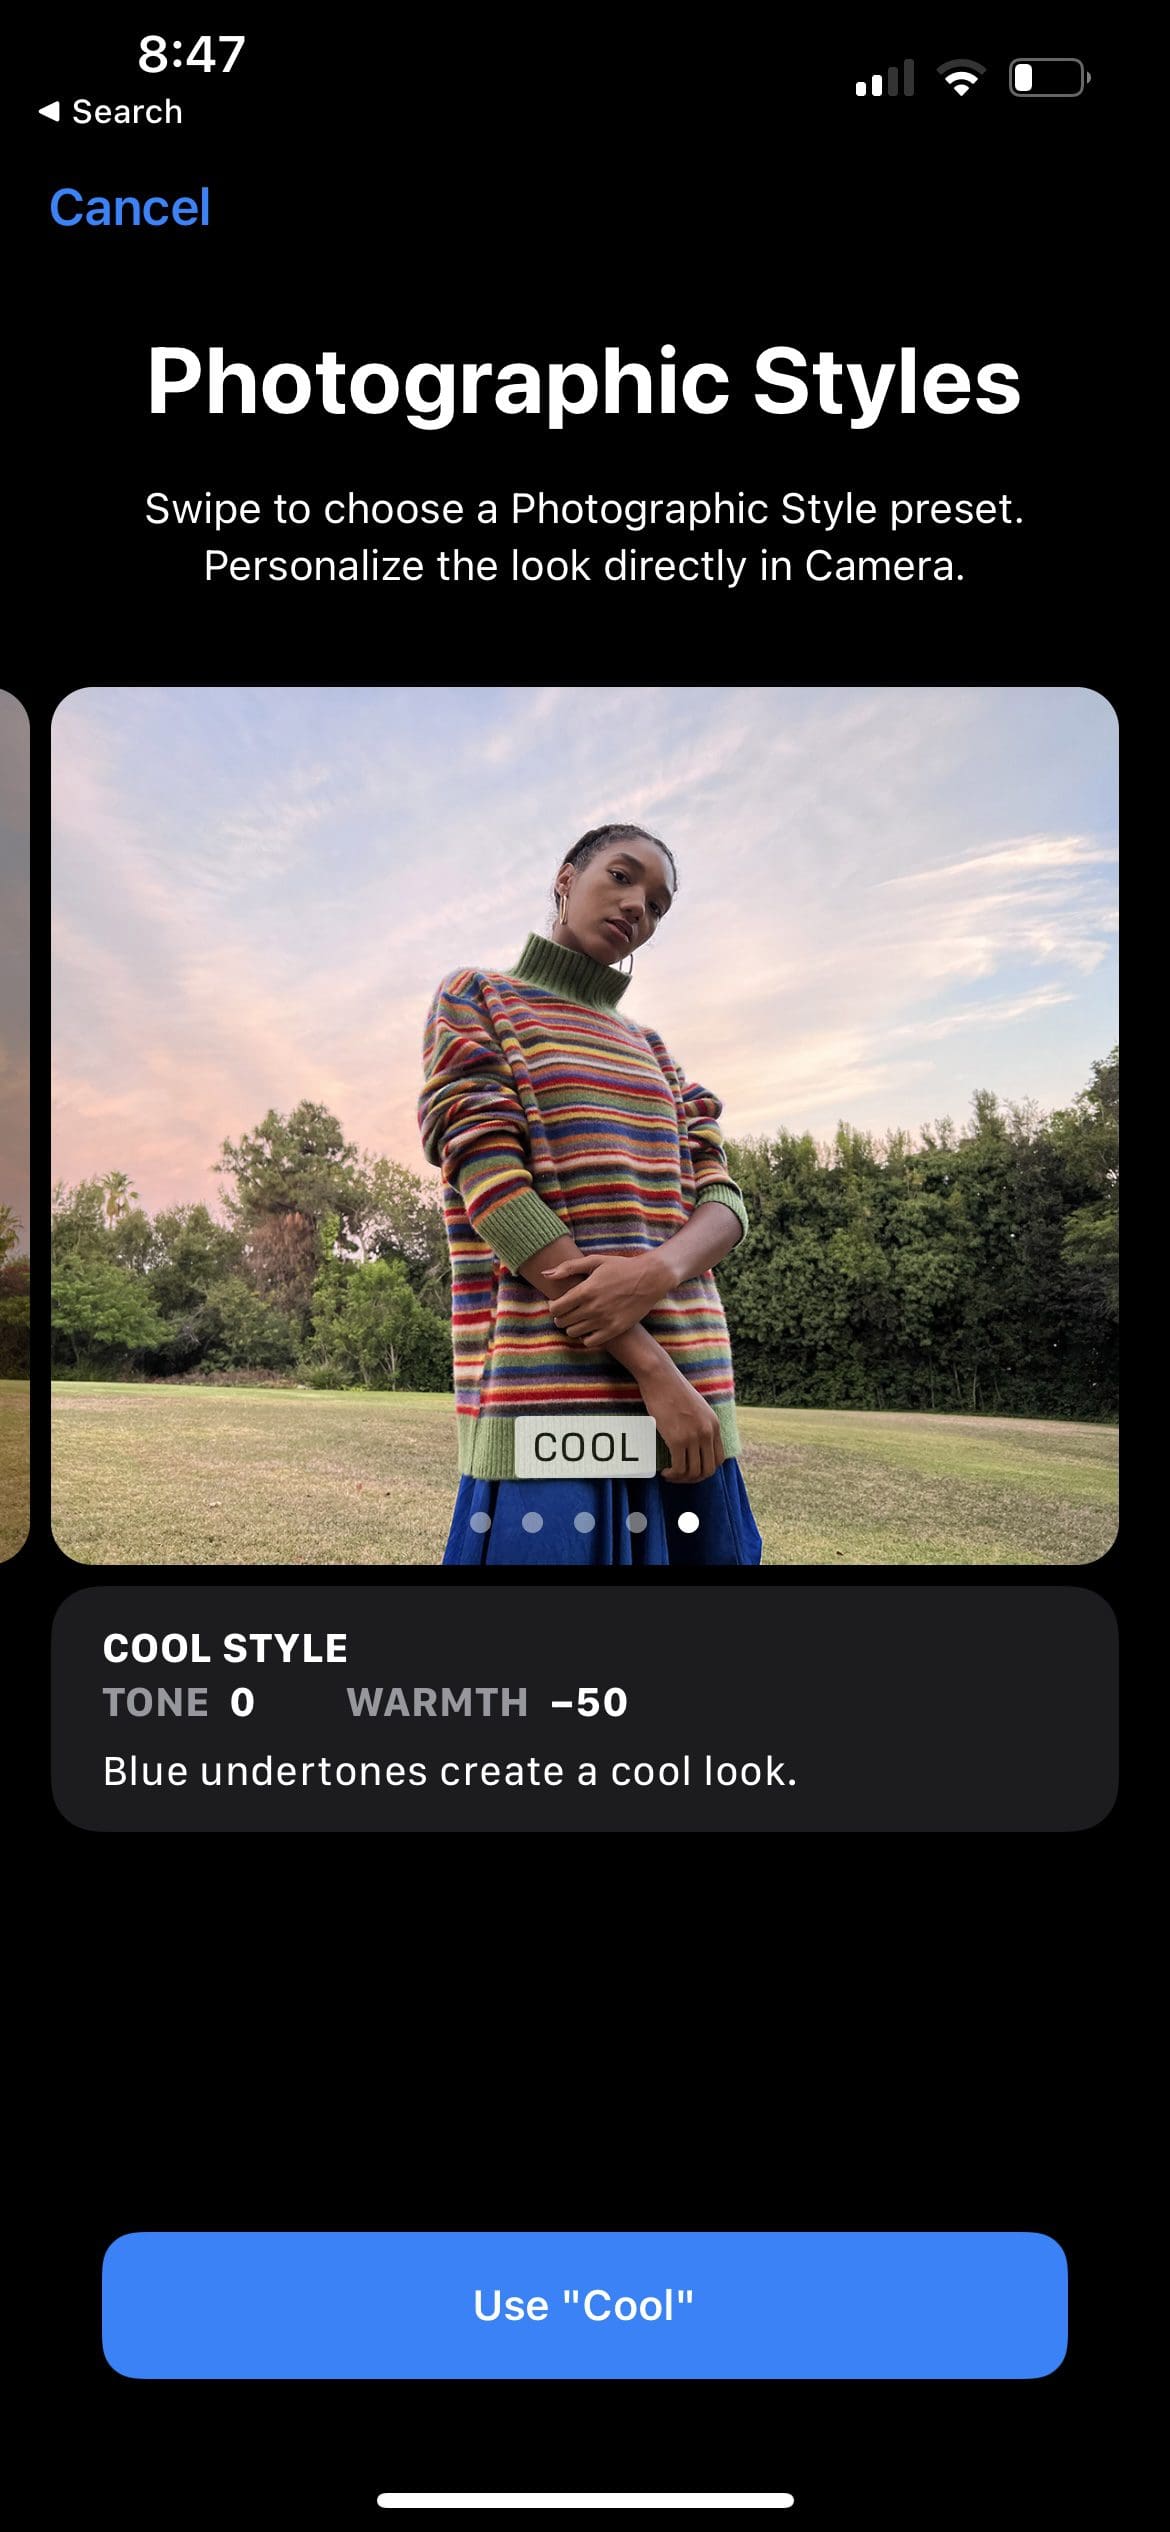
There are five different options to choose from with different tone and warmth values:
Standard Style – The default look produced by the iPhone camera that is balanced and true to life.
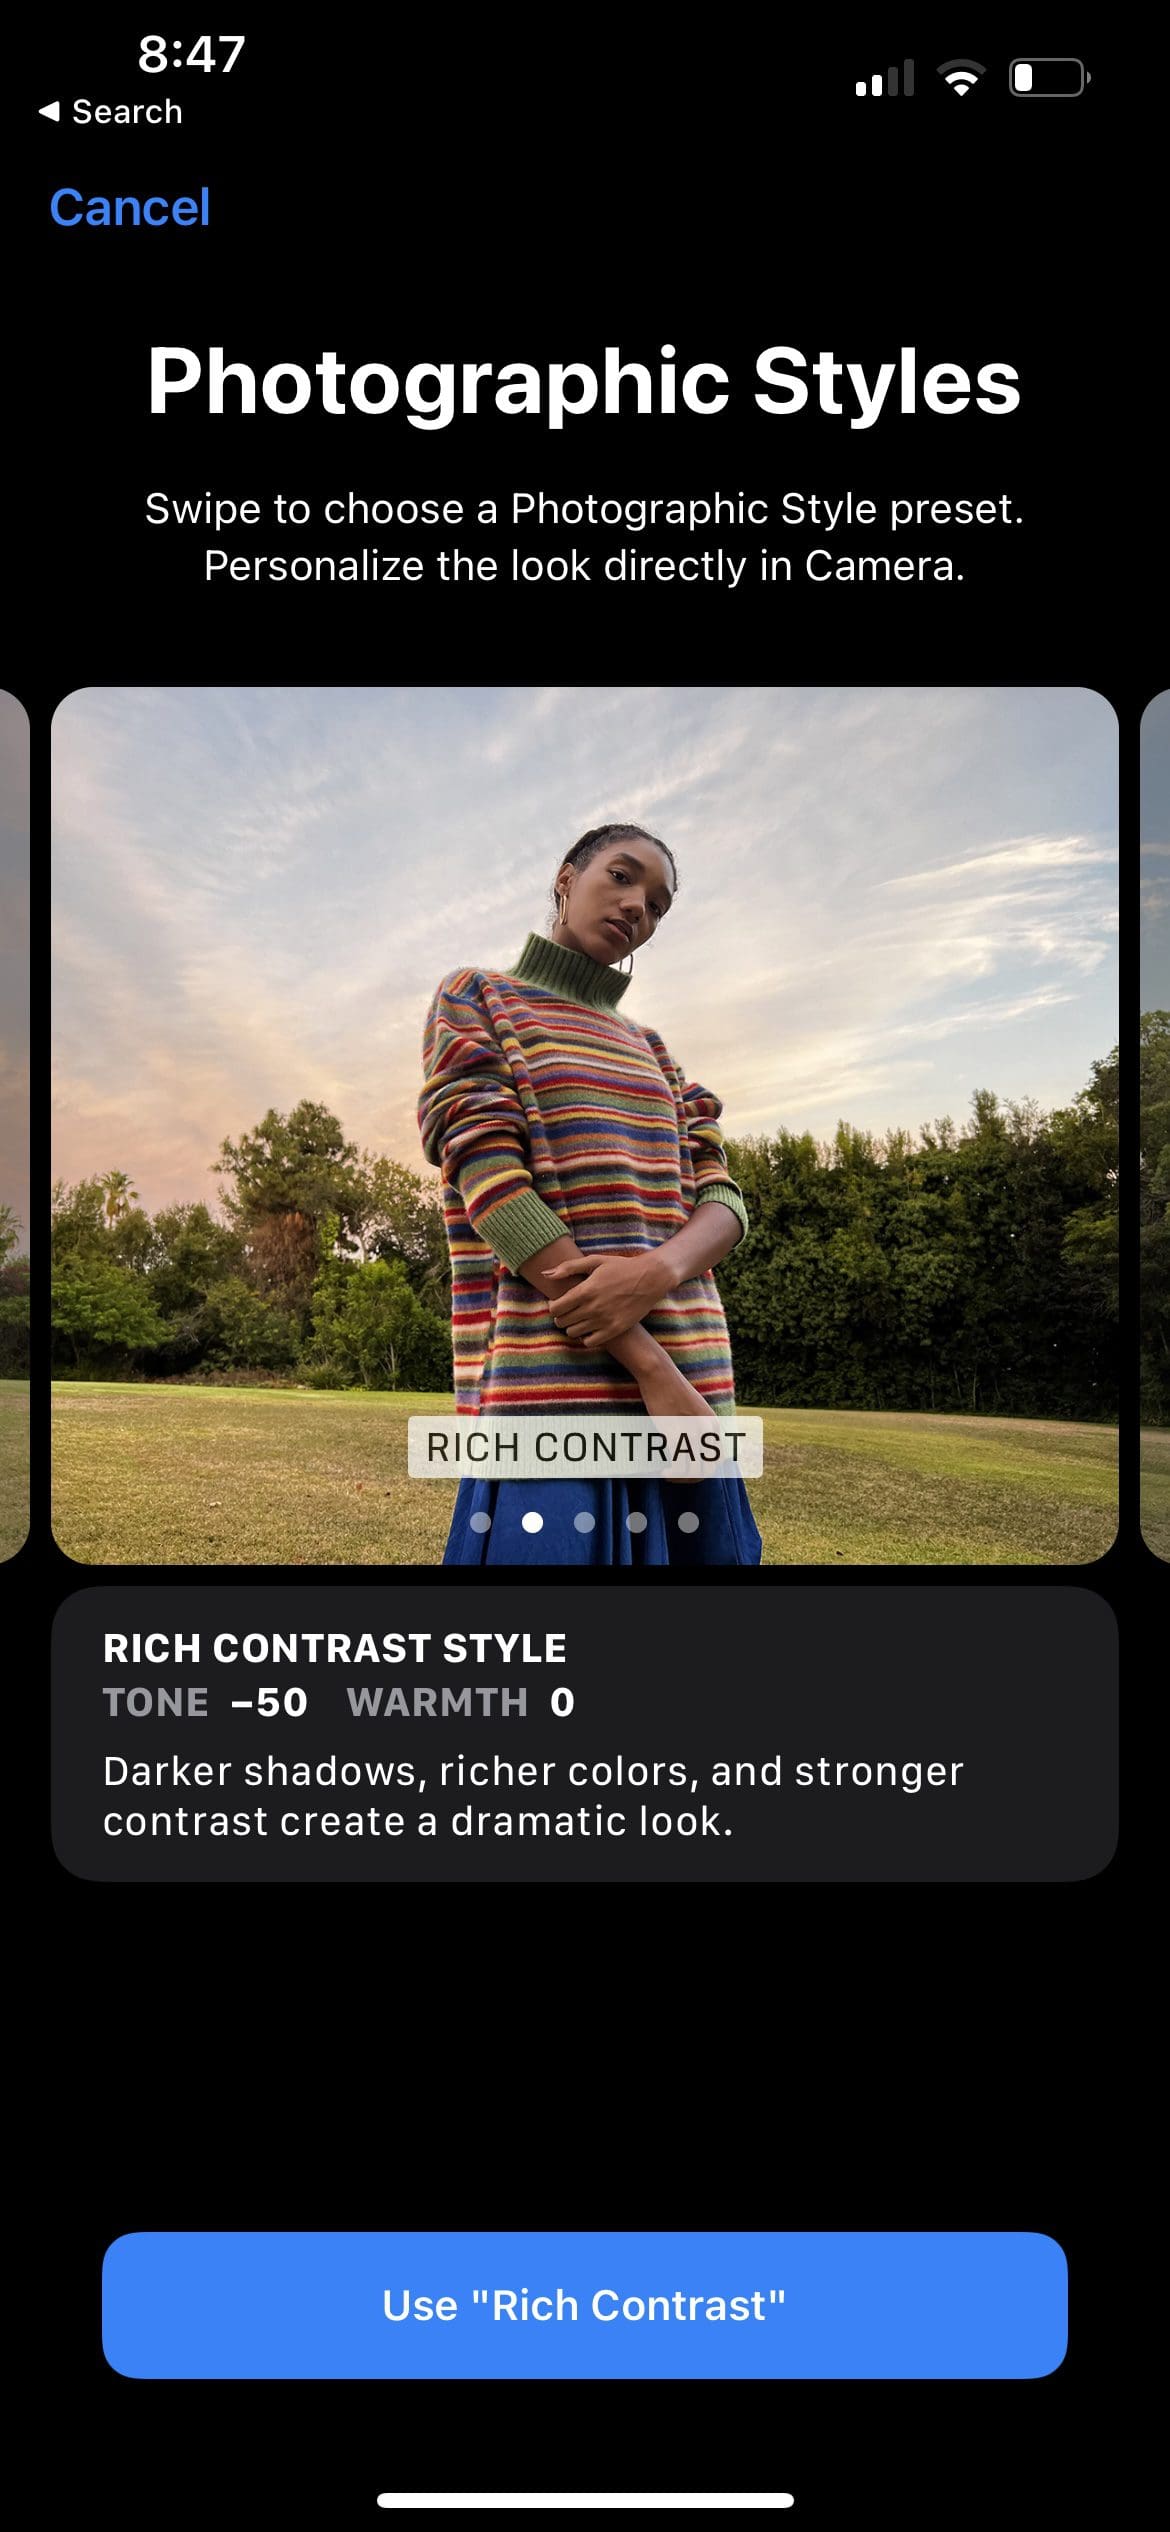
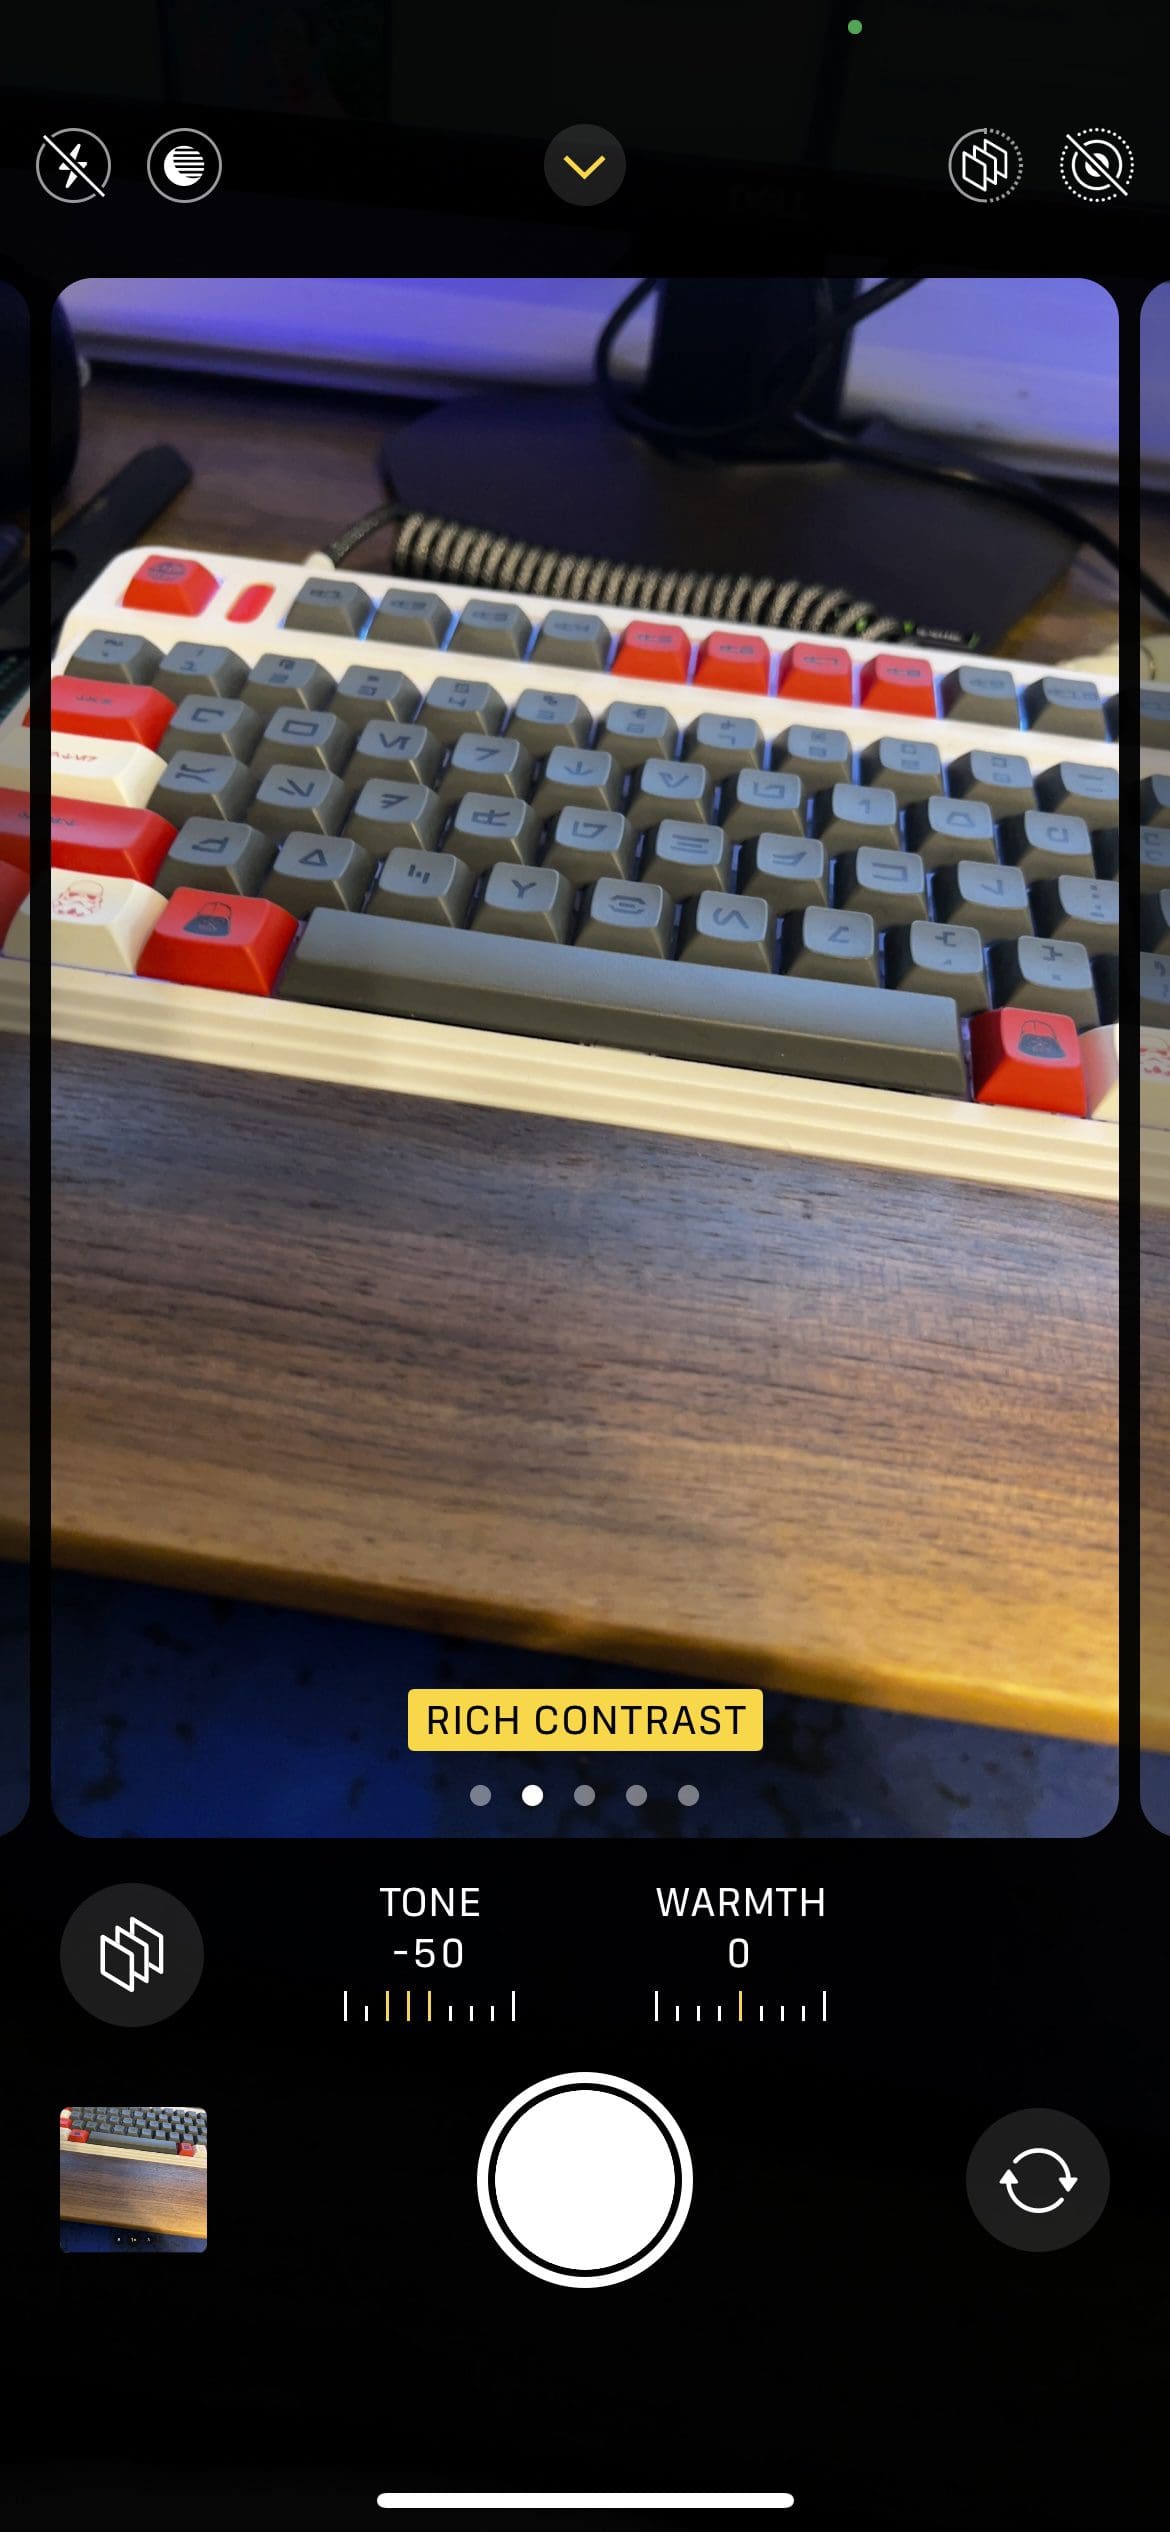
Rich Contrast Style – Darker shadows, richer colors, and stronger contrast create a dramatic look.
Vibrant Style – Wonderfully bright and vivid colors create a brilliant yet natural look.
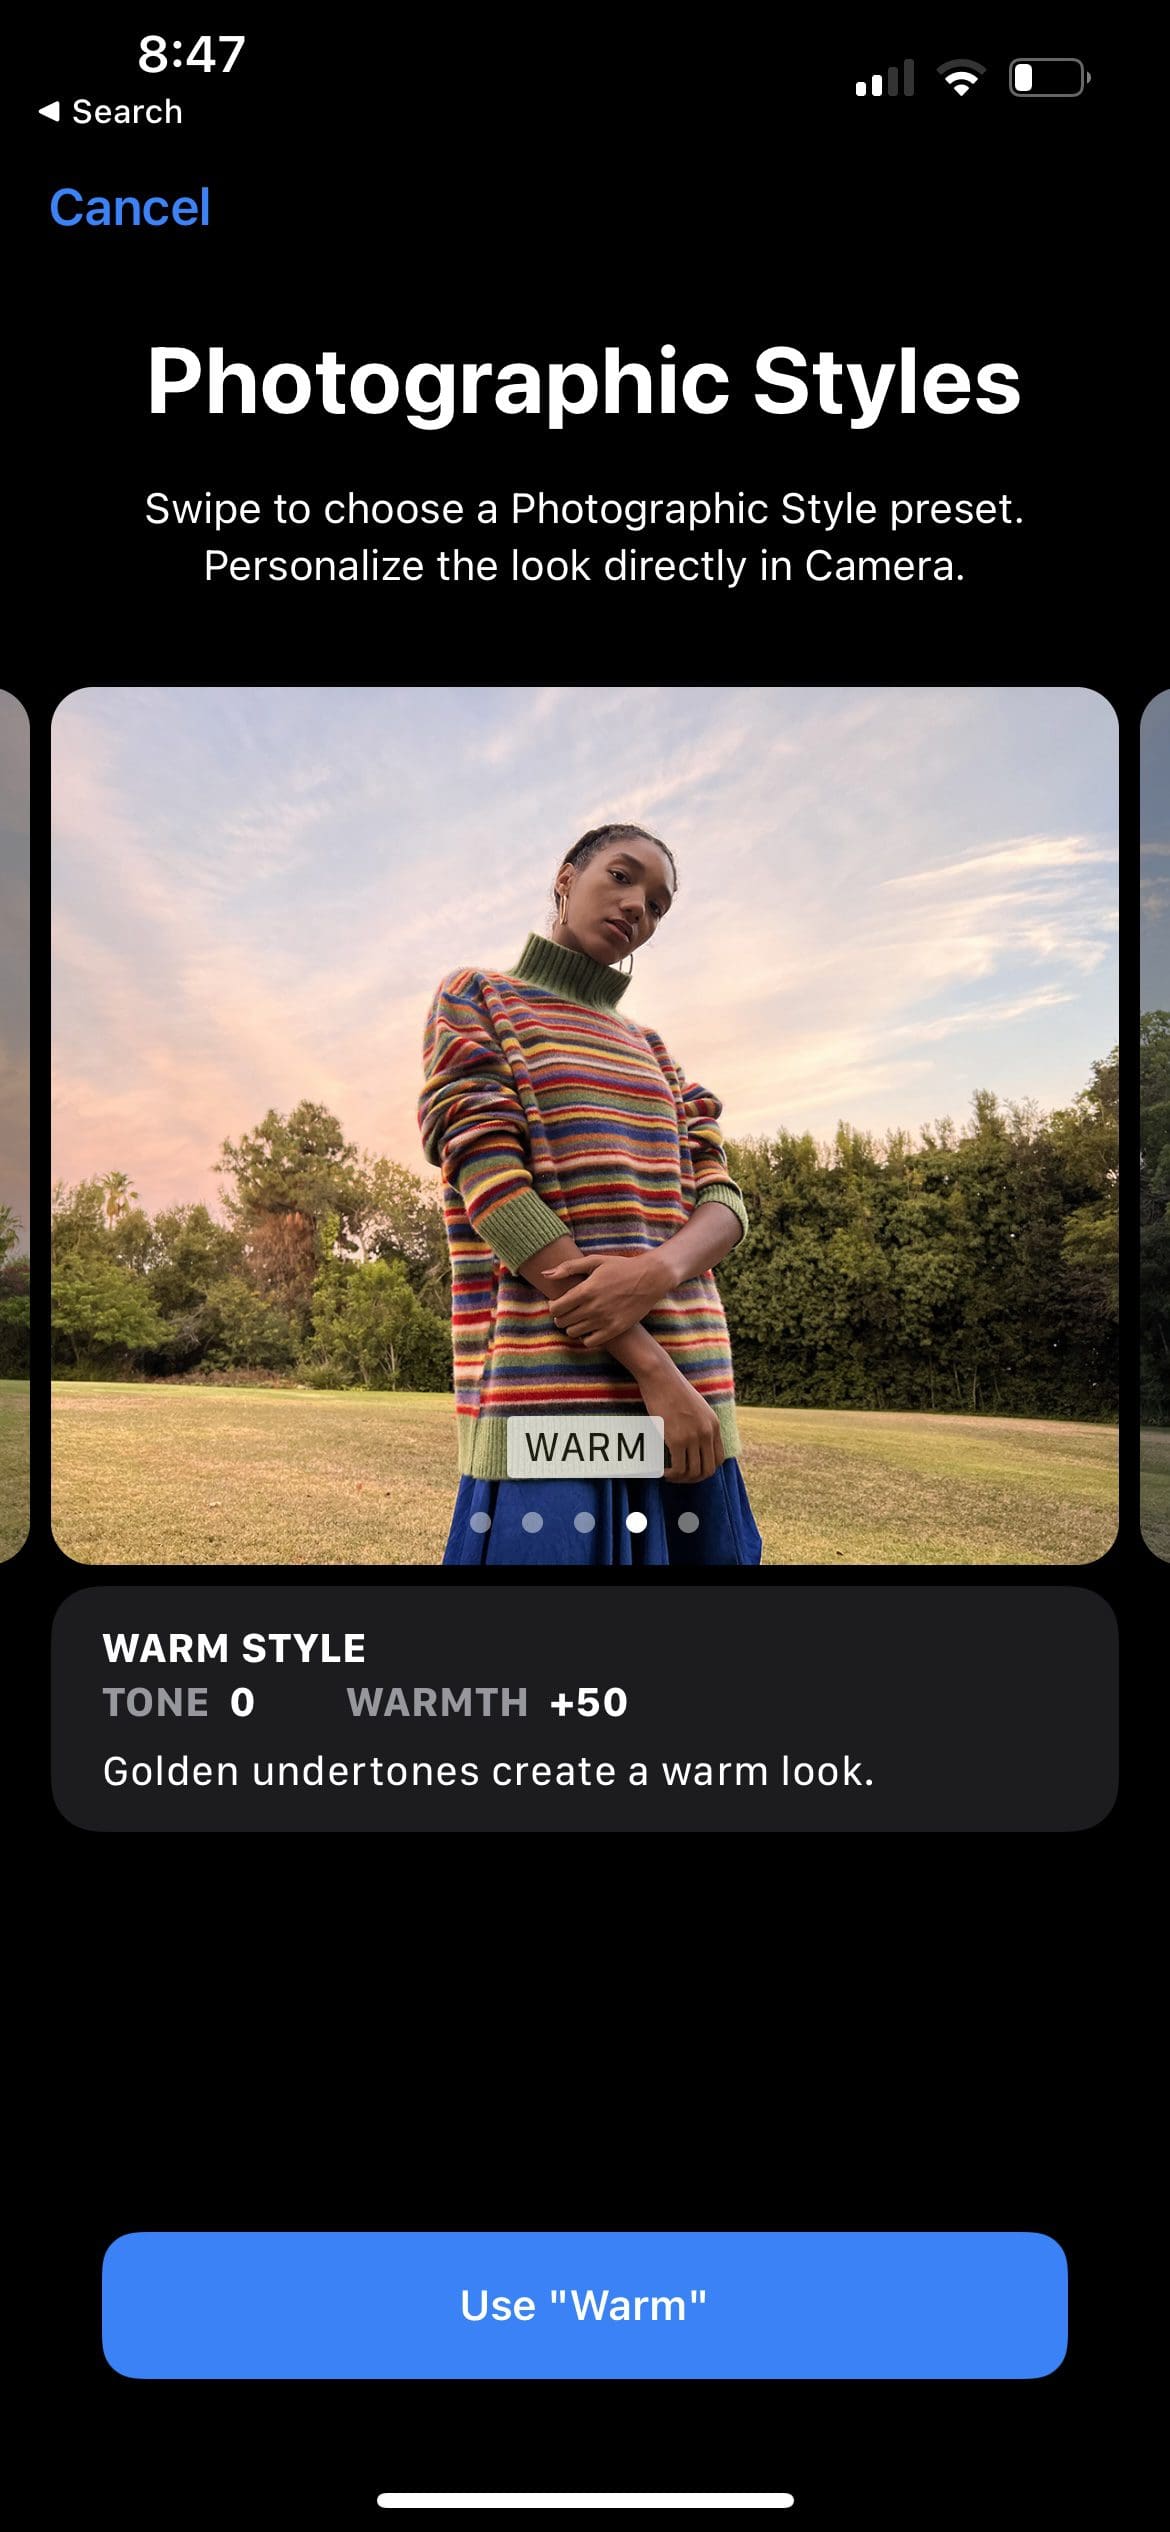
Warm Style – Golden undertones create a warm look.
Cool Style – Blue undertones create a cool look.
After making your choice, tap the button beneath the option.
Once selected, all of your photos will have this new style applied to them. And while there are some great third-party camera applications, such as Halide, Photographic Styles only works with Apple’s stock Camera app.
In addition to jumping into the Settings app to change the Photographic Styles you want to use, there’s actually a much-simpler option. And the best part about it is that you don’t even need to leave the Camera app if it’s already open. Here’s how you can change Photographic Styles on the fly:
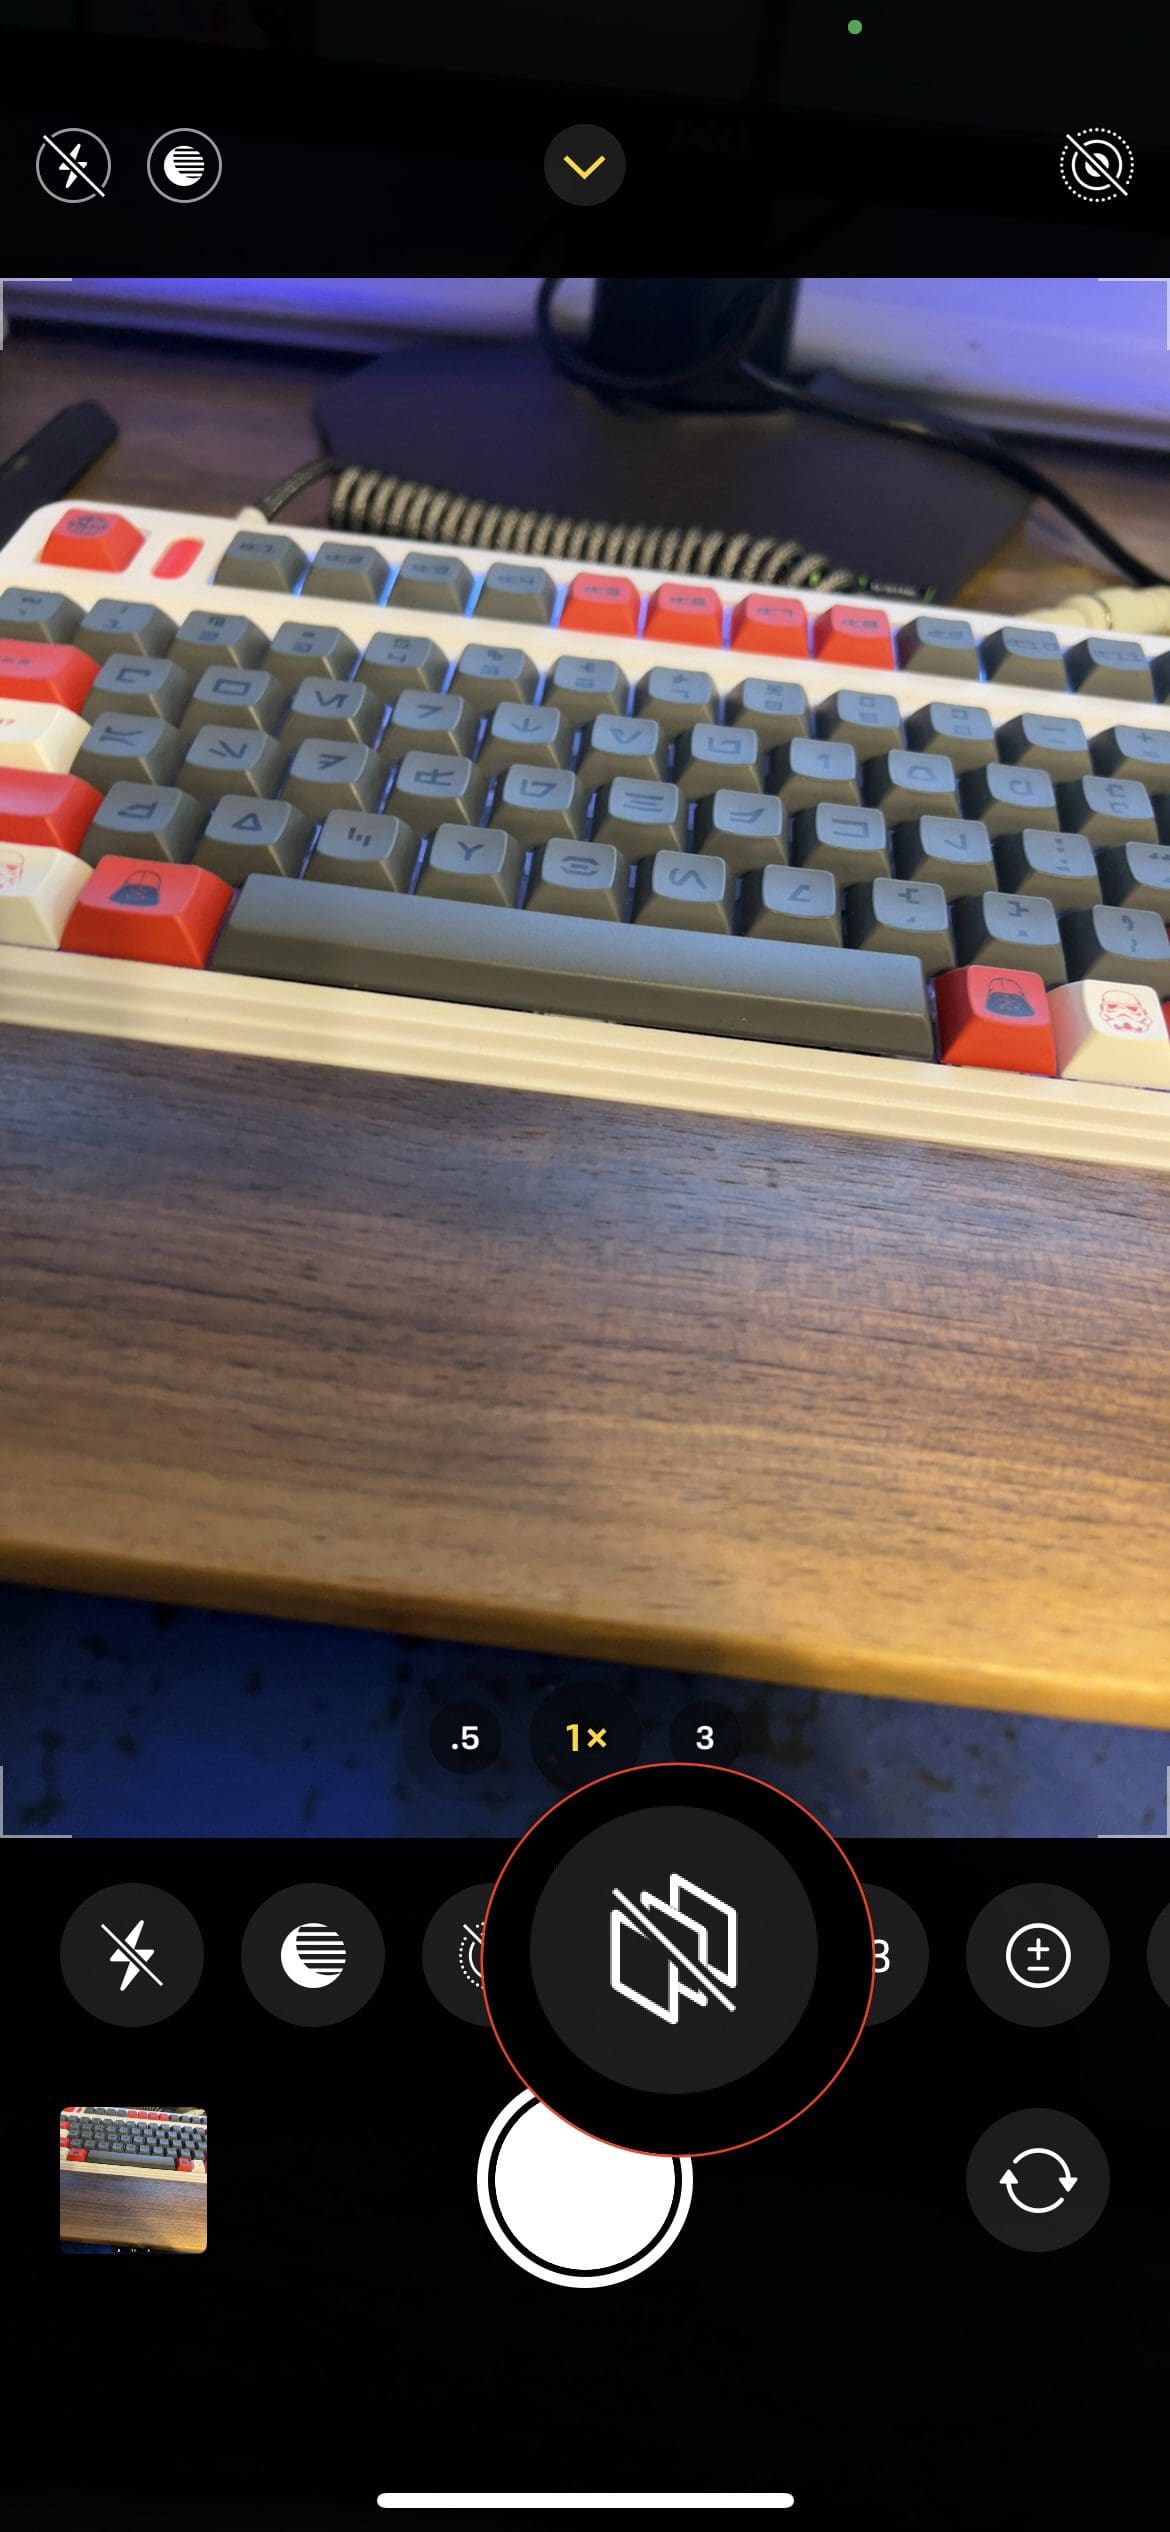
With the Camera app open, tap the Up Arrow at the top of the page.
From the menu bar that appears, tap the third icon from the right.
The icon looks similar to a stack of images and its next to the “4:3” icon.
Swipe to the left to switch to a different Photographic Style.
Apple has even taken things a step further if you opt to switch Photographic Styles from within the Camera app. You can also adjust the Tone and Warmth levels after selecting the Style of your choice. Just tap on either Tone or Warmth and drag the slider until the image looks the way you want.
What’s nifty about this feature is that, unlike changing Photographic Styles within the Settings app, you get a live preview of what the viewfinder sees. This gives you a much-better idea of what the final image will look like based on the Photographic Style selected.
Andrew Myrick is a freelance writer based on the East Coast of the US. He enjoys everything to do with technology, including tablets, smartphones, and everything in between. Perhaps his favorite past-time is having a never-ending supply of different keyboards and gaming handhelds that end up collecting more dust than the consoles that are being emulated.


Write a Comment