If you’ve been following the AppleToolBox blog for the past month, you may have noticed that I’ve written a lot of posts over automation. For the most part, these posts have revolved around using the Shortcuts and Automator apps on iPhone and Mac respectively. Today, we’re going to shift our focus to HomeKit automations.
In previous posts, I’ve mentioned that I think the current version of the Shortcuts app faces a few limitations. These limitations mainly center around a lot of toothless automation options (i.e., you only get surface-level features) and limited third-party integration.
HomeKit automations do not suffer the same problems. They’re far more robust, and there are tons of devices built for HomeKit. This allows HomeKit users to get the most out of their smart home automations.
In today’s post, I’m not going to spend too much time on what you need for HomeKit, how it works, or how to create these automations. Instead, this post is for those who have already experimented with HomeKit and automation and are looking for a creative boost.
If you would like to learn more about HomeKit, I’ll be writing most posts on it in the future, so subscribe to the AppleToolBox newsletter! Also, I would recommend reading this post I wrote on the Shortcuts app. It’ll help you understand the basics.
First up on our list of the best HomeKit automations is an absolute staple of smart home automation. Automatically turning your lights off and on as you move through your home.
In their simplest form, these automations take advantage of a motion sensor and smart light. You could also throw in a geofence, though, if you want to create lighting automations for when you leave and arrive at home.
The most basic automation you can do with this idea is to turn the lights on whenever you enter a room. Right after that is turning the lights off in a room after no motion has been detected for 15 minutes or so. These have the dual benefit of being convenient and energy-saving.
Another way you can make use of this feature is on stairs. Grab a smart LED strip (or a standard LED strip with a smart plug), line your stairs with it, then have it automatically turn on whenever someone is going up or down your stairs for one minute.
Keep track of the temperature inside your fridge and home
Next up we have temperature tracking. I don’t know about you, but the only time I check the temperature in my home is when I feel particularly hot or cool. And even then, a lot of time has usually passed before I realize how uncomfortable I am and decide to check.
This automation can help you change that! If you have a smart thermostat that works with HomeKit automations, you can use it to send yourself notifications based on the current temperature of your home.
If you don’t have a smart thermostat and can’t get one (i.e., you live in a rental), not to worry! You can buy devices that measure and report ambient temperatures to your iPhone.
After picking one of these up, you can use it to track the temperature of your home. That way, if it gets too hot, you’ve left the windows open too long, or your home is starting to get chilly, you can get a notification instantly.
You can also use these third-party thermometers to track the temperature of your fridge and freezer. That way you’ll know if the temperature inside your fridge is no longer keeping your food at the right temperature. Just make sure that the smart thermometer you grab can withstand the cold!
Change the lighting in your home throughout the day with the best HomeKit automations
Third on our list of the best HomeKit automations is another staple. Once again, we’re looking at smart lights. This time, though, we’re going to look at scheduled automations rather than motion-based ones.
There are a lot of things you can do when you use timers to adjust the smart lighting in your home. Here’s a bullet-point list of ideas for you:
Turn on all of your lights with your morning alarm
Turn off all of your lights when it’s time for bed
Switch from blue lighting to yellow lighting once the sun starts to set
Turn certain lights on and off to match the natural lighting entering your home. For instance, if your living room gets a lot of natural light in the morning but not in the evening, turn off the lights in the morning and back on at night
Turn off your lights whenever everyone in your home is at work/school and back on before your first family member arrives at home
If you’re away on a trip, set your lights to turn on and off at seemingly random times to make it look as if you’re still home
I’m sure there are plenty of other ideas you could come up with but that’s everything off the top of my head! My preference would be to stick to rule-based lighting (e.g., lighting that changes with motion sensors) rather than schedule-based lighting. It seems more flexible.
But that doesn’t mean you should use scheduled lighting automations! There are plenty of options that nearly anyone can take advantage of. Hopefully, these HomeKit automations give your creativity a kickstart.
Lower the temperature of your home before bed
This will probably be the most controversial on my list of HomeKit automations, but I’m sticking to my guns.
Using a scheduled automation and a smart thermostat, you can lower the temperature of your before bed. If you’re like me, then you don’t need to hear my reasoning. Just skip to the next item in this list.
For the dissenters, let me present my case.
First, a cool bed and pillow are phenomenal. There are few feelings as satisfying as slipping into cool, crisp covers and feeling them slowly adjust to the temperature of your body. It’s refreshing like a glass of lemonade or chocolate milk.
Second, scientists agree with me! The average temperature recommendation for adults heading to bed is 65 degrees Fahrenheit (18.3 degrees Celsius). That range does fluctuate a bit, but it fluctuates between 60 and 67 degrees. So it’s more likely that your room should be even colder than 65, certainly not warmer.
If you agree that warm-toned lighting is better at night but don’t agree with turning the thermostat down, I’d urge you to rethink your whole position. And if you don’t agree with either, well, you’re a lost cause!
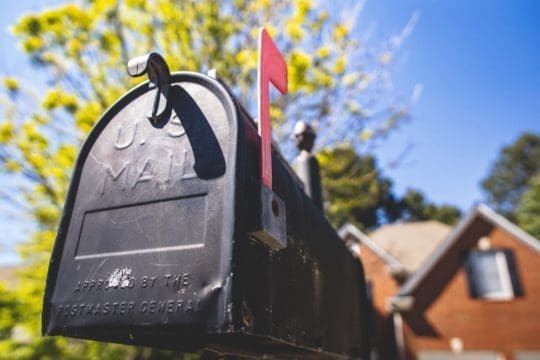
Get notifications whenever you get mail
A far less controversial item on our list of the best HomeKit automations has to do with your mail. No, not your email – your paper mail!
Specifically, the suggestion here is to create a HomeKit routine that will send you a notification whenever you get mail. The best way to do this is by hooking some kind of motion sensor up to your mailbox.
If you’re using a basic motion sensor, then I’d recommend putting it inside the mailbox. This Reddit user (who I first got this idea from) recommends using a tilt sensor, which you can mount directly on the mailbox’s door.
The only issue with this automation is that it doesn’t differentiate between when you open the mailbox and when the postperson opens it. I have a few ideas for workarounds, though:
Set this routine to only run once each day. This way, when you open the mailbox later in the day it’ll be ignored
Add an NFC card or proximity sensor that ends the routine if it detects you nearby
Use your home lighting as a notification system
Don’t worry, we’re almost done with all of the smart lighting automations!
This is one of the most creative applications of HomeKit automations. In this instance, you create automations that treat your home lighting like an alarm system.
For example, if someone rings your smart doorbell, you can set your lights to flash green. Or you can put a moisture sensor in a flood-prone area of your home (like the basement). If a leak is detected, your lights can turn blue to let you know.
An idea that I had for this had to do with my home office. Since I write from home, I tend to face interruptions from roommates and family members throughout the day who don’t realize I’m working.
To stave off these interruptions, I could line my office door with a smart LED strip. Whenever I sit down to work, a motion sensor pointed at my feet can turn this LED strip red. That way, people know better than to knock. It probably still wouldn’t work, but it’s worth a shot!
Turn on all of your lights whenever smoke is detected in your home
An adjacent routine to the previous suggestion is using your smart lighting to warn you of an emergency. If you’re a person with hearing, then this can be an extra security measure. But if you’re a deaf person, this could potentially be life-saving.
The first idea of these HomeKit automations is to get a smart smoke detector. Whenever smoke is detected, you can have all of your lighting turn on to make it easier to navigate to safety.
I’m not sure if I would recommend using a specific color in this instance. It would let you know that smoke detection is why your lights have turned on. However, it might also make it harder to navigate if your lights are red, for example.
You could also use a similar idea to wake you up in case of a break-in, warn you that a tornado is on the way, and so on.
Just be sure that this isn’t your only security measure! Smart devices can fail, as can the HomeKit app. This is especially true in an emergency, as there could easily be unanticipated factors that cause this system to fail. Think of it as an extra detail on top and not the full defensive system!
Automate your Christmas tree lighting with the best HomeKit automations
I thought it would be fun to include a seasonal suggestion on this list of the best HomeKit automations. This way, you can see how automations don’t have to be a 24/7 thing. They can help in specific, temporary scenarios.
This is a very straightforward automation. Just plug your Christmas tree’s lights into a smart plug in the wall. Then, set it to cut power to the lights when no one is around.
You can use any of the methods we’ve already covered. Motion sensors, scheduling, waiting for you to leave the house, etc. You can even use it for Christmas lights that you’ve hung elsewhere in the house. If you’re like me, for instance, you have Christmas lights hung up in your room year-round.
Christmas lights can be a huge drain on your electric bill, so cutting down on them in any way will save you a bunch of money.
Have your robot vacuum cleaner start and stop when you leave and arrive home
Admittedly, this one assumes that you’re privileged enough to have a robot vacuum cleaner in the first place. I do not, but considering that someone interested in a robot vacuum is already interested in automation, I thought I’d include this on here! If anything, it’s an indication of the ultra-connected and automated future we’re heading towards.
Now, it’s important to note that the most popular robot vacuum cleaner (and also the most popular robot in the world), the iRobot Roomba, doesn’t natively support HomeKit. Likewise, HomeKit doesn’t support Roomba.
Alongside the normal reasons that companies don’t want to support Apple’s SDKs, iRobot can’t make use of HomeKit because HomeKit doesn’t yet support robotics.
There is a workaround, though. I’m not going to get too deep into it because this isn’t the post for that. However, you can check out this guide on making Roomba work with HomeKit.
Once the two are connected, you can start to create some pretty cool automations. One that I’ve seen mentioned online is having your Roomba start vacuuming after everyone leaves the house. That way, your home is always clean but you never have to hear the vacuum.
Also, I looked up how much a Roomba costs on eBay because I’m a curious cheapskate. Looks like you can get a pretty solid one for under $200 – so I’m just going to leave that there for other automation enthusiasts!
Make sure your doors are always locked when they should be
Second to last on our list of the best HomeKit automations is a routine you can’t ignore: Automating the locks on your doors.
I’ve never had trouble remembering to lock doors myself as I’m pretty particular about it. However, after sharing a home with others I’ve realized that it’s far more normal than I expected to leave doors unlocked at all times.
For clear safety reasons, I would advise you to never pick up this habit. And if you have HomeKit and $100 to drop on a smart lock from eBay, you never have to.
The idea behind this automation is to have your doors lock themselves whenever you’re inside your house. There are, as usual, a few ways to go about this. You could use motion sensors to lock your front door after there’s been no motion there for X amount of time. I wouldn’t recommend this, though.
Instead, I think scheduled locks, voice commands for your locks, and buttons on your iPhone for your locks are a better way to go. Also, you could simply receive a notification whenever your door has been unlocked for X amount of time. These methods are less likely to lock you out of your home and cause other inconveniences while still keeping you safe.
Use NFC and QR code stickers to check an item off of your to-do list with the best HomeKit automations
The last of our best HomeKit automations is one that I think has a lot of creative potential. It uses NFC and/or QR code stickers around your home to trigger certain automations.
For those that don’t know, this is what a QR code is:
It’s a barcode-like arrangement of black and white cubes that you can scan with your iPhone. You can use QR codes in your iPhone Shortcuts (read here) as well as your home automations.
You can also use NFC tags! NFCs are tiny little chips that can communicate with your iPhone wirelessly. That’s how features like Apple Pay and App Clips work.
You can generate your own QR codes or buy NFC tags off of Amazon for $10. You can then place these around your house and scan them whenever you want to run a specific home automation.
For instance, I have a daily reminder to change my cats’ litter. I could keep track of that reminder by putting an NFC tag on the wall next to my cats’ litter boxes. After I’ve cleaned it, I could scan the NFC tag, which will trigger a routine that checks the reminder for today off and adds another one for tomorrow.
I could put one next to my washer machine that starts a timer to remind me that my laundry needs to be switched.
You could also place an NFC tag next to your front door. Then, you could create a routine that unlocks your smart lock whenever your phone scans that tag.
There are a ton of other location-based routines you could do with these stickers, so feel free to experiment!
Make your life easier with the best HomeKit automations today
And that’s it! Those are the best HomeKit automations you can do with the current HomeKit app and popular accessories.
While I did include some staples that you’ve may have heard of before, I hope there were just as many suggestions you hadn’t heard of. Again, the goal wasn’t to tell you what to do, but to inspire you and start the creativity flowing!
For more guides, tips, and tricks for all things Apple, check out the rest of the AppleToolBox blog.


Write a Comment