There’s a reason that the Library folder on your Mac is tucked away out of site. This all-important folder holds files that your system uses like containers, application scripts, font files, caches, and other types of files. Apple hides this folder by default to reduce the risk of accidental changes or deletions.
But if you find yourself in a position where you need to do some troubleshooting or are having difficulty locating a file or folder housed within the Library, then you’re going to want to unhide it.
Here are four super simple ways to unhide and access your Mac Library folder. We’ll show you two ways to unhide it temporarily and two ways to unhide it permanently. So you can use whichever is easiest or most comfortable for you!
If you just want to access the Library folder once or twice, you can use one of these two methods easily.
Finder and the Option key
This first method of accessing the Library folder on Mac is the quickest and simplest.
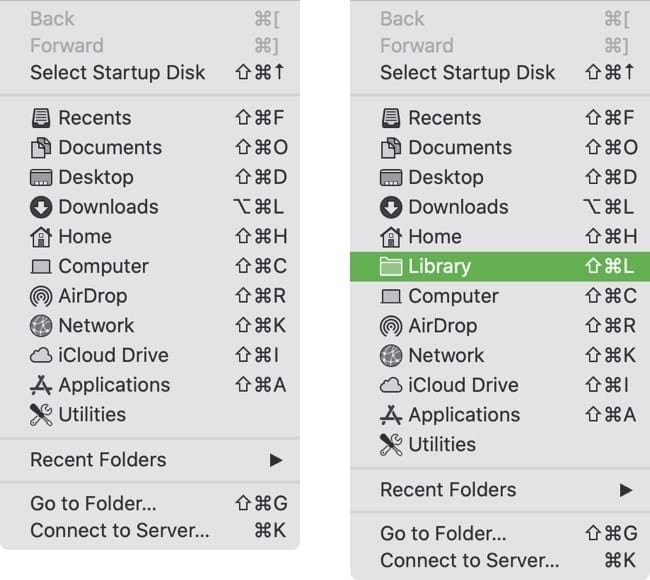
With Finder open, hold down your Option key while you click Go in the menu bar. Boom! You’ll see the Library folder display right below the Home folder. Just click it and go!
Hold Option and click Go
Finder and Go to Folder
Another way to use Finder to get to the Library folder is just as easy.
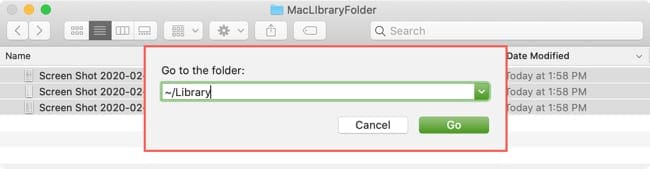
With Finder open, click Go > Go to Folder from the menu bar.
Type: ~/Library into the box and click GO.
Click Go To Folder and enter ~/Library
Your Library folder should open right up!
Unhide the Library folder permanently
Even though we say “permanently” here, you can still undo the steps below to hide the Library folder again. These two methods simply keep the folder displayed until you take action to tuck it back away.
Finder View Options
If you use your Home folder regularly, you can make a slight change and have the Library folder display unhidden there.
Open your Home folder using Go > Home from the menu bar or if you have a shortcut for it.
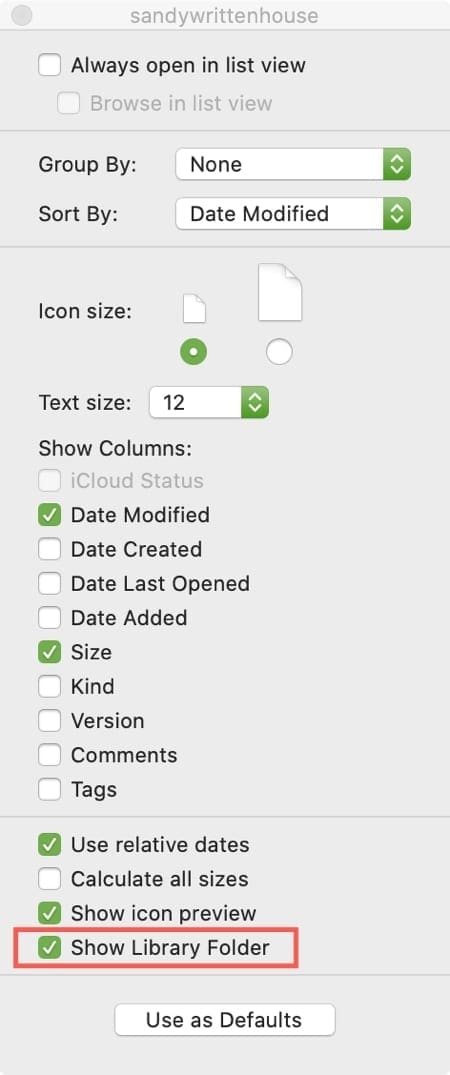
Click View > Show View Options from the menu bar.
Check the box for Show Library Folder and close the window.
Check the Show Library Folder option
If you want to hide the Library folder later, just follow the same steps as above and uncheck the Show Library Folder box.
Terminal commands
If you don’t mind using Terminal on your Mac, you can unhide the Library folder with a simple command.
Open Terminal from the Applications > Utilities folder or using Spotlight.
Copy and paste or enter the following commands, on separate lines, and hit Return when you finish.
chflags nohidden ~/Library
killall Finder
Unhide the Library folder with Terminal
The first command unhides the Library folder and the second restarts Finder to apply the change. The second command is optional. You can run the first command, hit Return, and then reopen Finder manually if you prefer.
If you decide to use this method and want to hide the Library folder again down the road, simply use this command:
chflags hidden ~/Library
Be cautious when using your Library
As we mentioned, the Library folder on macOS is hidden by default to protect you and your system from accidental changes. So be careful when accessing the Library folder and its files.
Are there any tips or tricks like these you’d like more help with on your Mac? Maybe you’re having trouble with your System Preferences or a built-in Mac app? You can comment below to request some help or send us a message on Facebook or Twitter!
Sandy worked for many years in the IT industry as a project manager, department manager, and PMO Lead. She then decided to follow her dream and now writes about technology full-time. Sandy holds a Bachelors of Science in Information Technology.
She loves technology– specifically – terrific games and apps for iOS, software that makes your life easier, and productivity tools that you can use every day, in both work and home environments.
Her articles have regularly been featured at MakeUseOf, iDownloadBlog and many other leading tech publications.


Write a Comment