These days, you can do quite a lot on your Mac. Accessing the internet is easy with apps like Safari, and you’ve got plenty of opportunities to carry out your work in a more efficient manner. And in some cases, you might not even need to open Safari.
Apple has made several changes to the Mail app in recent years, and you’ve got the opportunity to keep track of threads and much more nowadays. You can add and remove your internet accounts on your Mac with ease, too, and we’ll show you how to do both.
First, however, let’s look at what “internet accounts” actually means.
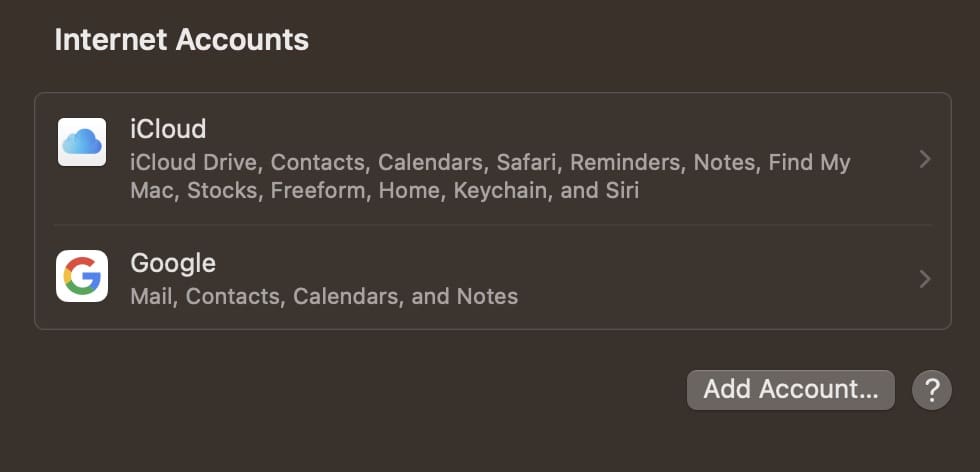
When we say “internet accounts”, we’re referring to the different profiles you can have for various web services. Examples include iCloud, Google, Microsoft Exchange, and AOL.
While we’ve spoken largely about emails in the intro, that’s not the only thing we’re discussing. For example, if you add your Google account to your Mac, you can use it with several other Apple apps – such as Calendar and Notes.
How to Add Internet Accounts to Your Mac
Before we look at how you can remove your internet accounts in macOS, let’s discuss how you can add them. Follow the steps below to achieve your desired result.
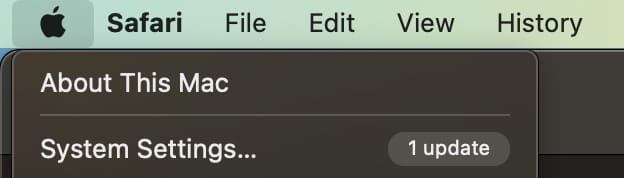
1. Open the System Settings app. You can do this by going to the Apple logo in the top left and expanding the dropdown menu.
2. In your Mac System Settings, go to Internet Accounts. You’ll find this option close to the bottom of your left-hand toolbar.
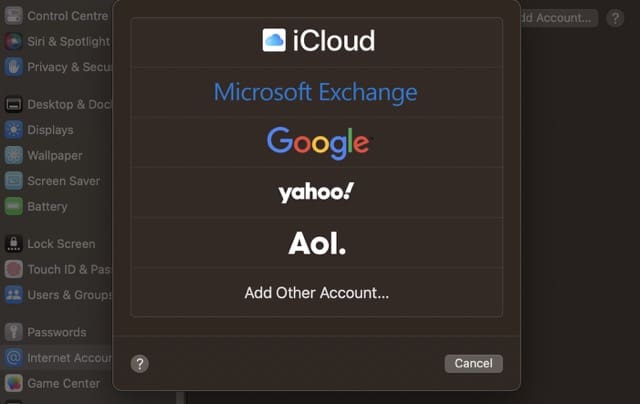
3. Click on the Add Account button, which you’ll see close to the top of your window.
4. Choose the provider you’d like to add your account from. You might need to authenticate in your web browser.
5. Complete the steps that are specific to your profile in your web browser. Then, go back to System Settings.
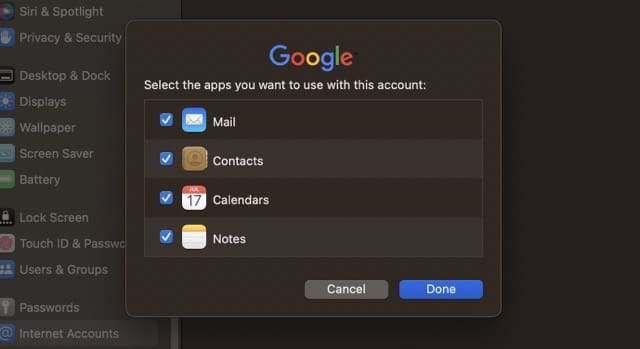
6. You’ll see an option asking what you’d like to use your account with. Tick and untick the boxes however you feel necessary, and hit the OK button once you’ve finished.
After a few seconds, you should see your newly-added internet account.
How to Remove Internet Accounts on Your Mac
Now that you know how to add internet accounts on your Mac, let’s look at how you can remove them. Below are the steps you need to follow:
1. Go to System Settings > Internet Accounts.
2. Select the internet account you’d like to delete.
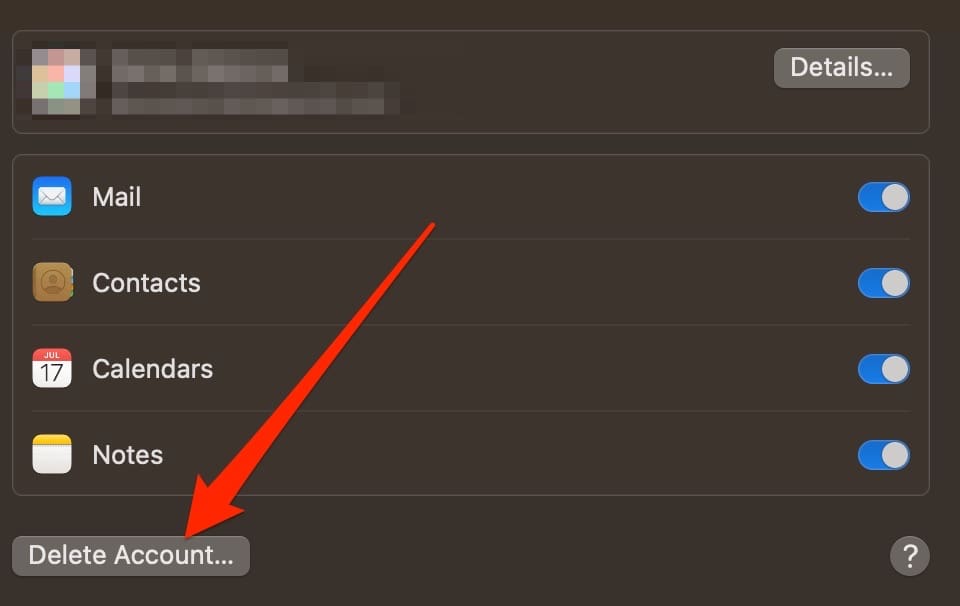
3. Beneath the main box on the next screen, you’ll see an option titled Delete Account. Click on this.
4. Confirm that you would like to delete your account when the pop-up window appears.
Adding and Removing Internet Accounts on Mac: Both Are Easy
Adding internet accounts to your Mac can make it much easier to keep track of your events, emails, and more. And if you want to add something new, doing so is pretty straightforward. All you need to do is perform a couple of steps, and you’ll be ready to go.
You might also later decide that you want to delete an internet account from your computer, and you’ll have no problems doing that either. Once you’ve opened your System Settings, the process is arguably even easier than adding something new.
Danny has been a professional writer since graduating from university in 2016, but he’s been writing online for over a decade. He has been intrigued by Apple products ever since getting an iPod Shuffle in 2008 and particularly enjoys writing about iPhones and iPads. Danny prides himself on making complex topics easy to understand. In his spare time, he’s a keen photographer.


Write a Comment