With iTunes retired in macOS Catalina, you might find yourself wondering how to back up an iPhone, iPad, or iPod touch to your Mac. Have no fear, it’s as easy as ever and we’ve explained everything you need to know below.
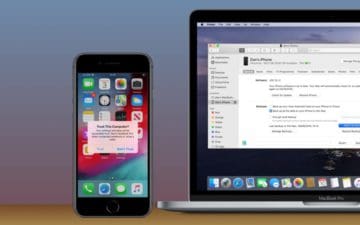
Use an official Apple charging cable to connect your iPhone, iPad, or iPod touch to your Mac. In order to back up your device, it needs to be powered on and unlocked before you do this.
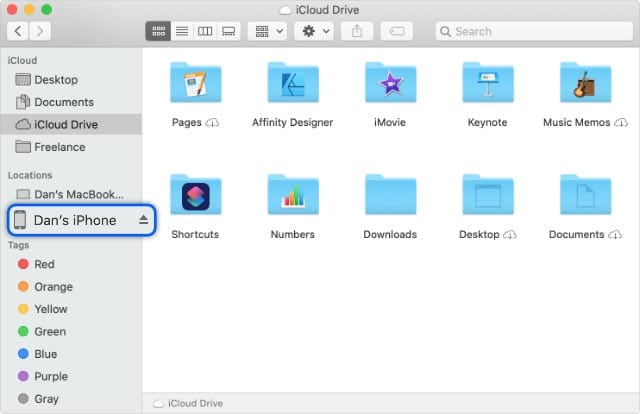
Step 2: Locate your iPhone, iPad, or iPod touch using Finder
After connecting your iPhone, iPad, or iPod touch, it should appear under Locations in the sidebar of Finder. If you don’t see it, go to Finder > Preferences > Sidebar and turn on CDs, DVDs and iOS Devices.
If your iPhone, iPad, or iPod touch still doesn’t show up, inspect your cable for damage, try a different cable, or try a different port on your computer. Also, make sure your device is powered on, unlocked, and waiting on the Home screen.
You should be able to see your iPhone, iPad, or iPod touch in Finder under Locations.
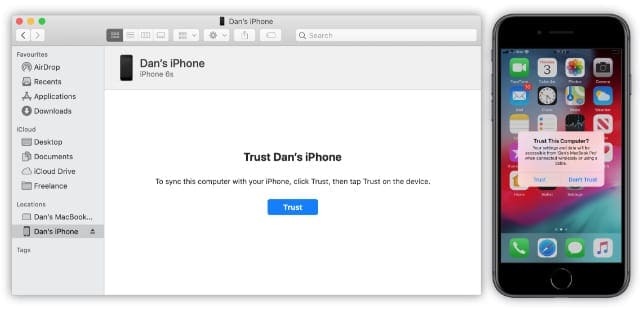
Step 3: Agree to trust the computer from your device
When you select your device in Finder, macOS asks if you trust the device. Click Trust, prompting a similar alert to appear on your iPhone, iPad, or iPod touch. Unlock your device and agree to Trust the computer.
You can’t back up your iPhone, iPad, or iPod touch to macOS if you don’t trust that computer. You shouldn’t agree to trust public computers or other people’s devices. When you do so, it puts your personal data at risk.
Choose to Trust your iPhone or computer on both devices.
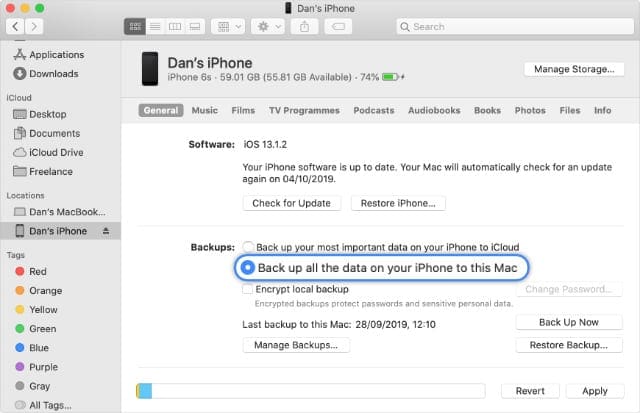
Step 4: Choose your backup settings in Finder
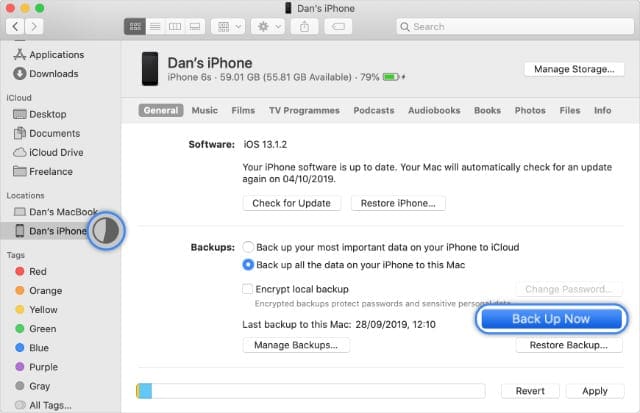
In Finder, select the General tab and look for the Backups section. Click the option to Back up all the data on your device to this Mac, then choose whether you want to encrypt your local backup or not.
Select the radio button to back up your iPhone to the Mac.
Should I encrypt my iPhone, iPad, or iPod touch backup for macOS Catalina?
When you choose to encrypt a local backup, macOS prompts you to create a secure password for it. This password can be as simple or as complicated as you like, but make sure it’s memorable.
If you forget your password you can never restore your encrypted backup.
Step 5: Start backing up your iPhone, iPad, or iPod touch
Click Back Up Now to start backing up your iPhone, iPad, or iPod touch to your Mac. Make sure you wait until the back up is complete before ejecting your device.
Follow the progress of your backup from the circle filling up next to your device name in Finder’s sidebar. When it’s complete, click the eject button.
The backup progress icon changes to an eject button after it finishes.
Let us know how you get on with backing up your iPhone, iPad, or iPod touch in Finder with macOS Catalina. It may seem unfamiliar at first, but most of the process is exactly the same as it used to be.
Dan writes tutorials and troubleshooting guides to help people make the most of their technology. Before becoming a writer, he earned a BSc in Sound Technology, supervised repairs at an Apple Store, and even taught English in China.


Write a Comment