Apple introduced its air quality reporting in its Weather app some time back. With the advent of iOS 12, this feature became popular. Since then, it has continued to be a popular tool — and it has helped people during crises, such as wildfires in their local area.
This feature is also very helpful to users who suffer from Allergies and asthma and would like to learn about the air quality outside before venturing out for the day.
Today, you’ll find out how to check the air quality in both Apple Maps and the Weather app. We’ll also show you how to check the current weather conditions in Apple Maps.
How To Check Air Quality Report via Maps on Your iPhone
To check the air quality for a place in Apple Maps, you’ll first have to set up this feature on your iPhone. Doing so is quite straightforward.
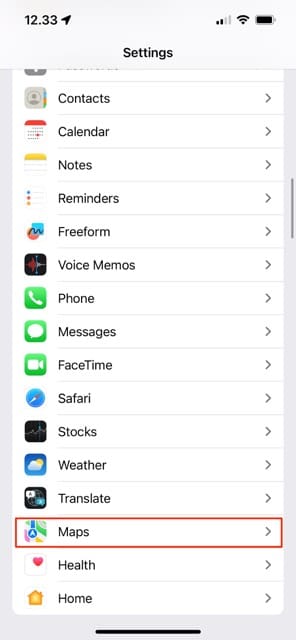
Open the Settings app.
Either scroll down to Maps or search for the app in the search bar.
Scroll down to Climate and make sure that Air Quality Index is toggled on.
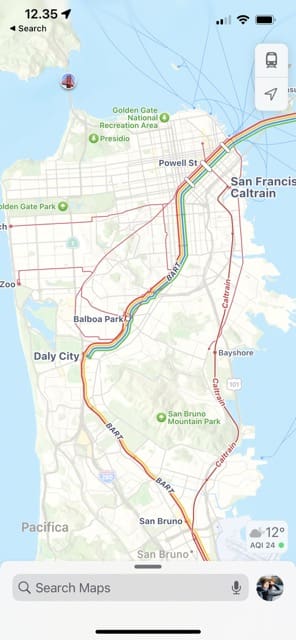
Once you have enabled this feature, you will find the weather condition and the associated air quality index (AQI) in the bottom right corner of your Map Screen. As you scroll around different parts of a city, you’ll notice that the AQI changes based on the local area.
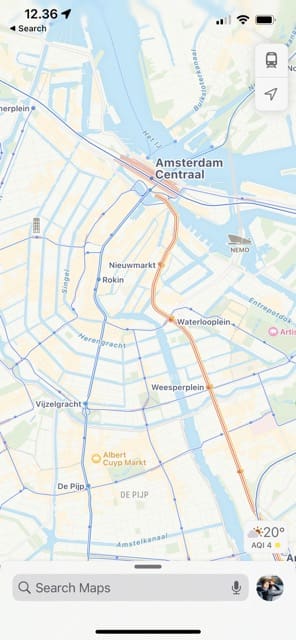
The feature automatically shows a ‘green’ circle when the air quality is good and a ‘red’ icon along with the index reading, when things are bad. If things are okay, you’ll see a yellow circle. Below are some examples of the air quality in different cities at the time of writing.
Note that you can’t see the AQI for every single city in the world in Apple Maps. But you should be fine in many parts of the US, plus a host of other countries and continents.
How to Check Weather Conditions in Apple Maps on iPhone
To check the temperature and weather conditions in Apple Maps, you’ll need to go to Settings > Maps > Climate and toggle on Weather Conditions. Except for the fact that you need to toggle on Weather Conditions instead of Air Quality, the steps are the same as what we’ve discussed above.
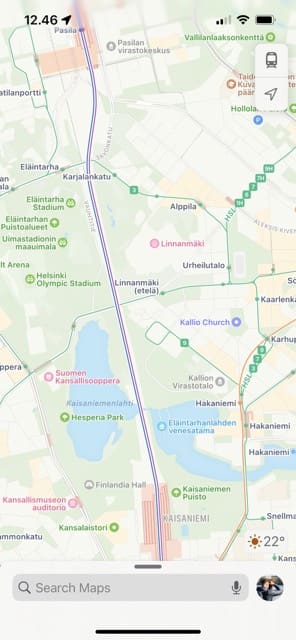
When you open the Apple Maps app, you’ll see the temperature in Fahrenheit or Celsius — depending on your preferences — just above the AQI in the bottom right-hand corner. You’ll also see an image showing whether it’s sunny, raining, or something else.
How to Check Air Quality Report using the Weather App on your iPhone
This feature is easy to check, but you need to ensure that your town or region is covered. If you can see the AQI for a location in Apple Maps, you shouldn’t have a problem doing the same in the Weather app.
Tap on the Weather App on your iPhone to get started.
Choose a city for which you want to check the air quality. You can use the search bar if needed.
Tap on the city when you see it.
Scroll down to find the Air Quality tab. You’ll see how different the air quality is compared to what it was like around the same time yesterday.
Understand the Air Quality and Weather Conditions in Your Area Better
We hope that you found these tips helpful. It is encouraging to see Apple using some of the common features and propagating them across the iOS system to help users out.
Whether you’re looking for the weather and air quality where you currently live, or you want to know what it’s like when traveling somewhere else, you can use these tips to achieve what you want.
Obsessed with tech since the early arrival of A/UX on Apple, Sudz (SK) is responsible for the original editorial direction of AppleToolBox. He is based out of Los Angeles, CA.
Sudz specializes in covering all things macOS, having reviewed dozens of OS X and macOS developments over the years.
In a former life, Sudz worked helping Fortune 100 companies with their technology and business transformation aspirations.


Write a Comment