macOS Catalina is one of the most exciting updates to Apple’s desktop platform in quite some time. There are many new features that are expected to change how our desktops and laptops work for the future. Make sure to create a macOS Catalina USB installer before you update your MacBook and start exploring Catalina features.
While you don’t need a bootable installer to install macOS Catalina, it’s a good option for people with a limited or sporadic internet connection, multiple Macs, or who want a backup installer for emergencies.
However, what if you are one of those people who love to “tinker” and what to play with Catalina without fully installing it? Today, we’re going to take a look at how you can create a USB installer for macOS Catalina.
What do you need to create the Catalina installer?
As expected, there are a few things that you have to have in your possession before you can turn this dream into a reality. We have a list below of what you’ll need before you get started.
USB Flash Drive – This must have a capacity of at least 16GB, as it will be the bootable drive for Catalina.
The “Install macOS 10.15.app” – Downloadable from Apple’s Mac App Store and placed in the /Applications/ folder on your Mac.
Also find the macOS download links in the support pages for macOS Catalina
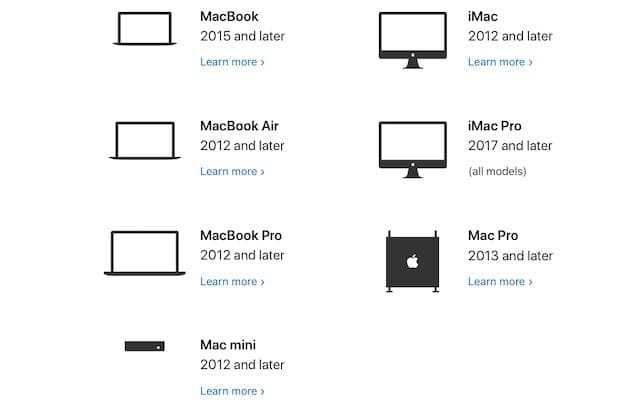
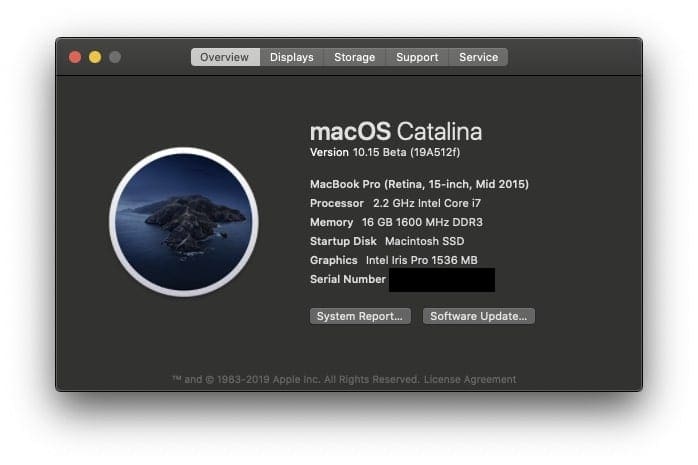
A Mac compatible with macOS Catalina
A steady internet connection
After you have picked up a suitable USB drive and downloaded the “Install macOS 10.15.app”, they will be ready to create the USB drive. The steps for doing so are a bit more complicated and require you to use a terminal command.
Want an earlier version of macOS or Mac OS X?
Visit these Apple support pages for your preferred macOS version and follow the links to download the installer.
After everything has been downloaded, there is another few steps that you’ll need to take. First and foremost, make sure that that drive has at least 12GB of available storage.
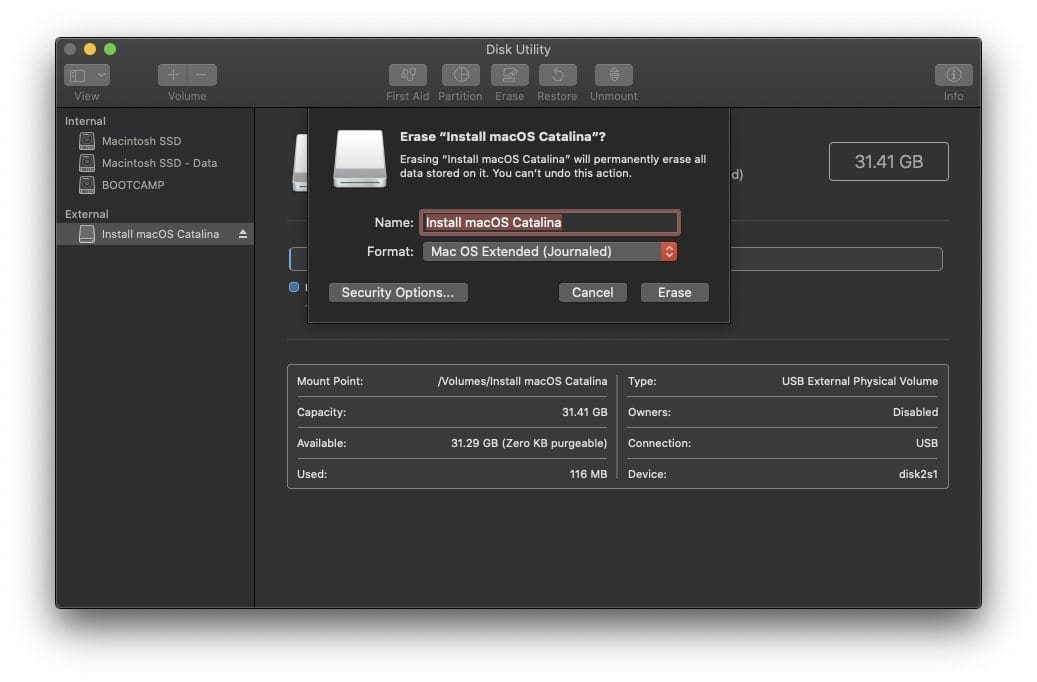
Then, plug the USB flash drive into your Mac. Next, open the Disk Utility application from your Mac and locate the thumb drive under “External”.
At the top, there will be a few buttons listed, but you will need to click “Erase”. You can change the name from here, but you will need to ensure your drive is formatted as follows:
Format: Mac OS Extended (Journaled)
Scheme: GUID Partition Map
It’s critical that your USB drive is formatted as Mac OS Extended. These steps do not work for APFS or any other formatting option.
From there, select “Erase” and your drive will be ready to go. Now that you are ready to go, here are the steps to create your bootable Catalina drive.
Connect the USB flash drive to your Mac
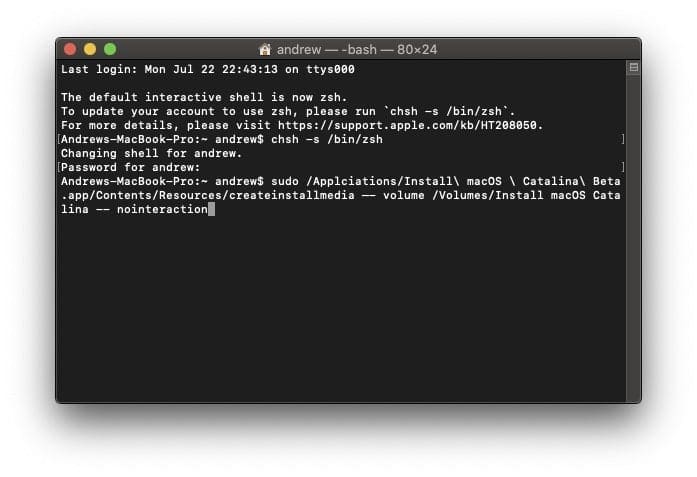
Open the Terminal application, which is found in /Applications/Utilities
Enter the following command for which version of Catalina you downloaded. Replace “UNTITLED” with the name of the flash drive that you plugged into your Mac for macOS Catalina
Before hitting the “Enter/Return” Key, ensure that the command in Terminal is 100% correct. If not, an error will appear and you will end up having to start over before the USB will properly work.
After you have verified the command, hit Enter and then enter the Administrator password on your Mac. From there, the Catalina Installer will be installed onto the USB drive. We do warn that this may take a little bit of time before you will be able to actually use it.
What to do next?
Once the USB drive has been created, you can then use this to plug into any compatible Mac in order to test-drive macOS Catalina. After the drive has been created, an icon will appear on your desktop which will be named “Install macOS Catalina”.
This acts as the final fail-safe of confirming that you followed the steps correctly. Once finished, you can begin the fun of playing with Catalina and using this USB drive to do so.
How to boot with the macOS Catalina Installer drive
Now that the drive has been created properly, you can now install Catalina on any of your compatible Macs. Here are the steps that you’ll need to take to boot using the new USB drive.
Connect the USB install drive that you created into the Mac of your choice.
Reboot your Mac
Immediately hold down the OPTION key while booting. Continue to hold the key until you see the boot menu
Using the arrow keys, select the “Install macOS 10.15” drive
We HIGHLY recommend not installing Catalina on your primary computer, or your primary hard drive. Instead, if you want to test new features, use a secondary hard drive or an extra Mac that you have access to.
There are still very a lot of user-reported issues with Catalina, and not all of your apps will work properly. This is especially true for those apps that are based on the 32-bit architecture, as those are no longer supported.
Conclusion
It’s important to reiterate that we do not recommend installing Catalina on your primary device until you verify compatibility and create a backup of your Mac.
Once you are ready with taking the deep dive into the world of macOS 10.15, use the created drive to install it. For any issues, see Apple’s instructions on creating a USB installer for macOS.
If you run into any issues, please let us know in the comments below and we’ll be sure to help out. Catalina is currently gracing the machine this is written on, so we’ll be able to properly help out with issues.
Andrew Myrick is a freelance writer based on the East Coast of the US. He enjoys everything to do with technology, including tablets, smartphones, and everything in between. Perhaps his favorite past-time is having a never-ending supply of different keyboards and gaming handhelds that end up collecting more dust than the consoles that are being emulated.


Any update now that Catalina is released?
Hi James,
The tips are the same–download the macOS Catalina installer from Apple’s Mac App Store and then use the createinstallmedia command in Terminal