You usually won’t encounter many Wi-Fi issues when you use your iPhone or iPad. But occasionally, you might see a “Privacy Warning” message when you check your network settings.
Needless to say, keeping yourself online should be your top priority. So, what should you do when you see this message? Why is it even showing up in the first place? Let’s find out.
Before we look at how to solve this issue, it’s worth identifying why the message is showing up.
Generally speaking, your iPhone or iPad will say “Privacy Warning” when you haven’t masked your device’s media access control (MAC) address. As a result, others can see your MAC address.
The Privacy Warning message usually appears because of an issue on or with your device. But sometimes, you might need to tweak your Wi-Fi router settings.
How to Make the Privacy Warning Message Go Away
Seeing a Privacy Warning message is far from ideal, but fixing the issue is usually straightforward. Below are five things you can try.
Toggling your Wi-Fi settings is the easiest way to fix the Privacy Warning message on your iPhone or iPad. Follow the steps below to do this; while the screenshots are from an iPhone, the steps are identical if you saw the warning on your iPad.
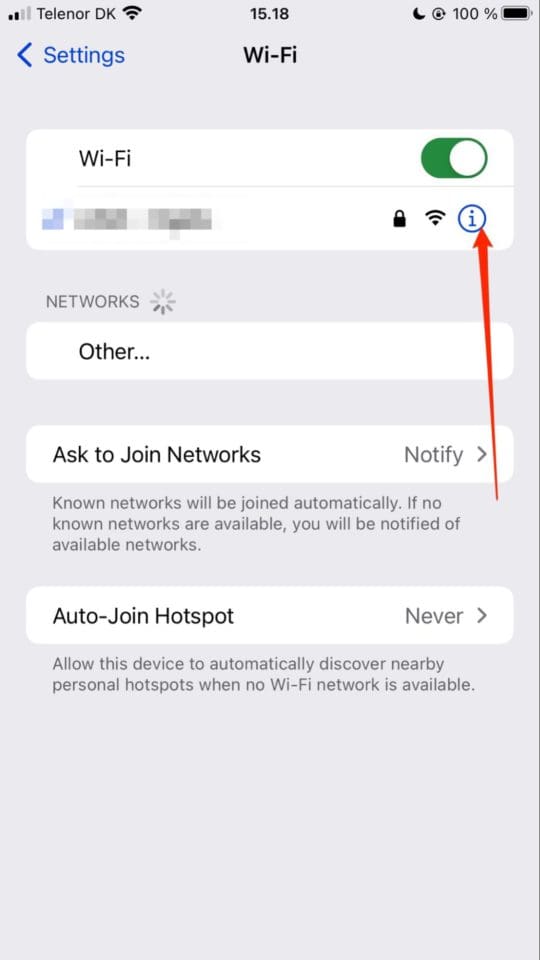
1. Open the Settings app on your device and go to Wi-Fi.
2. Select the i button next to the network you’re connected to.
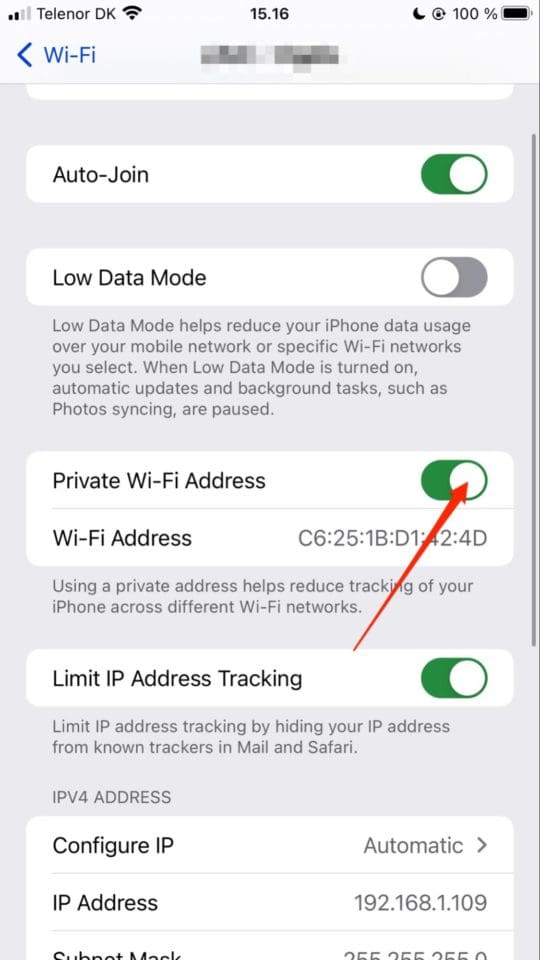
3. Look for the Private Wi-Fi Address banner. Make sure you’ve turned the option on; if you haven’t, toggle the setting so that it is.
2. Forget the Wi-Fi Network
Once you’ve completed the steps above, you should have fixed the issue. But if that isn’t the case, you can try forgetting your Wi-Fi network and reconnecting.
1. Go to Settings > Wi-Fi.
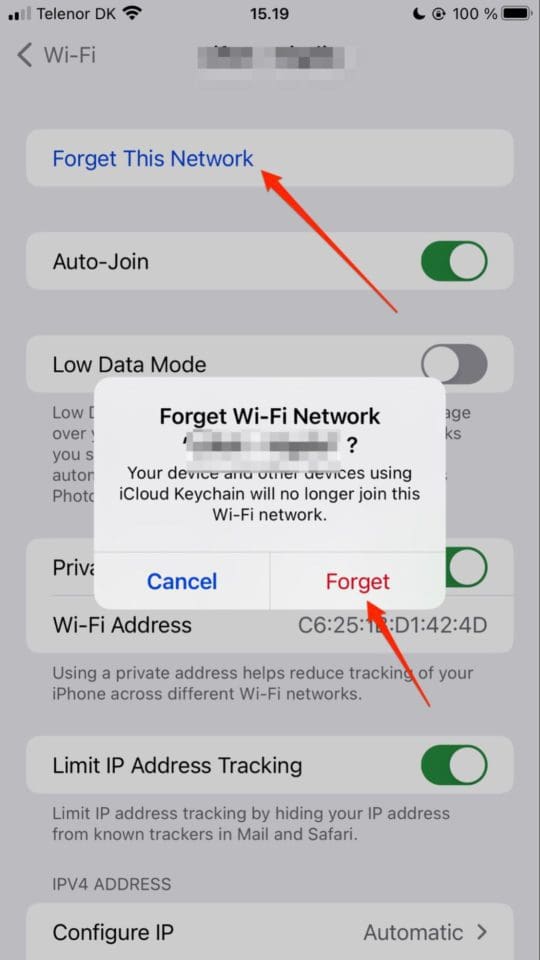
2. Click on the i button next to the Wi-Fi network with the Privacy Warning message.
3. At the top of the next screen, click on Forget This Network. Your device will ask you to confirm your decision; select Forget.
Once your iPhone or iPad has disconnected from the network, follow these steps:
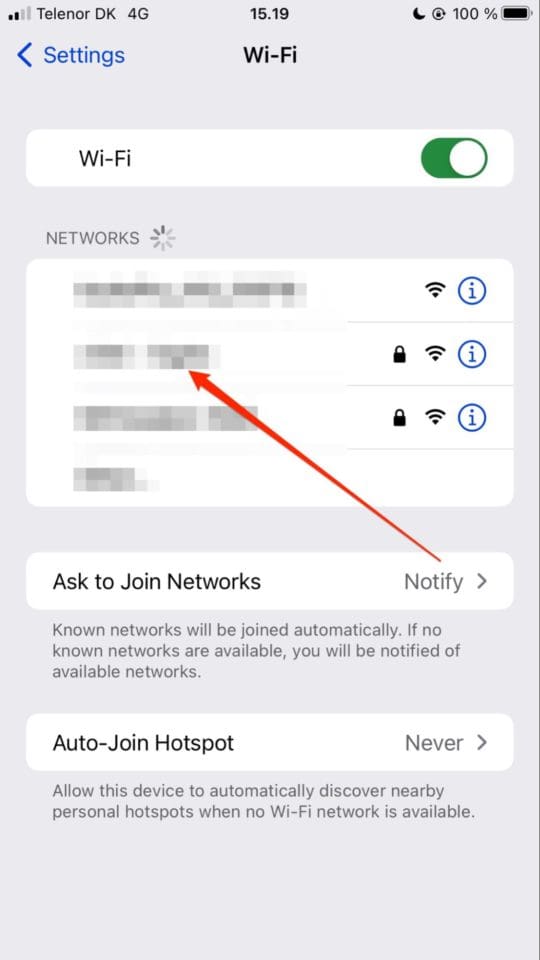
1. Find the Wi-Fi network you want to reconnect to and click on it.
2. Enter your password and select Join.
3. Go into the Wi-Fi network and ensure the Private Wi-Fi Address option is toggled on.
3. Restart Your Device
If you’re still experiencing problems with your Wi-Fi showing the Privacy Warning message, you can try turning Airplane Mode on and off. If that doesn’t work, restarting your device might work.
How you turn your device off will depend on the model. For iPhones with the home button and iPads, hold the side or top button — depending on your model — off. If you’ve got an iPhone X or later, hold one of the volume buttons with the side button.
Once your device is off, switch it on again and check the network.
4. Make Sure Your Router Is Using a Secure Connection
In some instances, the Privacy Warning problem might lie with your network and not your iPhone or iPhone. If you suspect something is wrong with your router, consider updating the firmware or restarting it.
The steps will vary depending on your network provider. To update the firmware, you’ll probably need to use an app.
If the issue persists, you should contact your Wi-Fi supplier.
5. Consider Using a VPN
Suppose you’re in a place without a secure connection or using somebody else’s Wi-Fi. In that case, you can always consider using a virtual private network (VPN). Doing so will help to encrypt your data, and it should remove any reason for your device to keep showing the Privacy Warning message.
Once you’ve chosen your preferred VPN, connect your device to it:
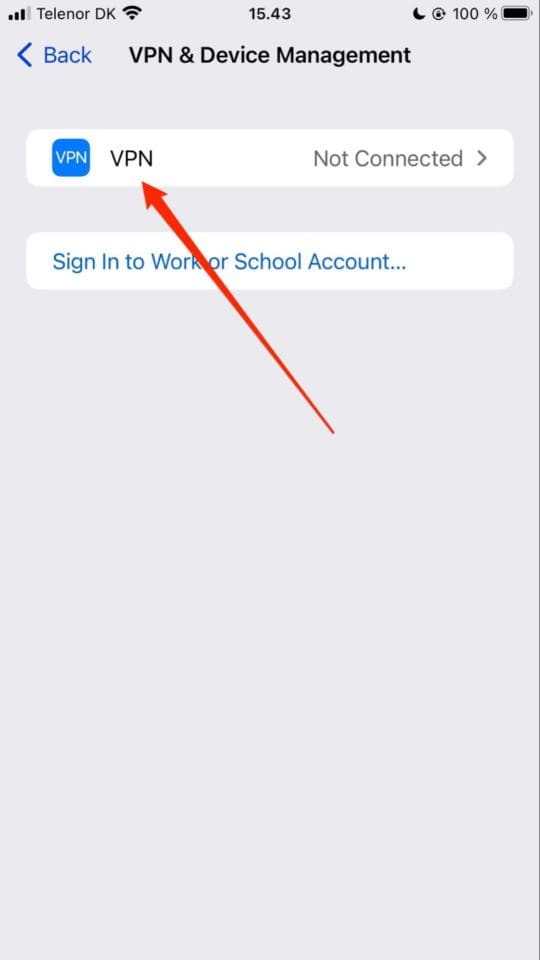
1.Go to Settings > General > VPN & Device Management.
2. Select the VPN option.
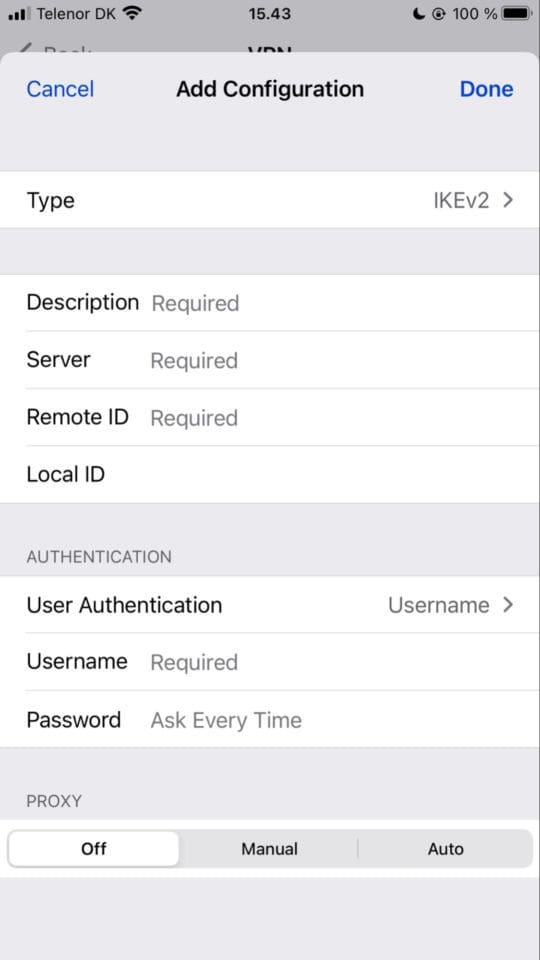
3. Click on Add VPN Configuration and enter the necessary details before selecting Done.
The Privacy Warning Message Usually Isn’t Something to Worry About
You shouldn’t have too many issues fixing the Privacy Warning message in most cases. Once you’ve toggled the Private Wi-Fi network feature on, everything should be back to normal. However, you’ll have to dig a little deeper in some instances.
You might want to use a VPN or check your router at the most extreme level. But before you go that far, try the simpler options on this list.
I have been working in IT for over 25 years. As a child, I delighted in tinkering with radios, VCRs, and TVs—a passion that still resonates with me today. I possess an extensive array of TV and music streaming tech, fostering my ongoing fascination with these innovations, which I enjoy documenting through my writing. When I’m not engrossed in technological pursuits, I enthusiastically support my Chicago Bears or the Chicago Cubs. Additionally, I indulge my passion for collecting baseball cards, amassing a collection that some might consider excessive.


Your recommendations have been very helpful, detailed and easy to follow.
Thank you,