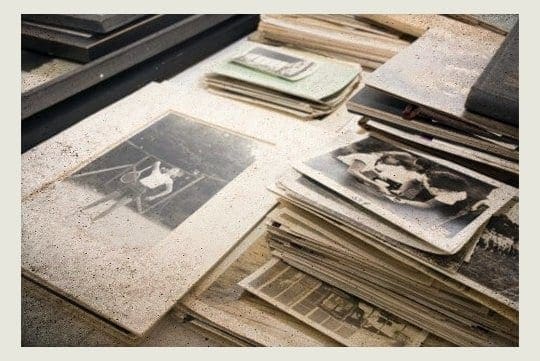
If your family is anything like mine, there’s a ton of old photos tucked away in boxes, trunks, and bags in your attic, basement, garage, or rented storage unit. And there’s probably little to no organization. Since these were most likely all taken in the pre-digital days, the task of digitizing them is arduous and lengthy.
For those of us with Mac and iPhones, iPads, or some other iDevice, we’d like to get some of those old photos into our digital photo library for safe-keeping. And that’s where both our Photos app and scanning comes in.
Photos and the now obsolete iPhoto are part of the Apple suite of applications included with any Mac purchase. This combination of programs contains things like Garageband, iMovie, Messages, FaceTime, Photo Booth, and the productivity software package iWork.
Although Photos (or the elder iPhoto) has many great features to organize and edit your complete photo library, scanning directly into Photos or iPhoto is not one of them. But as always with Macs, there are workarounds for that!
How-To Scan on a Mac Computer
Software Check to Scan photos/images by using iPhoto or Photos
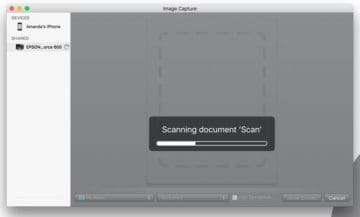
Before we move on, check that your scanner is installed correctly. First, connect your scanner to your Mac and power up the scanner if not already on. Then open the application Image Capture from your main Applications folder.
If your scanner appears in the left column, everything is ok. If your scanner does not appear, you must (re)install the scanner driver that is specifically for your scanner. Check the manufacturer’s website for the drivers if your Mac is unable to locate them.
Use Image Capture to scan images directly into Photos
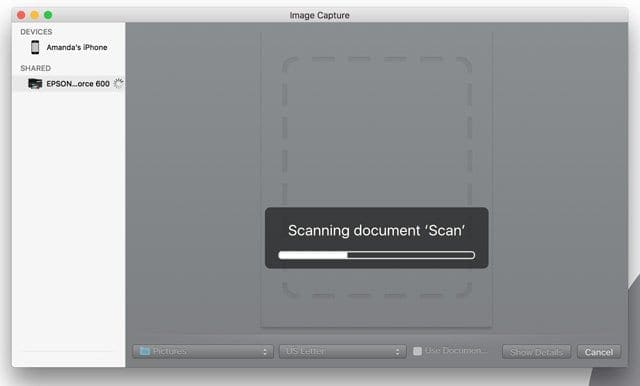
Open Image Capture from your dock or the Applications folder.
Select Show Details and change the Scan To: to Photos (if you don’t see the Photos app, choose Other and then navigate and select the Photos app from your Applications folder)
Place the photo you want to scan face down on the glass in the scanner
If you want to adjust the settings like DPI, size, and format, hit the button ‘Show Details.’ The scanner shows you a preview, and you adjust the settings as you wish
Hit the button Scan
After the scanner is finished, the image is automatically imported into Photos
Find your picture(s) by clicking on Last Import (Left column in Photos)
Scan normally using Image Capture and then import the file into Photos
Open Image Capture
Select Your Scanner in the Left Sidebar
Look in Shared for WiFi and Ethernet Connected Printers
To change DPI and other settings, select the Show Details button
Place the photo or content you want to scan face down on the glass in the scanner and choose the Scan button
Once completed, a Scan Results Window pops-up with your current scan
Tap the magnifying glass to locate the scanned image, then rename and open it
Image Capture works with your System Photo Library
Check if the scan is performed as intended
Check file details, dimensions, and the pixels (DPI)
If not acceptable, delete the current scan and rescan with any revised settings
To change the location of scans, select the Show Details button and change the Scan To Folder to your desktop or location of choice or create a Scanned Photos folder
Open Photos from your dock or your Applications folder
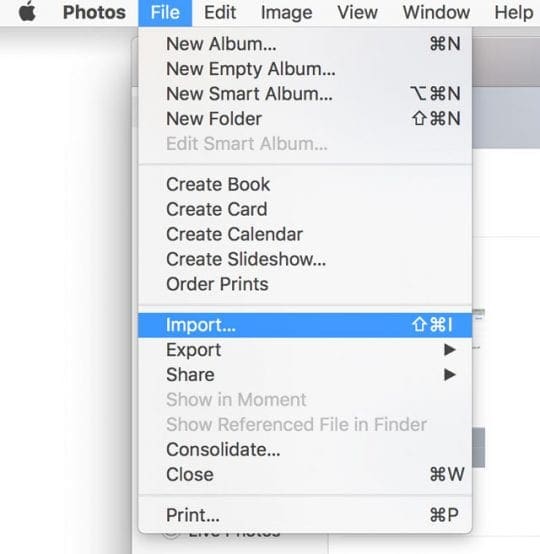
Click on the Photos menu File >Import, select the image(s) you want to import and click Review for Import
Your scanned photo is now in your Photos Library
Want Another Method to scan photos/images?
Another way is to drag and drop the files onto the Photos directly. Find your picture(s) in Photos in the left column of Photos under the heading Last Import.
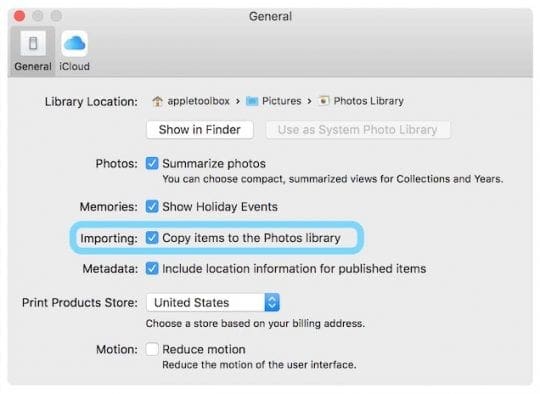
Dragging and dropping follows whatever import preferences you set in your Photos App. So if you set your Photos Library to Copy when importing, moving your scans follows this same rule.
Scans are Imported, Now What?
After your pictures are imported into Photos, take advantage of the helpful tools like the slideshow tool (Photos > File > Create Slideshow.) Or quickly create a slideshow by clicking the arrow in the upper-right corner. With Slideshow, you get to customize the theme and music. And adjust the settings for display time and transitions.
The Photos editing tools are also great to enhance your images. You can resize, rotate and crop the photo.
Other features are red-eye-reduction, aligning the horizontal position and improve the color balance of the picture. Just try and experiment with all the awesome Photo tools. Don’t be afraid, because you can always return to the original image!
And Don’t Forget to Share with Friends
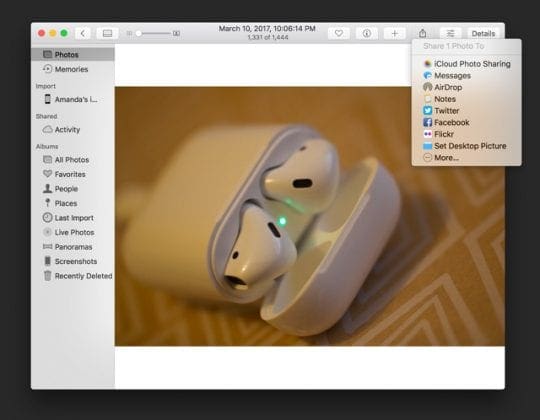
Use the Photos app Share Button to send your photos to friends, family, and social media via Messages, Facebook, Twitter, iCloud Photo Sharing, Mail, and more.
iCloud Photo Library
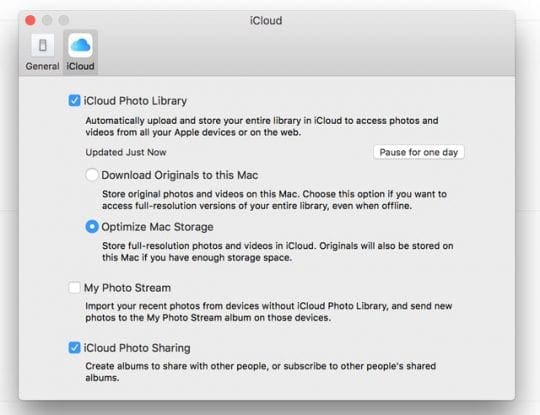
Another feature to take advantage of is iCloud Photo Library. This feature securely stores your entire photo collection so you can access it from anywhere, including all your devices and on iCloud.com. To turn on iCloud Photo Library, go to Photos > Preferences > and select the iCloud tab. Tick the box for iCloud Photo Library.
The beauty of an iCloud photo library is that when you edit and organize images in the Photos app on any device, your changes are kept up to date and visible on all devices including icloud.com. Just make sure that you’re signed in with the same Apple ID on all of your devices.
The only downside is that your photos count towards your total iCloud storage, so if you have the free 5GB plan, you may need to upgrade to a larger capacity plan to accommodate your photo library.
Not able to scan to your Mac?
If your Image Capture does not list your scanner, check that you updated your scanner’s firmware and scanner driver.
Check with your scanner’s manufacturer’s support site to find the appropriate updates for your device and your computer’s operating system.
Common scanning errors
Error Occurred communicating with scanner, -9923
Several readers have pointed out that whey they use their scanner along with their Mac, they are often stuck with an error code -9923, where it says that an error occurred communicating with scanner.
If you see this error, you can resolve it directly from your Mac by following these steps:
Click on > System Preferences
Choose Network
Click on the ‘Advanced…’ at the bottom right of the screen
Click on the TCP/IP tab on the top
Change Configure IPv6 to automatically
Click OK and confirm
If it was already set to IPv6, change it to ‘link-local’, confirm and then re-change it back to automatically. This toggling action on the IPv6 solves this problem for most users.
Unable to import photos Error 9912
Try a different cable. Error 9912 usually indicates a connection problem between your device and the Mac. See if changing the cable solves the issue for you!
Image capture error 9956
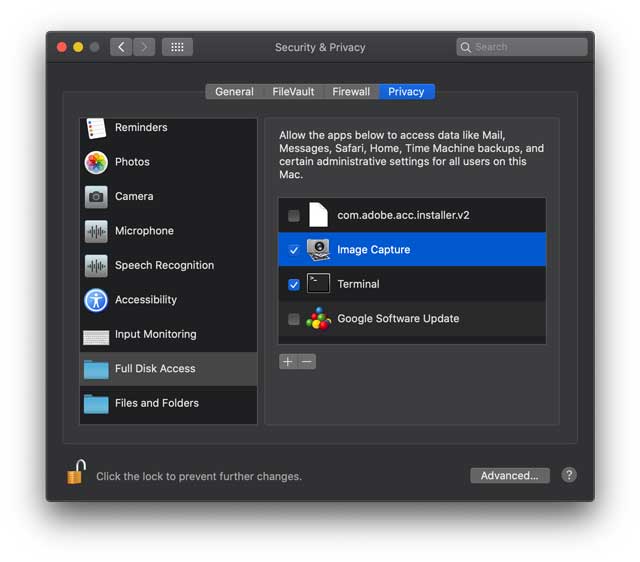
We see this error on Macs using macOS Mojave+. Apple introduced an updated security and privacy procedure. The good news is it’s easy to do.
Go to System Preferences > Security & Privacy
If locked, tap the lock icon in the bottom corner and type in your password
Choose Full Disk Access from the sidebar
Tap the Plus sign to add a new app
Navigate to your Applications folder and tap Image Capture to add it to the list
When done, tap the lock to prevent changes
Image capture error 9934
This error shows up when you try to import photos to a folder or location that your current user does not have permission to write to. By default, Image Capture saves your photos and videos to your user’s Pictures folder. For folks trying to save their images elsewhere, make sure you can write to that designated folder or directory before you save your images.
Obsessed with tech since the early arrival of A/UX on Apple, Sudz (SK) is responsible for the original editorial direction of AppleToolBox. He is based out of Los Angeles, CA.
Sudz specializes in covering all things macOS, having reviewed dozens of OS X and macOS developments over the years.
In a former life, Sudz worked helping Fortune 100 companies with their technology and business transformation aspirations.
I have an Epson FastFoto, and using Mac with Big Sur. I have been on the phone with support four times, and they cannot seem to help. (Basically uninstall and install the Epson scanner). I followed your directions to Change Configure IPv6 automatically, and not solving the problem. Still unable to communicate with scanner. Thank you for any help you might have!
I’m trying to scan a photo into a folder; however, after hitting the scan button and the scanned photo is visible, a message appears; “Please select area to scan”. What does this mean?
Hi, I had try all the ways to fix my corrupt half grey photos on my mac book didn’t work anything. Then Lastly , I tried Stellar software for repair photos it’s repaired my gray photos with in a minutes. I hope this information help most of us. Thanks!
We just tested Image Capture and it’s allowing us to scan directly into the Mac Photos app (using macOS Catalina) from our Brother HL-L2380DW scanner/printer.
We suggest you visit the support site for your scanner manufacturer and see if there are any updated drivers and firmware for your father’s scanner for macOS Catalina. Once installed, close all open apps like Photos, Image Capture, and System Preferences, restart the Mac, and try again using Image Capture.
Hope it works.
If not, let us know the make and model of your father’s scanner and we’ll see what we can dig up to assist.
If the scanner is quite old, it’s also possible that it is no longer supported by the manufacturer and therefore may not be compatible with Catalina.
Hi Elizabeth – I really appreciate the quick reply.
His printer is a Canon Pixma MP190.
I went looking for new drivers and didn’t find any – (it says there are not drivers for at least Mojave and Catalina. I didn’t go back further).
Also, we get the same truncated menu where I’m at with an HP computer (only a couple of years old – HP Laserjet Pro MFP 125nw) that are upgraded to Catalina, but not with mine, which is still on Mojave.
I can still scan to Photos, Preview and Mail but the other Mac in the house cannot.
So in this scenario, your situation is the outlier. And the arrows point to Catalina. Oddly, I cannot find others speaking of this issue, so it is indeed a puzzle. Any further help/suggestions would be appreciated.
Thank you for the further information on your father’s printer/scanner. It looks like Canon’s current recommendation for the Pixma MP190 is to install the latest My Image Garden software. Find this on the support page for the Canon Pixma MP190 and choose the software tab from Drivers & Downloads.
Alternatively, some folks found that installing the Image Capture (ICA) driver for Canon scanners worked for them–ICA Driver Ver.4.3.4a (Mac). This was recently updated to support macOS Catalina. This may or may not work.
For the HP, the recommendation is to install the HP Smart app from the Mac App Store.
I’m also looking for a solution to scan a batch of receipts and have them automatically recognised, split, tagged and saved as separate files.
The software supporting my *late* Brother MFC did a good job of identifying and tagging multiple recipes in a single scan but I now have an Epson 660W which is an absolute beast for scanning and tagging batches of photos. And even though it comes with a carrier sheet for assembling an arbitrary number receipts into a single scan its clunky scanning software can’t identify them and process them separately.
I’ve since found no other software anywhere that does the whole job. What does exist falls into one of two camps:
* Photo processors like SNIP-TAG and SNIP-BATCH (in the App Store) that will identify multiple photos sitting on a white background. They can’t cope with receipts that are largely white with black text – they can’t detect the edges. They also can’t cope with receipts placed on a colour background.
* Receipt processors that want to do OCR and data extraction from them, on a single receipt at a time. Not fun when I have thousands of such to process.
So it looks like this is an unfilled niche in the Mac market.
Using an iMac Os High Sierra and Image Capture, can I enlarge the image during the editing process prior to sharing it to an email in order to make it easier for the recipient to read?
Rene, Yes you can change the image size in a few different ways on your iMac. Easiest will be to simply open the image using the ‘Preview’ app. once you have the image opened, Click on ‘Tools’ on the top menu followed by ‘Adjust Size..’ and change it there. Save it as a new image and you are good to go.
once photos are scanned and in the library, how do I change the ‘meta-data’ to correct the date the photo was taken? Picture is from 1972. Photo appears in library in 2018 when it was scanned. Thanks
One subtlety about trying to use Image Capture with PHOTOS is that it only works if the PHOTOS file you are using is the “System Photo Library”. it took me a long time to find this out. I keep two PHOTOS files: one for images from current digital cameras (my System Photo Library), and one for all my old scanned images. I had endless trouble trying to scan into the latter.
You can delete photos from iCloud using any of your devices or computers that use the same Apple ID. Or you can visit the iCloud website and delete photos from there.
However, when you delete a photo or video from Photos in iOS or macOS AND you have enabled iCloud Photo Library on those devices, it deletes those photos everywhere, even when you have full-resolution downloads turned on in the Photos App.
did you copy them or use Photos to import them? if you import and the Preferences item in the general tab says to copy to library, you should still be able to see them even after deleting from desktop.
It’s a matter of choice. I usually import my scans or scan directly into Photos. And yes, you are correct moving a scan into the Photos App follows whatever import rules you set-up in your Photos Preferences.
What macOS or OS X version are you running? I did a test with macOS Sierra 10.12.6 and Image Capture did scan directly into Photos. Provide me your specs and we’ll look into this problem.
that’s all fine, but if I delete the images from my desktop, then iPhoto will no longer let me view those images in the iPhoto folder I copied them to.


I have an Epson FastFoto, and using Mac with Big Sur. I have been on the phone with support four times, and they cannot seem to help. (Basically uninstall and install the Epson scanner). I followed your directions to Change Configure IPv6 automatically, and not solving the problem. Still unable to communicate with scanner. Thank you for any help you might have!
I’m trying to scan a photo into a folder; however, after hitting the scan button and the scanned photo is visible, a message appears; “Please select area to scan”. What does this mean?
Hi, I had try all the ways to fix my corrupt half grey photos on my mac book didn’t work anything. Then Lastly , I tried Stellar software for repair photos it’s repaired my gray photos with in a minutes. I hope this information help most of us. Thanks!
I don’t think you can scan directly to Photos anymore after the Catalina update. Nor email.
Those options used to show up under the “scan to” menu, but no longer do for some reason.
Inquiry into Apple support gets explanations about the OS being the issue.
This is frustrating for my dad, who used to have this process down for scanning old family photos.
Unless I’m missing something, I’d gladly be corrected.
Hi Mark,
We just tested Image Capture and it’s allowing us to scan directly into the Mac Photos app (using macOS Catalina) from our Brother HL-L2380DW scanner/printer.
We suggest you visit the support site for your scanner manufacturer and see if there are any updated drivers and firmware for your father’s scanner for macOS Catalina. Once installed, close all open apps like Photos, Image Capture, and System Preferences, restart the Mac, and try again using Image Capture.
Hope it works.
If not, let us know the make and model of your father’s scanner and we’ll see what we can dig up to assist.
If the scanner is quite old, it’s also possible that it is no longer supported by the manufacturer and therefore may not be compatible with Catalina.
Hope this works!
liz
Hi Elizabeth – I really appreciate the quick reply.
His printer is a Canon Pixma MP190.
I went looking for new drivers and didn’t find any – (it says there are not drivers for at least Mojave and Catalina. I didn’t go back further).
Also, we get the same truncated menu where I’m at with an HP computer (only a couple of years old – HP Laserjet Pro MFP 125nw) that are upgraded to Catalina, but not with mine, which is still on Mojave.
I can still scan to Photos, Preview and Mail but the other Mac in the house cannot.
So in this scenario, your situation is the outlier. And the arrows point to Catalina. Oddly, I cannot find others speaking of this issue, so it is indeed a puzzle. Any further help/suggestions would be appreciated.
Z
Hi Z,
Thank you for the further information on your father’s printer/scanner. It looks like Canon’s current recommendation for the Pixma MP190 is to install the latest My Image Garden software. Find this on the support page for the Canon Pixma MP190 and choose the software tab from Drivers & Downloads.
Alternatively, some folks found that installing the Image Capture (ICA) driver for Canon scanners worked for them–ICA Driver Ver.4.3.4a (Mac). This was recently updated to support macOS Catalina. This may or may not work.
For the HP, the recommendation is to install the HP Smart app from the Mac App Store.
I followed these steps, choosing 400 DPI and jpeg format from the menu.
It worked well but cropping took too long.
So I found an app on Mac App Store that can automatically crop a whole batch of scans at a time.
Also, I can put 4-5 pictures on the scanner glass, scan them as a single image, and the app separates and crops them. Very amazing.
Hi Dorothy,
Which app did you find? I am looking in the app store now, is it SnipTag (https://apps.apple.com/app/id1448677570)? regards,
I’m also looking for a solution to scan a batch of receipts and have them automatically recognised, split, tagged and saved as separate files.
The software supporting my *late* Brother MFC did a good job of identifying and tagging multiple recipes in a single scan but I now have an Epson 660W which is an absolute beast for scanning and tagging batches of photos. And even though it comes with a carrier sheet for assembling an arbitrary number receipts into a single scan its clunky scanning software can’t identify them and process them separately.
I’ve since found no other software anywhere that does the whole job. What does exist falls into one of two camps:
* Photo processors like SNIP-TAG and SNIP-BATCH (in the App Store) that will identify multiple photos sitting on a white background. They can’t cope with receipts that are largely white with black text – they can’t detect the edges. They also can’t cope with receipts placed on a colour background.
* Receipt processors that want to do OCR and data extraction from them, on a single receipt at a time. Not fun when I have thousands of such to process.
So it looks like this is an unfilled niche in the Mac market.
Hi Sk, After reading your blog I learned how to use our Mac so we can scan our photos and documents. Thanks
Using an iMac Os High Sierra and Image Capture, can I enlarge the image during the editing process prior to sharing it to an email in order to make it easier for the recipient to read?
Thanks,
Rene
Rene, Yes you can change the image size in a few different ways on your iMac. Easiest will be to simply open the image using the ‘Preview’ app. once you have the image opened, Click on ‘Tools’ on the top menu followed by ‘Adjust Size..’ and change it there. Save it as a new image and you are good to go.
once photos are scanned and in the library, how do I change the ‘meta-data’ to correct the date the photo was taken? Picture is from 1972. Photo appears in library in 2018 when it was scanned. Thanks
Debra, This post shows how to get to the metadata of a photo. Give it a try and see if it allows you to change the dates. https://appletoolbox.com/how-to-fix-inaccurate-geotags-on-your-iphone-photos/
One subtlety about trying to use Image Capture with PHOTOS is that it only works if the PHOTOS file you are using is the “System Photo Library”. it took me a long time to find this out. I keep two PHOTOS files: one for images from current digital cameras (my System Photo Library), and one for all my old scanned images. I had endless trouble trying to scan into the latter.
How do I delete photos from iCloud and if I delete them there are they deleted from my laptops and iPhone ?
Hi Dudley,
You can delete photos from iCloud using any of your devices or computers that use the same Apple ID. Or you can visit the iCloud website and delete photos from there.
However, when you delete a photo or video from Photos in iOS or macOS AND you have enabled iCloud Photo Library on those devices, it deletes those photos everywhere, even when you have full-resolution downloads turned on in the Photos App.
SK
did you copy them or use Photos to import them? if you import and the Preferences item in the general tab says to copy to library, you should still be able to see them even after deleting from desktop.
Hi Oscar,
It’s a matter of choice. I usually import my scans or scan directly into Photos. And yes, you are correct moving a scan into the Photos App follows whatever import rules you set-up in your Photos Preferences.
Thanks,
Liz
Apple would be wise to remove the option to scan to Photos app if it is no longer working. Or maybe, fix it… ?
Hi Oscar,
What macOS or OS X version are you running? I did a test with macOS Sierra 10.12.6 and Image Capture did scan directly into Photos. Provide me your specs and we’ll look into this problem.
Liz
that’s all fine, but if I delete the images from my desktop, then iPhoto will no longer let me view those images in the iPhoto folder I copied them to.