Every time Apple releases a new iOS update, it’s tempting to update your iPhone immediately so you can start enjoying the latest features. But it’s better to take a moment to prepare your iPhone for the newest iOS update, protecting yourself against potential bugs and data loss.
Before your download or install the update to iOS 14, take a few minutes to prepare your iPhone with the steps below.
Why do you need to prepare your iPhone to update iOS?
Although there’s nothing stopping you from going to Settings > General > Software Update and updating iOS right now, you run the risk of data loss, software bugs, or failed updates if you do so.
Downloading and installing a major iOS update takes a long time, and you’ll need to go through it all again if you don’t prepare your iPhone first.
If you don’t have enough storage, the update could fail partway through. If the update is riddled with bugs, you might regret installing it. And if you fail to make a backup before updating, you could lose all the data on your iPhone.
Follow the steps below to fully prepare your iPhone before installing the newest update to iOS. It only takes a few minutes to protect yourself.
Step 1. Make sure your device is compatible
If you’re using an older device, there’s no guarantee that your iPhone is compatible with the latest iOS update. Apple leads the industry at providing years of support for its products, but that support doesn’t last forever.
Eventually, older devices lack the processing power to run the latest update smoothly, so Apple stops updating those devices to maintain the user experience.
The easiest way to check if your iPhone is compatible with a new iOS update is in the Settings app.
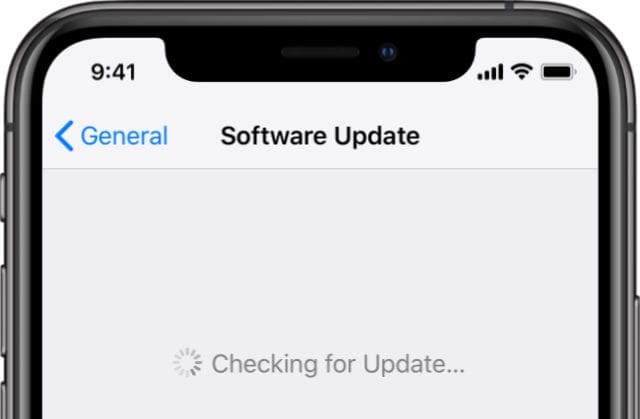
Open Settings and go to General > Software Update.
Wait for your iPhone to check for new software updates.
If it finds one, that means your iPhone is compatible. Don’t choose to download and install this update yet.
If it says your software is up to date, that means your iPhone isn’t compatible with any newer versions of iOS.
Check for newer updates in your device settings.
For reference, iOS 13 and iOS 14 are both compatible with these iPhones and newer:
iPhone 11, iPhone 11 Pro, and iPhone 11 Pro Max
iPhone XS and iPhone XS Max
iPhone X and iPhone XR
iPhone 8 and iPhone 8 Plus
iPhone 7 and iPhone 7 Plus
iPhone 6S and iPhone 6S Plus
iPhone SE and iPhone SE (2nd generation)
Even if your device is compatible with the newest iOS update, you still might not be able to use every new feature. Some of these features, like animated Memoji, require hardware that your iPhone may not have, such as a Face ID sensor.
Step 2. Create enough free space on your iPhone
A new iOS update usually takes up a fair amount of space on your iPhone. It’s a good idea to make sure you have plenty of free storage before trying to download and install new updates.
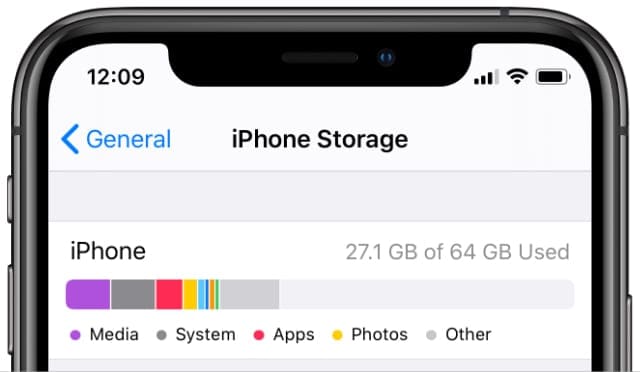
Go to Settings > General > iPhone Storage to check how much free storage you have. Aim for at least 5GB of free space.
Check your free storage in the General settings.
Don’t worry, you usually get all this storage back once the update is complete. But iOS needs extra free space for unpacking and copying files during the update process.
If you can’t create enough free storage without deleting important files from your iPhone, skip to the next step to make a back up of your device first. When it comes to updating, you can also use a computer to update iOS, which requires less free space.
Step 3. Back up to iCloud or to a computer
It’s crucial to back up your iPhone before attempting to install an iOS update. If something goes wrong during the update process, you may need to completely erase your iPhone to fix it.
If you didn’t back up your iPhone before updating, that means you will lose all your photos, contacts, messages, and other iPhone data.
It doesn’t matter if you back up your iPhone using iCloud or using a computer. However, if you back up your iPhone to a computer, be sure to encrypt the backup so that it includes secure health data as well.
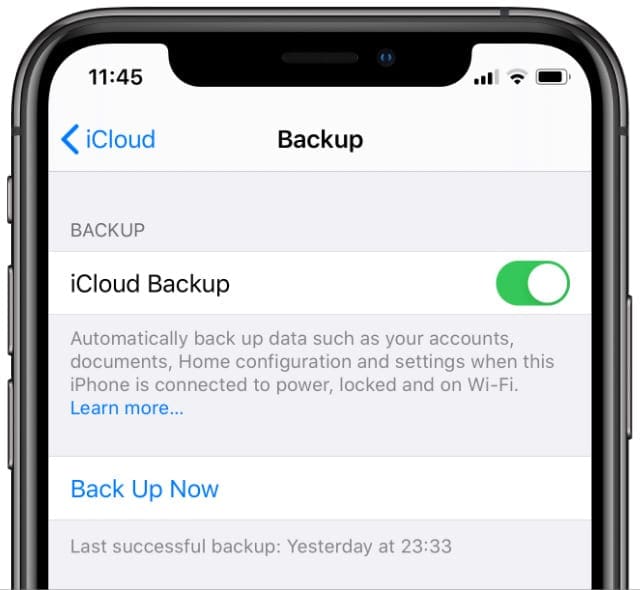
iCloud backups are always encrypted and include all the data from your iPhone. To back up using iCloud:
Open the Settings app and tap [Your Name] at the top of the screen.
Tap iCloud, then scroll down and select iCloud Backup.
After updating iOS, any new backups you make on your iPhone won’t work with older versions of iOS anymore. That means you won’t be able to restore any future backups if you ever downgrade to an older version of iOS again.
For example, a backup you make with iOS 14 won’t work if you revert your iPhone to iOS 13 again.
You might need to downgrade your iOS version if your iPhone doesn’t run the newer iOS very smoothly or if the newer version of iOS is full of bugs.
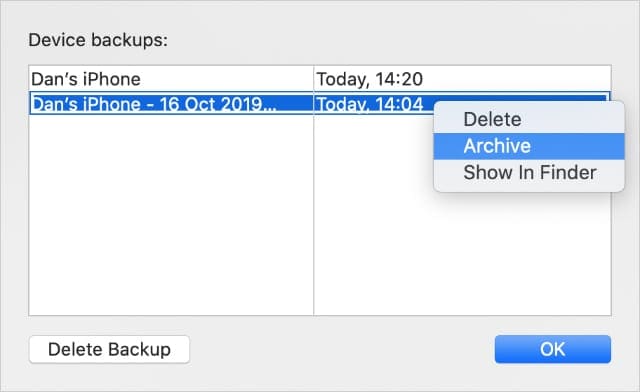
If you think there’s any chance you might downgrade the iOS on your iPhone, you should archive your iPhone backup so iOS doesn’t overwrite it with future backups.
Archived backups don’t get overwritten like regular backups.
That way, you can always restore the backup from your current version of iOS if you downgrade your iPhone.
Step 4. Check for any problems with the latest update
When a brand new version of iOS comes out, there are usually some teething problems that Apple still needs to fix. Most of the time, these are minor bugs that might cause graphics errors or missing apps.
But sometimes, these bugs result in devastating data loss for unlucky users who installed the update.
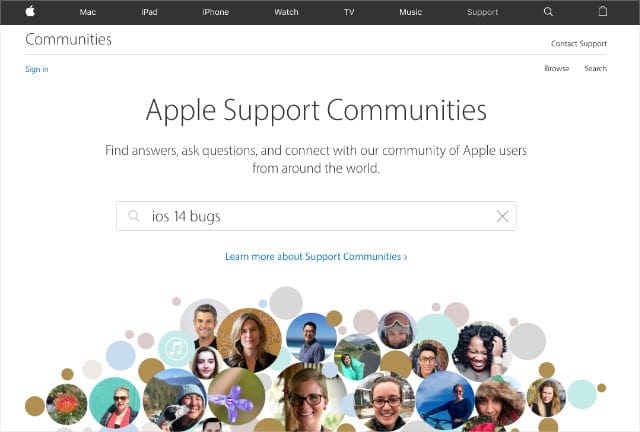
Take a few minutes to check news reports and user forums looking for prevalent software bugs before installing the latest version of iOS. Remember there are always some bugs with new software, you just need to keep an eye out for widespread issues that cause serious problems.
Visit the Apple Support Communities to look for prevalent software bugs.
If you’re worried about potential bugs in the latest version of iOS, wait a couple of weeks for Apple to release a patch update. These usually have extra numbers at the end of the iOS version, such as iOS 14.1.
Patch updates aim to fix all the worst bugs in a new update.
Step 5. Download and install the iOS update
After following each of the previous steps, it’s finally time to download and install the latest iOS update on your iPhone.
You can feel confident that your iPhone should be able to download and install the update without any major problems. And even if you do encounter an issue, you can restore your backup so you won’t lose any data.
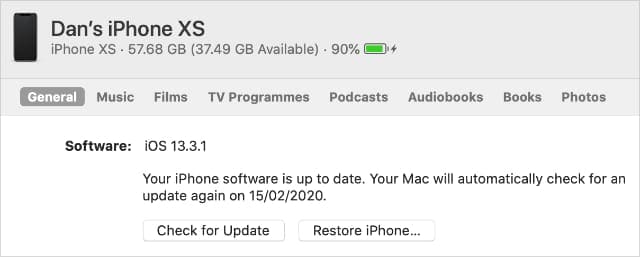
To update your iPhone, go to Settings > General > Software Update and choose to Download and Install the update. This could take an hour or more.
Click Check for Update to install the latest iPhone software on a computer.
Find out what to do if your iOS update fails
Even after taking every precaution to prepare your iPhone for the newest iOS update, it’s still possible the update could fail to install. If this happens, you might see an error message or your iPhone might get stuck in a boot loop.
Dan writes tutorials and troubleshooting guides to help people make the most of their technology. Before becoming a writer, he earned a BSc in Sound Technology, supervised repairs at an Apple Store, and even taught English in China.
“We have also tested updating iPhone to iOS 13 on macOS High Sierra without any issues.”
Oh really?
I allowed my iPhone to upgrade itself to iOS 13 and now it categorically refuses to connect to my Mac running High Sierra.
It appears that I’m forced to upgrade to Mojave if I want to back up the phone.
Hell of a thing to find out in the middle of a workday.
Yes, same here. Updated to 13.3 and now iTunes on my laptop running High Sierra doesn’t see my iPhone. Photos does open automatically, just not iTunes.
Hi Malcolm and Michael,
Make sure your Mac runs iTunes 12.8.0.150 or above.
Then, from the Top Menu, choose Go > Go to Folder…and copy and paste this into the dialog box
/System/Library/PrivateFrameworks/MobileDevice.framework/Versions/Current/Resources
Now, connect your iPhone and make sure it’s unlocked. In that search window, locate the files called MobileDeviceUpdater.
Open that file.
If it works, you should see a message pop-up that says a software update is required to connect.
Tap install and hopefully, your iPhone now works with your Mac!
People are saying that iOS 13 will be about a 3 gigabyte download size