As Apple continues to improve iPadOS, it’s only natural for some features to be implemented that were first found on the Mac. Apple is still attempting to solve the “multi-window” experience, but it’s still quite an impressive device that has a few hidden tricks up its sleeve that you won’t find advertised or shown in commercials.
Hot Corners has been a staple feature of macOS for quite a long time. It’s not something that is configured out of the box, instead, Apple lets you decide whether you want to set up Hot Corners or not.
Once Hot Corners have been configured, you’ll be able to simply move your cursor into one of the four corners of your screen to perform a variety of tasks. For instance, you could set up Hot Corners to launch Mission Control by moving the cursor to the bottom right corner. But it can also be used to put your Mac’s display to sleep, lock your Mac, start your Screen Saver, along with several other options.
How to Set up Hot Corners on iPad
Whenever I get a new Mac, setting up and configuring Hot Corners is always one of the first things I do. Because I don’t use Apple’s Magic Keyboard and switch between different Spaces on a regular basis, having a Hot Corner gesture shortcut at my disposal has proven to be one of those things that I just can’t live without.
And while my iPad usage has gone down quite a bit over the years, I still keep one around, but even I didn’t know that you can set up Hot Corners on iPad. It should come as little surprise that this functionality is “hidden” within the Accessibility settings, as Apple has a tendency of putting certain features here without adding another section within the overall Settings app.
That being said, here’s how you can set up Hot Corners on iPad:
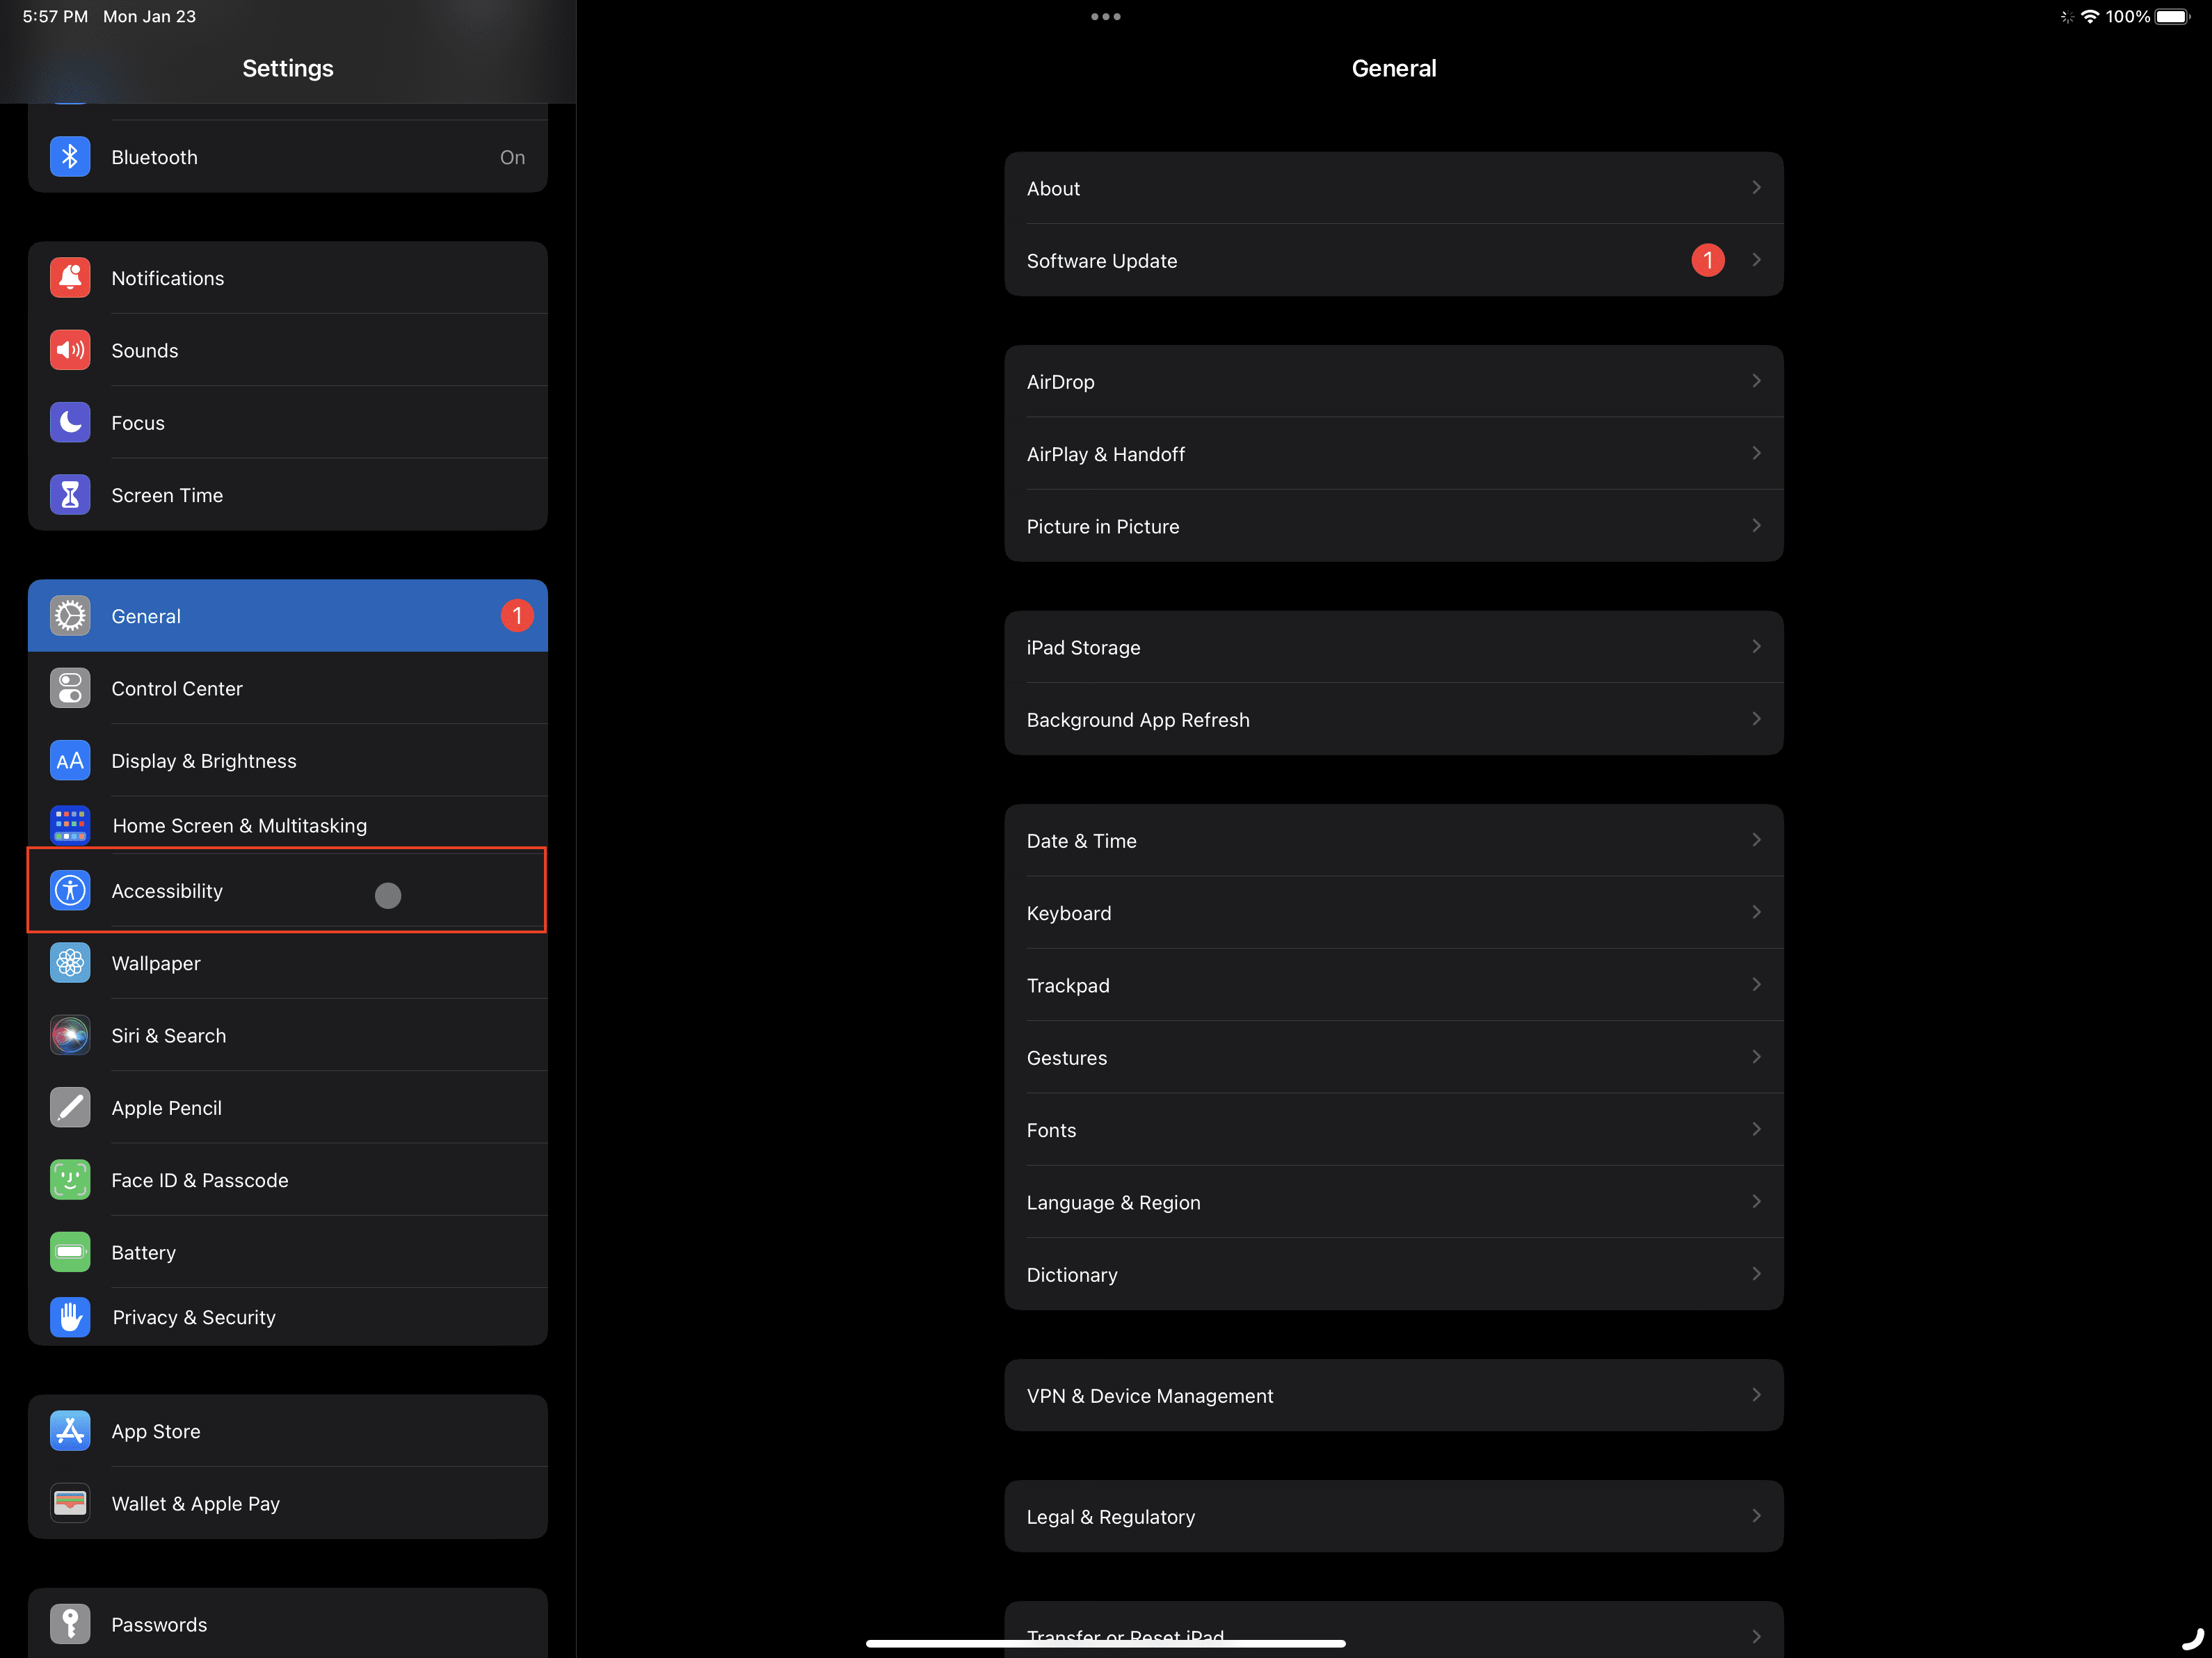
Open the Settings app on your iPad.
Scroll down and tap Accessibility in the left sidebar.
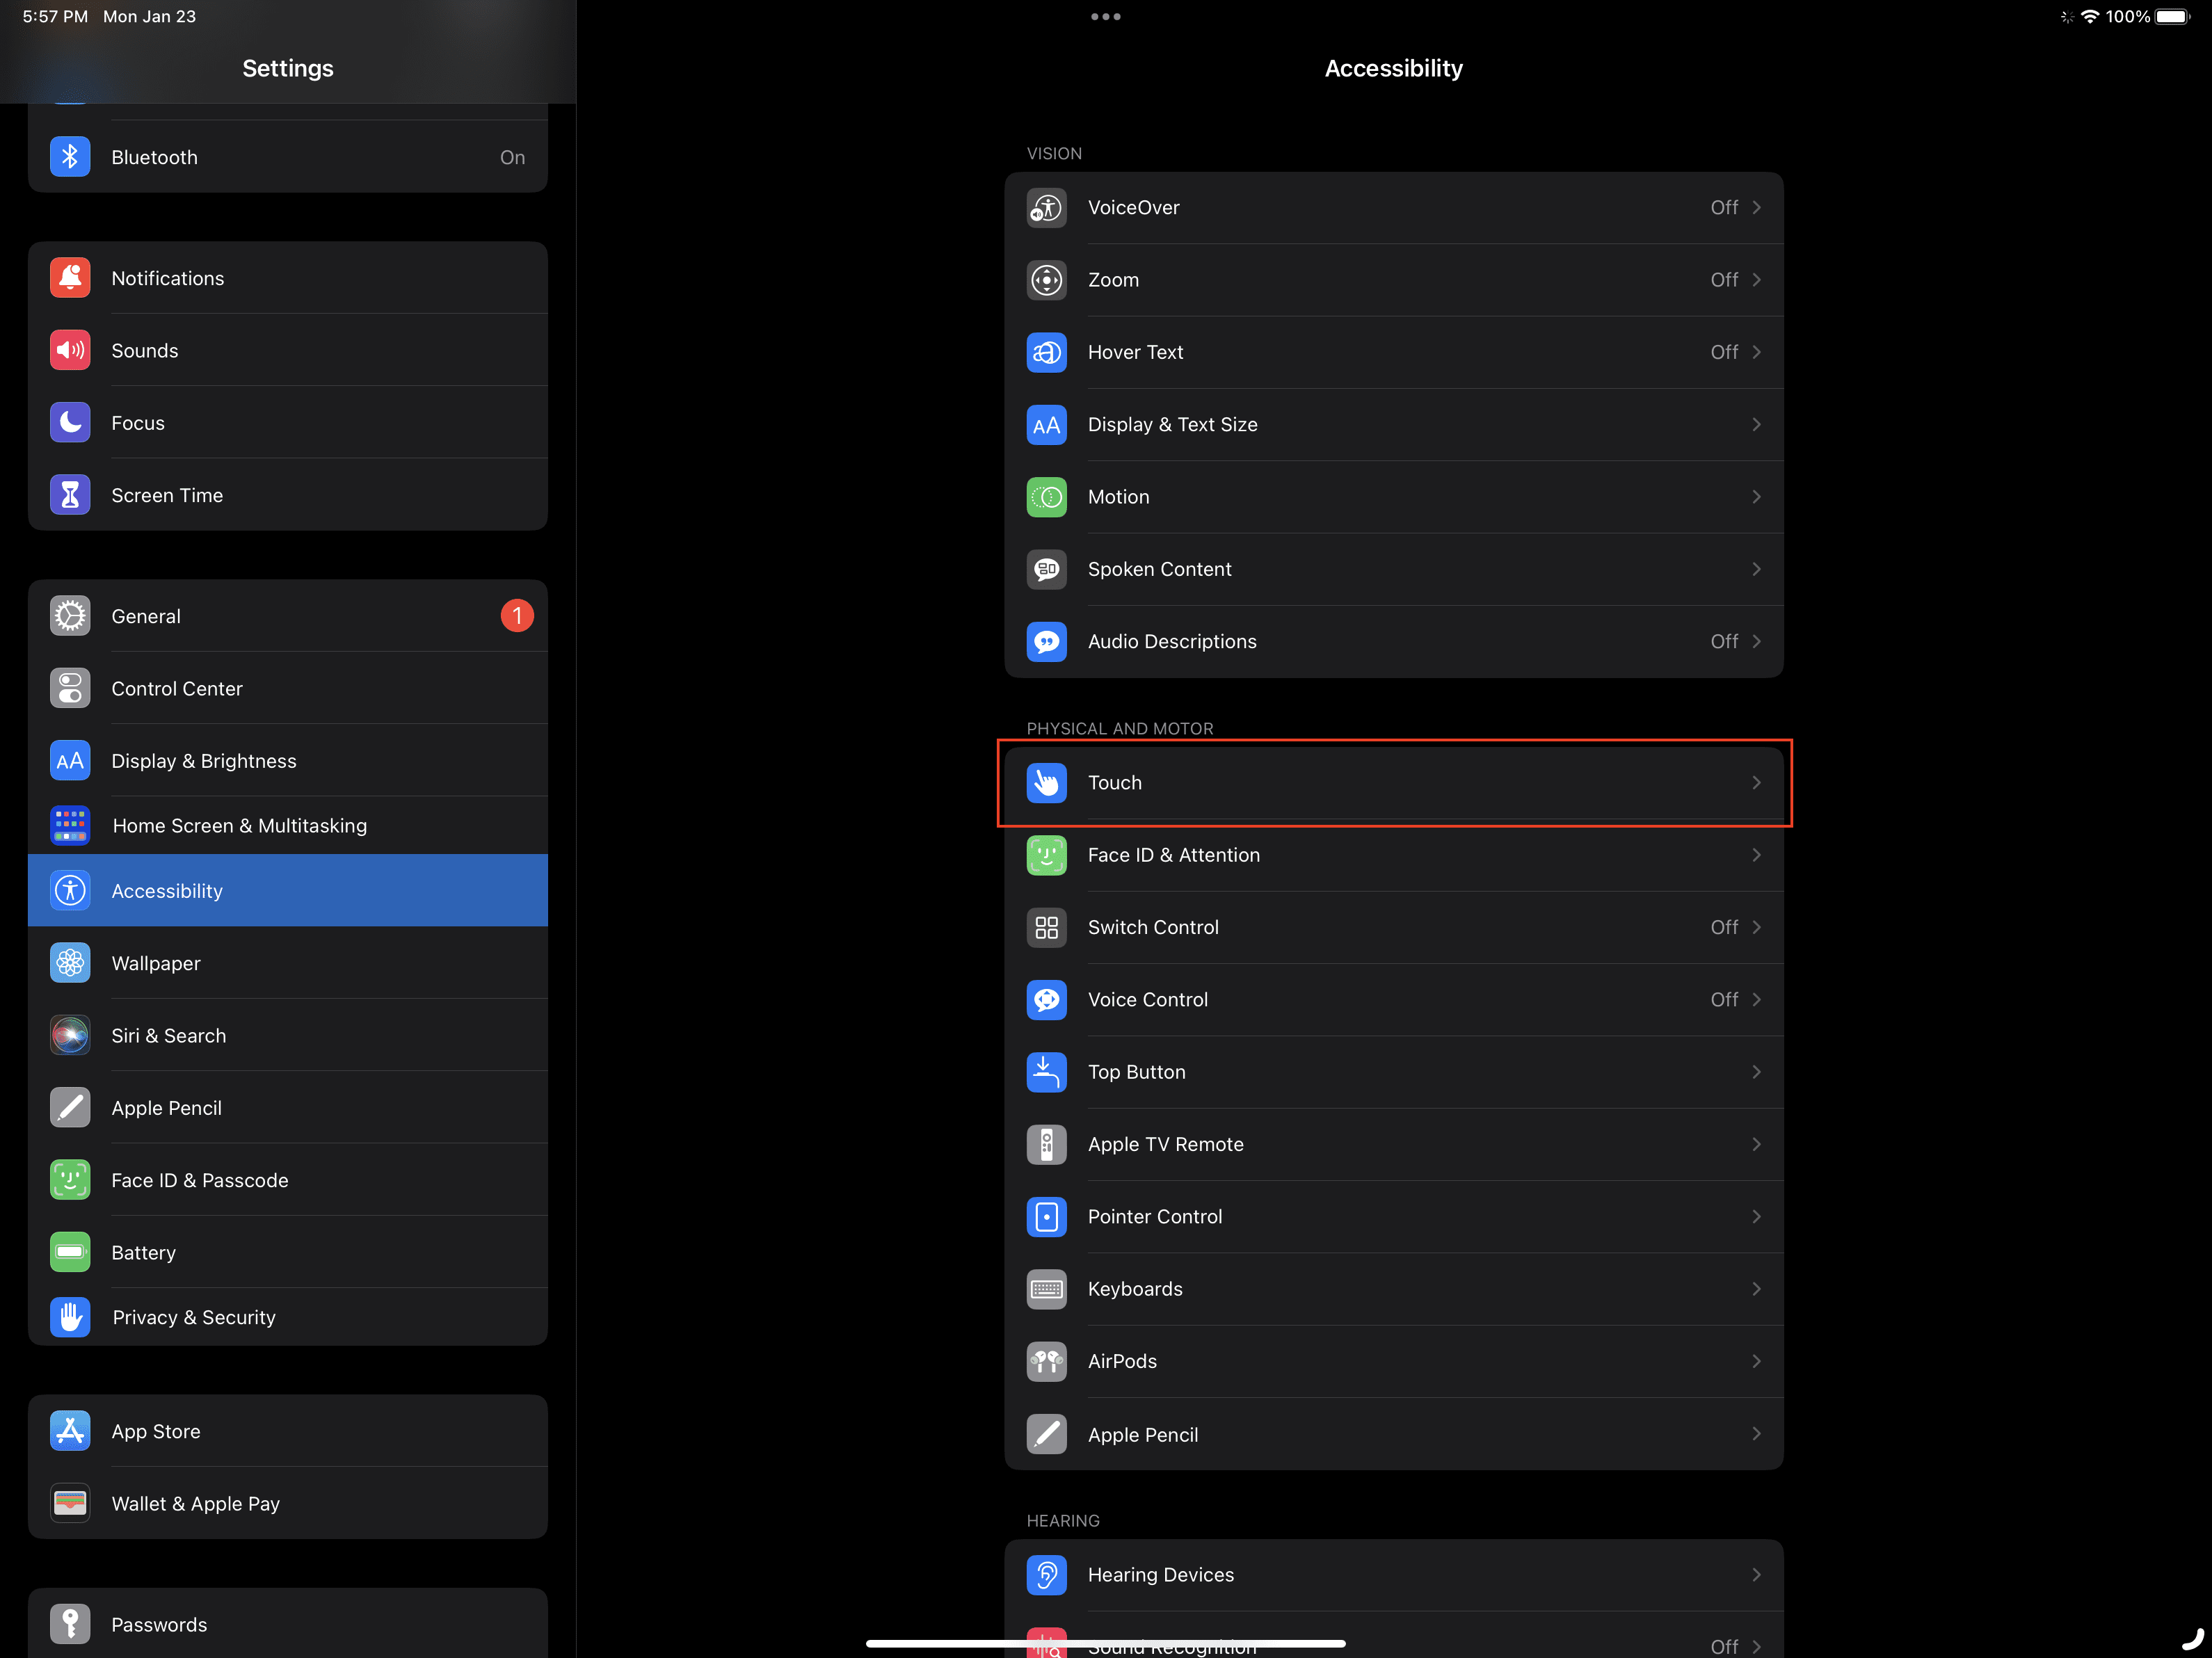
On the right under the Physical and Motor section, tap Touch.
Tap AssistiveTouch.
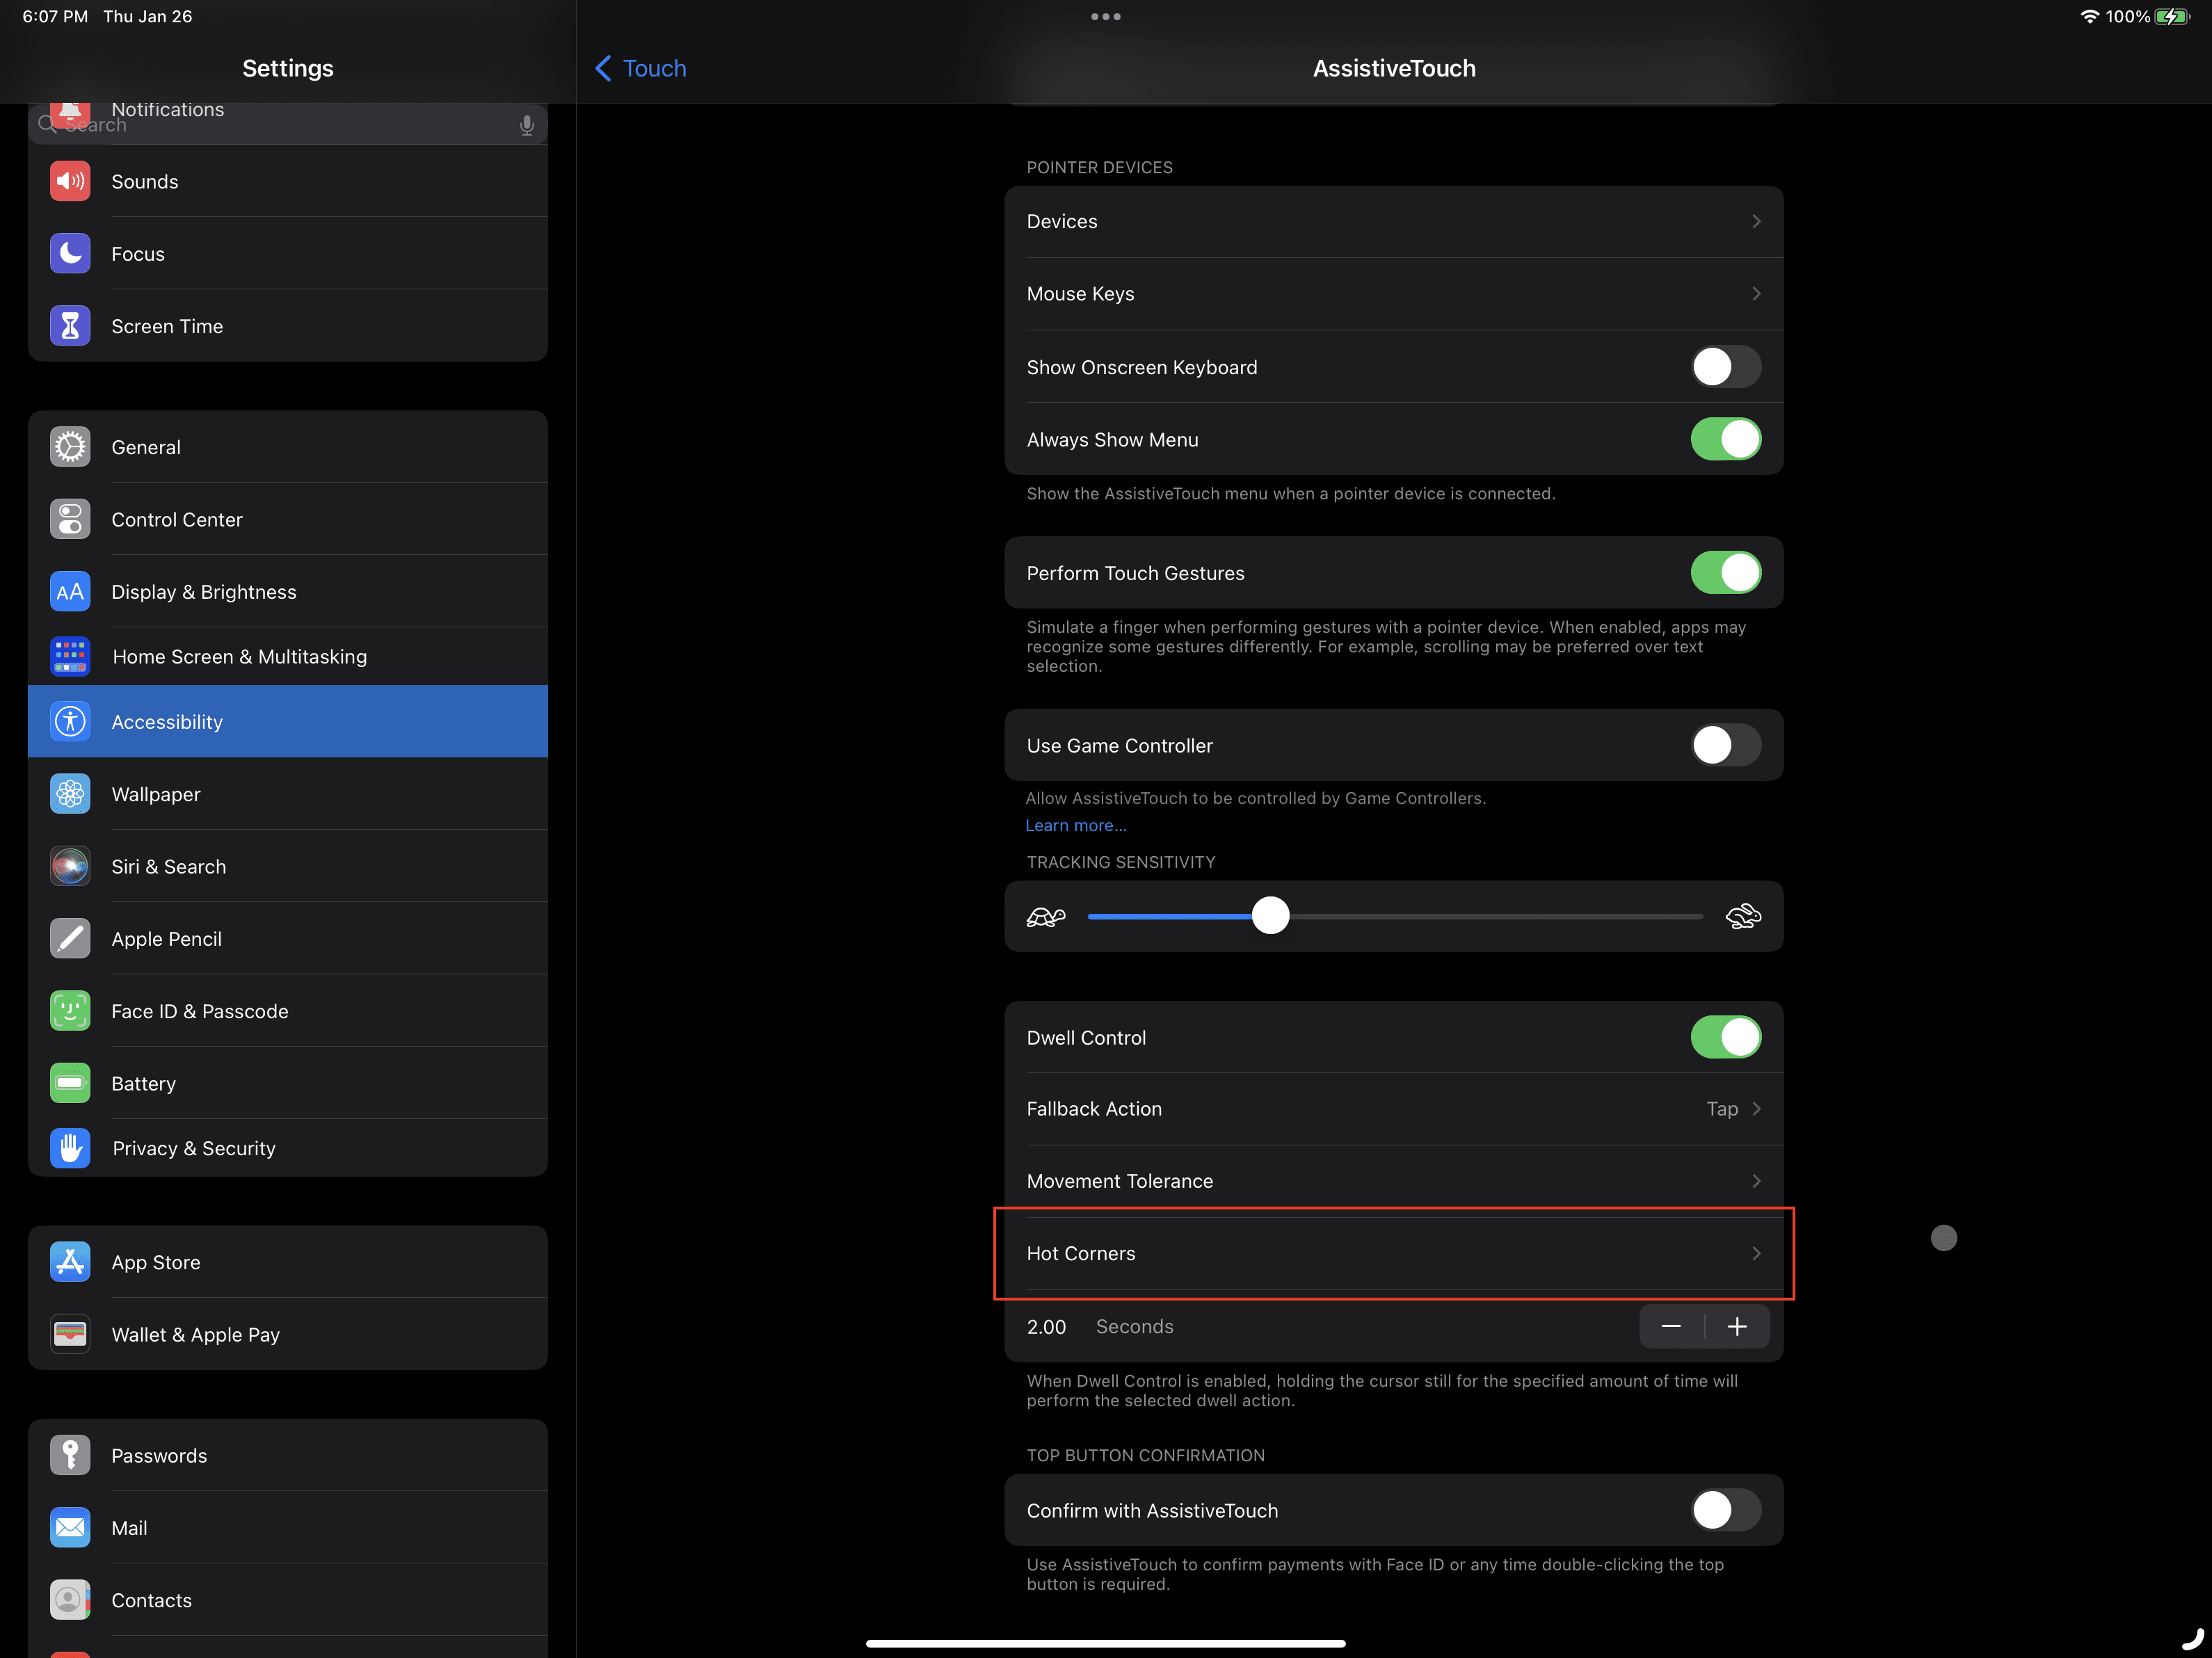
Scroll down and tap the toggle next to Dwell Control to the On position.
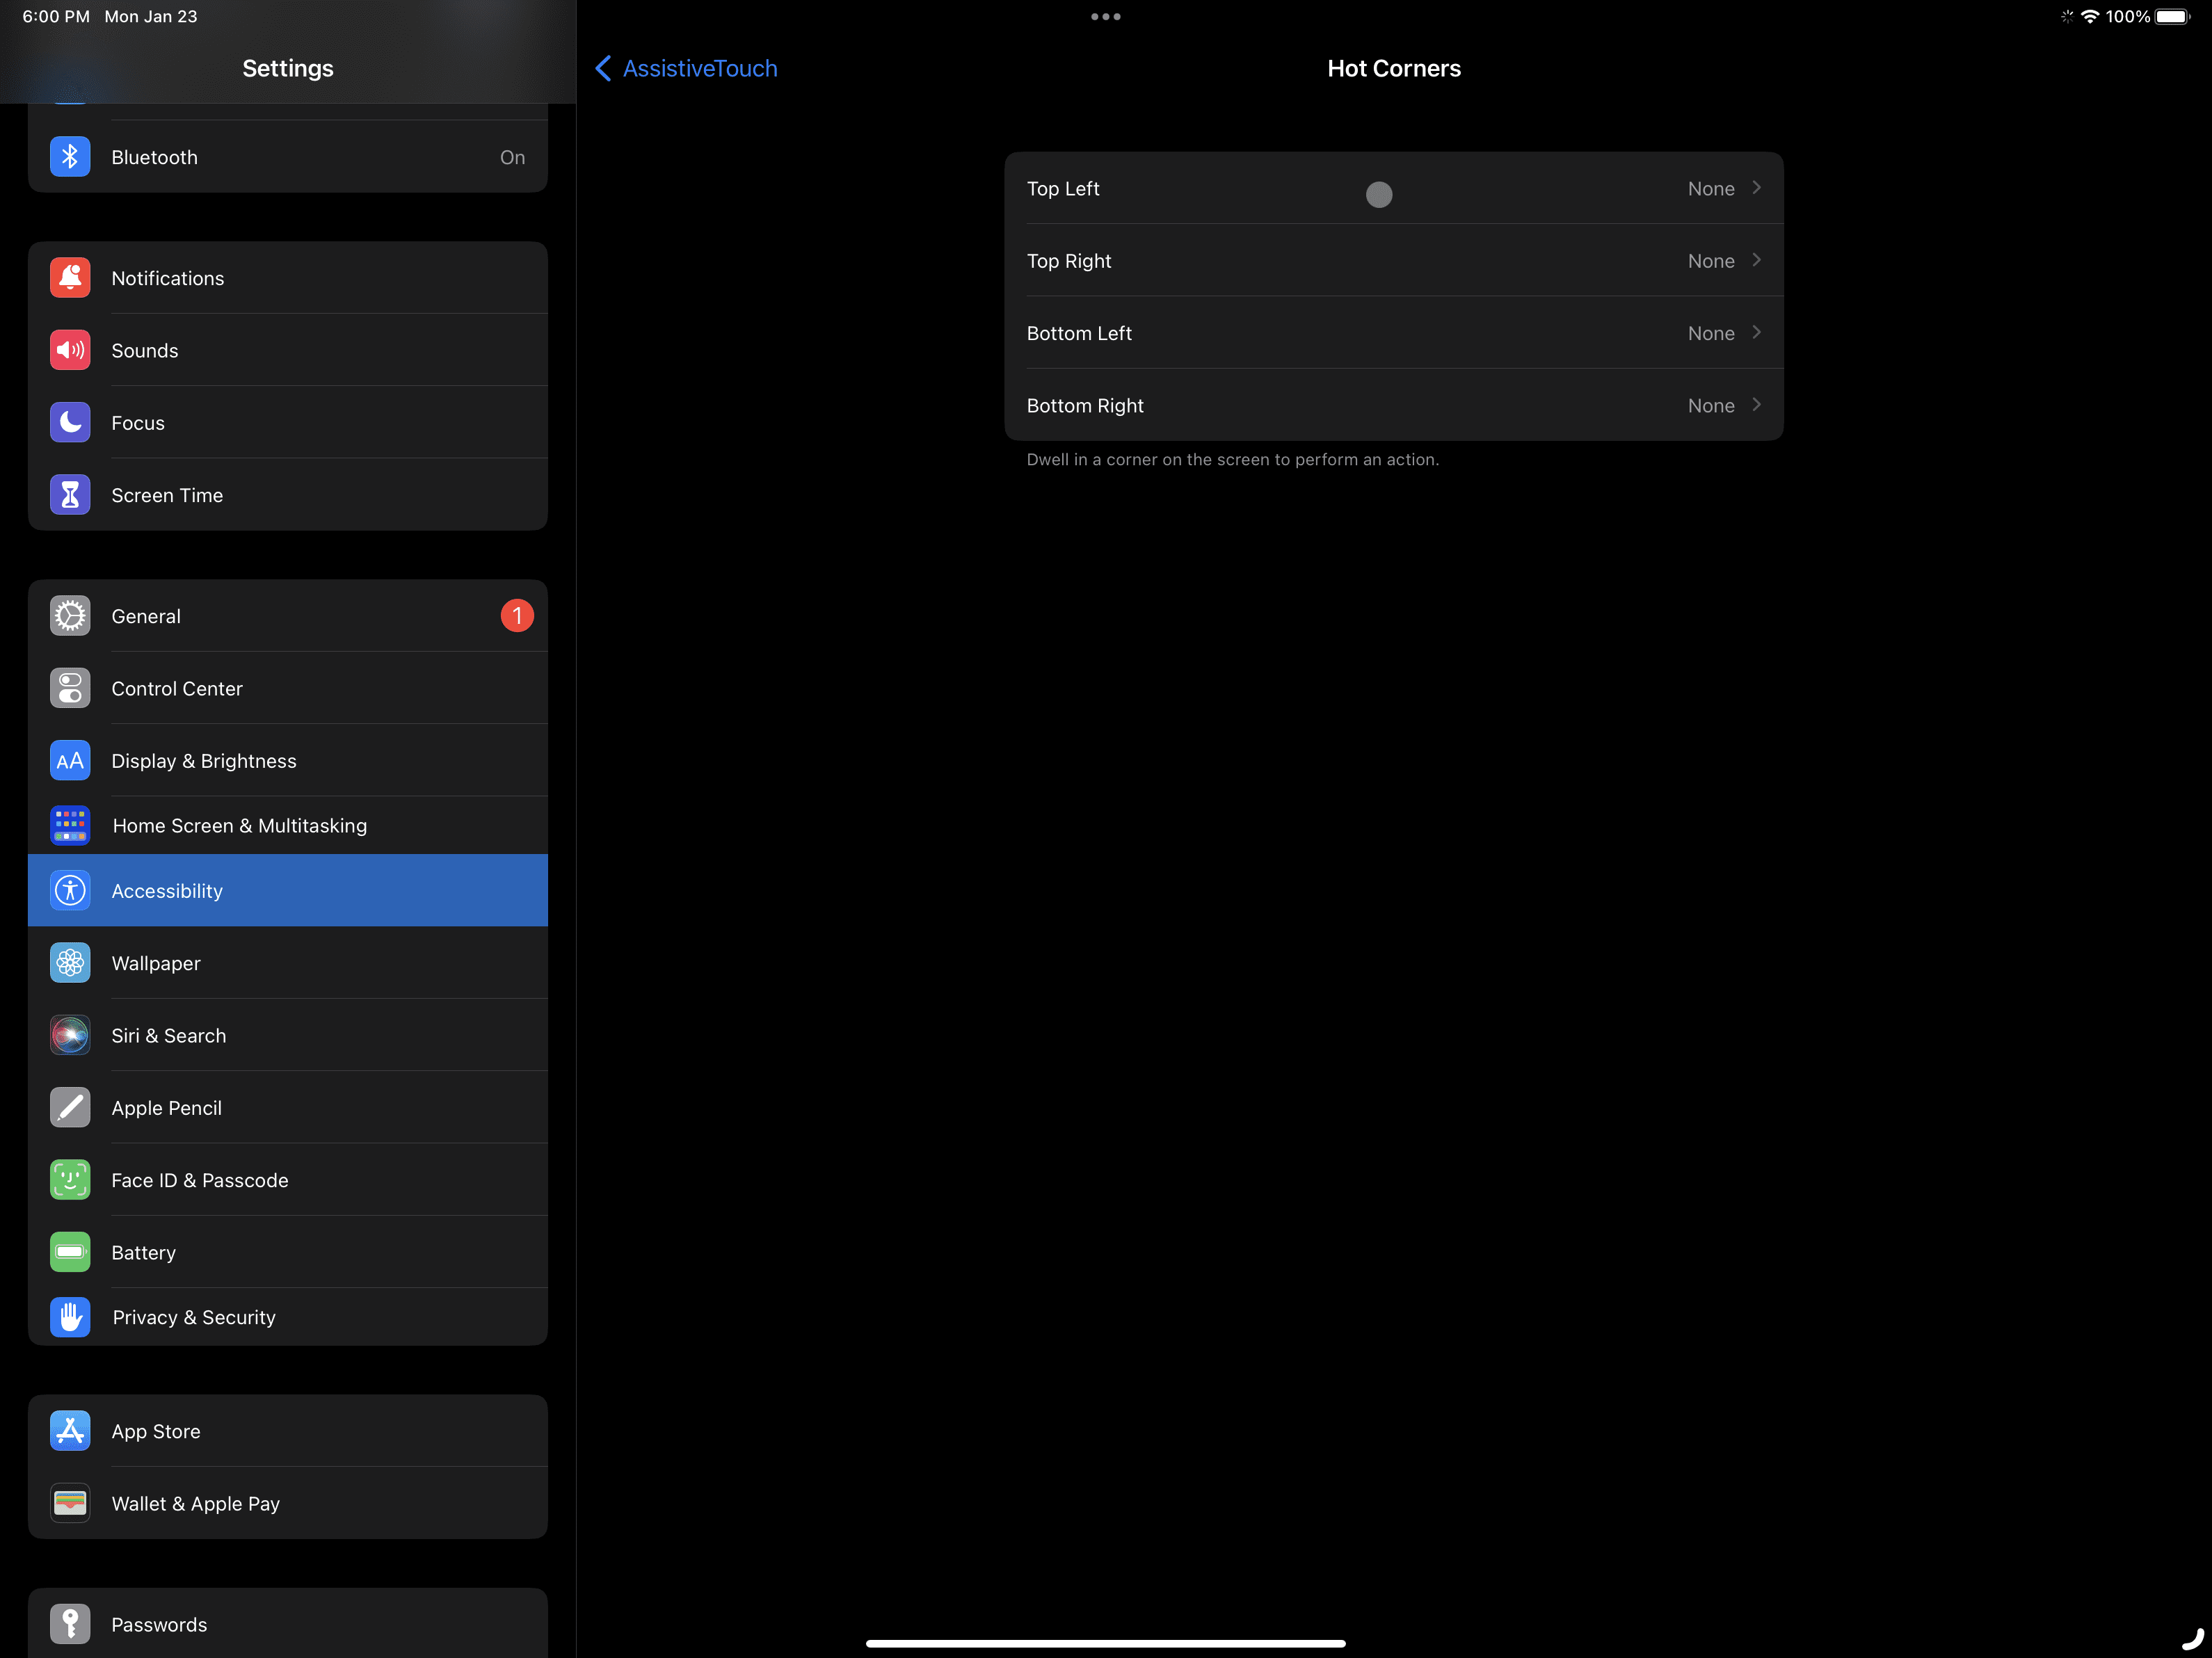
Tap Hot Corners.
Select one of the following:
Top Left
Top Right
Bottom Left
Bottom Right
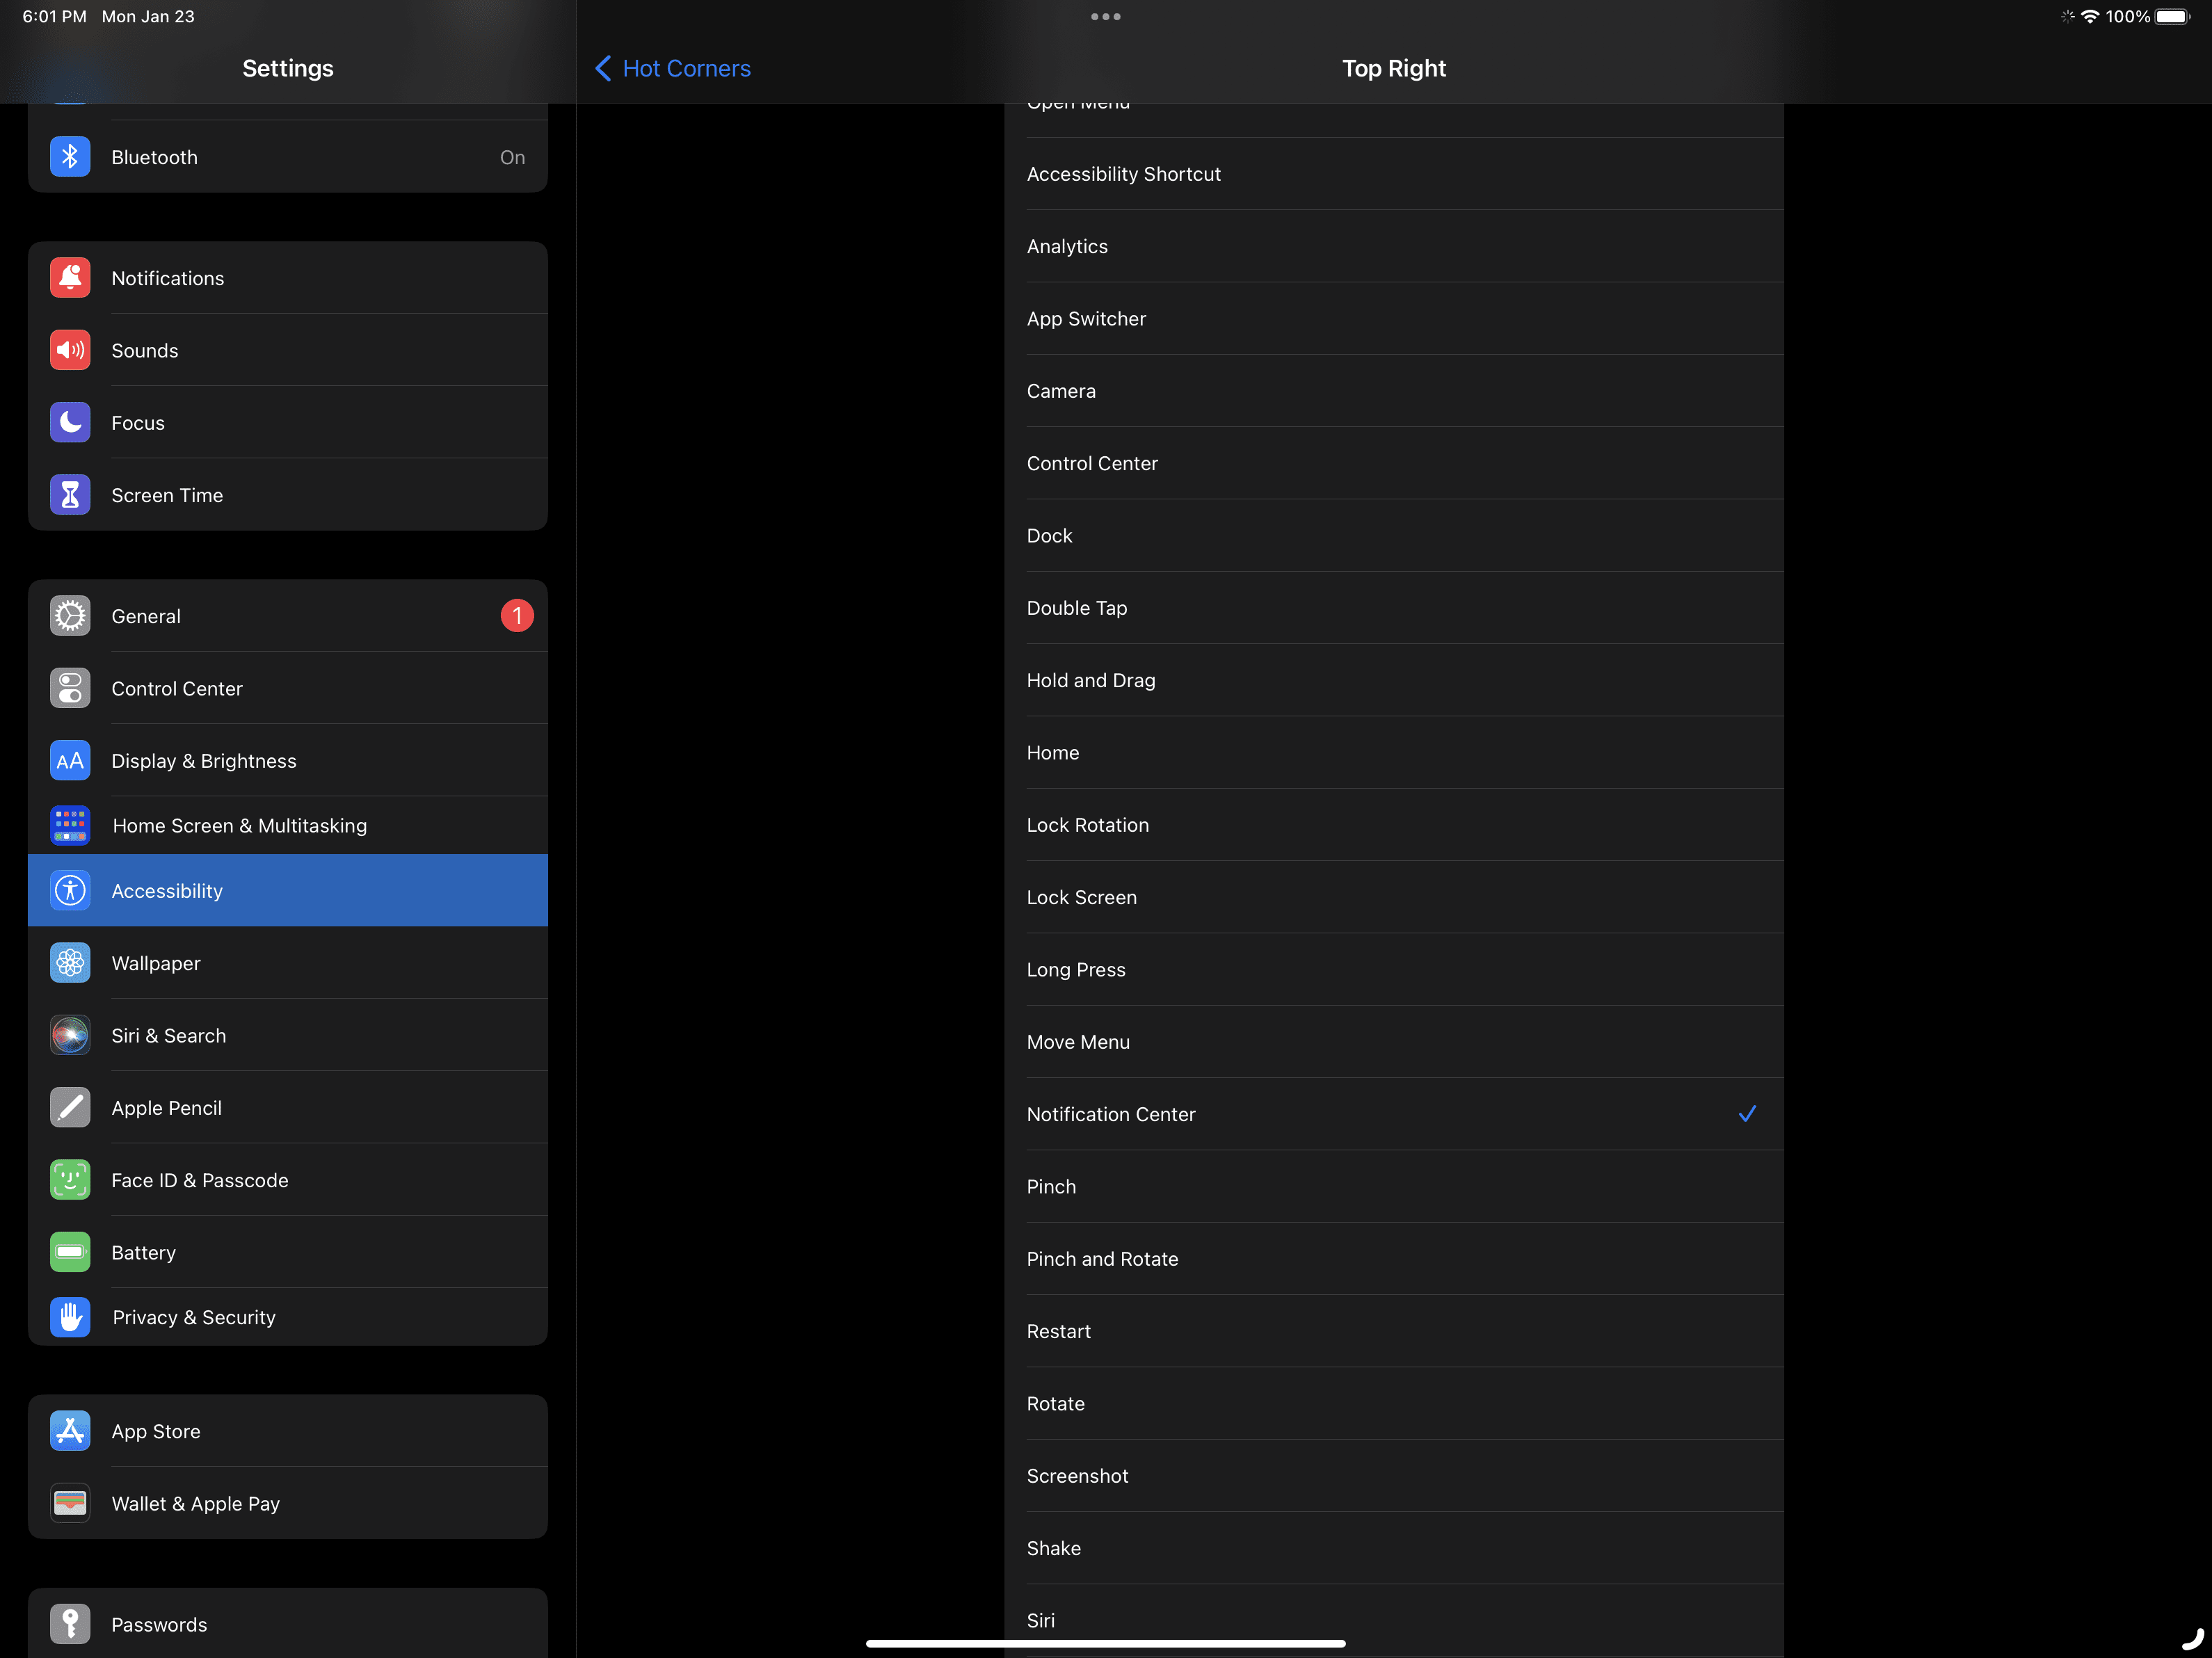
Go through the different sections, and tap what action you want to be performed when you move your cursor to one of the Hot Corners.
Repeat the steps for the remaining Hot Corner areas.
Tap < AssistiveTouch in the top left corner.
After you’ve gone through and set up Hot Corners on iPad, there are a few other settings that you can tinker with to improve the experience. These are found at the bottom of the AssistiveTouchscreen within the Settings app.
Fallback Action: The fallback action reverts your preferred action after performing an operation.
Tap
Pause Dwell
Movement Tolerance: The distance you can move while dwelling on an item. If you move beyond this limit, the dwell action isn’t performed.
X Seconds: When Dwell Control is enabled, holding the cursor still for the specified amount of time will perform the selected dwell action.
Once everything is set up and configured, you can play around with Hot Corners on iPad to see how you like using the feature. And if you need to go back and make any adjustments, such as changing the amount of time between when the cursor is moved to a corner and the action is performed, you can do so. Maybe, just maybe, you’ll end up falling in love with this feature the same way that I have.
Andrew Myrick is a freelance writer based on the East Coast of the US. He enjoys everything to do with technology, including tablets, smartphones, and everything in between. Perhaps his favorite past-time is having a never-ending supply of different keyboards and gaming handhelds that end up collecting more dust than the consoles that are being emulated.


This feature has a lot of issues. Don’t even get me started when you use it with stage manager