As everyone knows, open source is taking over the world one highly useful, well-designed app and utility at a time. OpenDNS is not only faster than your ISP’s DNS, but it’s more secure and helps keep your searches to yourself. So why not make your computer or iDevice more secure with OpenDNS or Google Public DNS?
Related Articles
Contents
Read The Most Recent Articles on Safari
2018/2019 saw an increased integration of Safari and icloud keychain, which allowed users to save their Passwords and change behavior for auto-fill with strong passwords.
In 2019, we also saw an increase of instances where users found that their Safari was being re-directed to Bing due to malicious activity. Here is how you can take care of this re-direct issue.
Third-Party DNS Services
When it comes to squeezing every drop of performance out of the Internet, configuring your Mac and iOS device to use a third-party Domain Name System (DNS) service may significantly (your mileage may vary) improve how fast you get from here to there. Also, cleaning out your caches and cookies on a regular basis is a good idea to keep your computer and devices in optimal networking performance.

Thereupon, both Google AND Cisco have options to help you out with their Google Public DNS and Cisco Open DNS services, which are open, public and completely free services that might just be faster than your ISP’s DNS service you’re using at home or even in the office now.
Open and Public DNS Benefits include:
- Performance — implements “smart” caching to increase the speed of responses
- Security — DNS is vulnerable to various kinds of spoofing attacks that can “poison” a nameserver’s cache and route its users to malicious sites
- Correct results — returns the right answer to every query every time, following the DNS standards

Why does your DNS matter anyway?
The Domain Name System (DNS) protocol is a vital component of the internet’s infrastructure, basically acting like the Internet’s phone book. Each time you visit a website, your computer or mobile device performs a DNS lookup–like looking up a unique number that identifies the page you want to go to. Some pages even need multiple DNS lookups before they usually load due to their complexity of content. That means your mobile device(s) and computer(s) just might perform hundreds, even thousands of DNS lookups a day.
RELATED:
- How and Why You should Use Third party DNS for faster and more secure browsing on your Apple devices
- How and Why You should Look into editing the ‘hosts’ file on your MacBook
How-To Update DNS Settings On Macs
- Click Apple > System Preferences > Network
- If the lock icon in the lower left-hand corner of the window is locked, click the icon to make changes, and when prompted to authenticate, enter your password
- Select the connection for which you want to configure Google Public DNS or OpenDNS
- To modify the settings for an Ethernet connection, select Built-In Ethernet, and click Advanced
- To change the settings for a wireless connection, select Airport, and click Advanced
- Select the DNS tab
- For OpenDNS, in the DNS Servers, click “+” and then paste or type in 208.67.222.222, 208.67.220.220, 208.67.222.220 and 208.67.220.222 one at a time
- In the Search Domain box, click the “+” and then paste (or type) guide.opendns.com
- For Google Public DNS IPv4, click “+” and then paste or type in 8.8.8.8 and 8.8.4.4 as your DNS servers
- The Google Public DNS IPv6 addresses are as follows:
- 2001:4860:4860::888 & 2001:4860:4860::8844
- The Google Public DNS IPv6 addresses are as follows:
- Click Apply > OK

How-To Update DNS Settings On Windows
- Go to the Control Panel
- Click Network and Internet > Network and Sharing Center > Change adapter settings
- To modify the settings for an Ethernet connection, right-click Local Area Connection > Properties
- To change the settings for a wireless connection, right-click Wireless Network Connection > Properties. Select the connection for which you want to configure Google Public DNS
- If prompted for an administrator password or confirmation, type the password or provide confirmation.
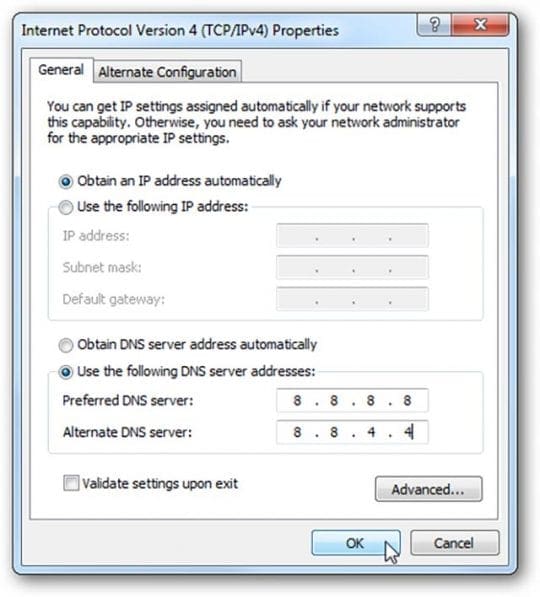
- Select the Networking tab. Under This connection uses the following items, select Internet Protocol Version 4 (TCP/IPv4) or Internet Protocol Version 6 (TCP/IPv6) and then click Properties
- Click Advanced and select the DNS tab. If there are any DNS server IP addresses listed there, write them down for future reference, and remove them from this window
- Click OK
- Select Use the following DNS server addresses. If there are any IP addresses listed in the Preferred DNS server orAlternate DNS server, write them down for future reference
- For OpenDNS, in the DNS Servers, click “+” and then paste or type in 208.67.222.222, 208.67.220.220, 208.67.222.220 and 208.67.220.222 one at a time
- In the Search Domain box, click the “+” and then paste (or type) guide.opendns.com
- For Google Public DNS IPv4, click “+” and then paste or type in 8.8.8.8 and 8.8.4.4 as your DNS servers
- The Google Public DNS IPv6 addresses are as follows:
- 2001:4860:4860::888 & 2001:4860:4860::8844
- The Google Public DNS IPv6 addresses are as follows:
- Restart the connection you selected in step 2
How-To Update DNS Settings On iOS for iPhones, iPads, and iPod Touch
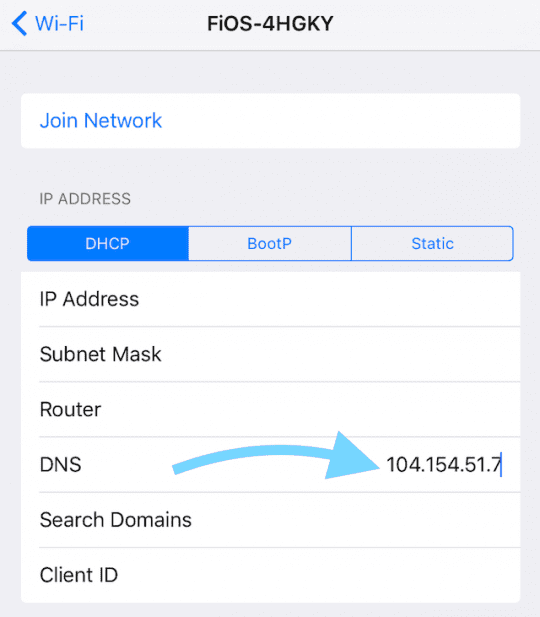
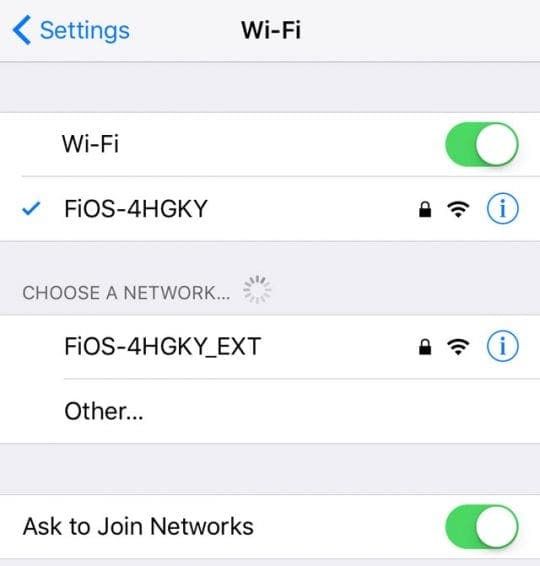
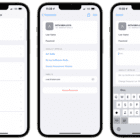
- Go to Settings > WiFi
- Select the WiFi Network you connect to and tap the “i” next to it

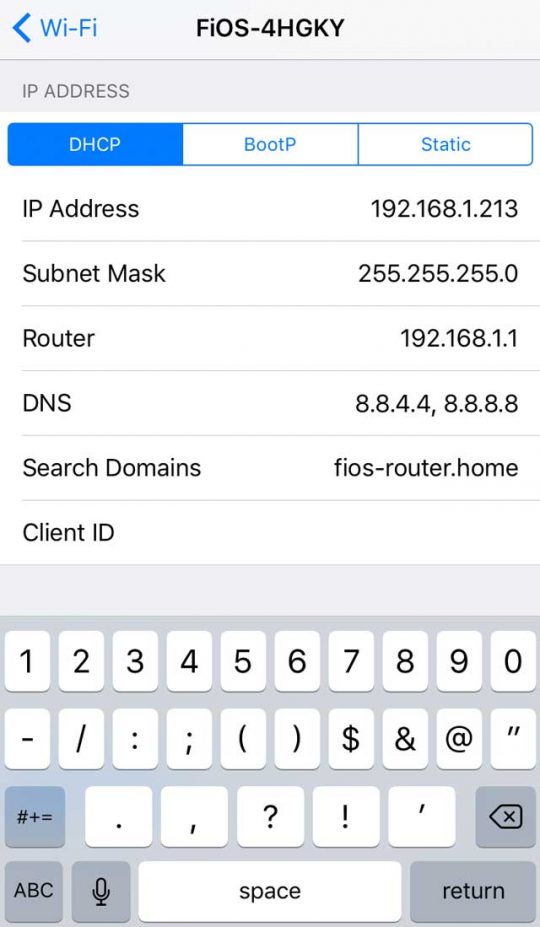
- Tap DNS. A cursor appears at the end of your current DNS addresses
- Write down the existing addresses for safety (in case you need to change back)
- Replace those addresses with the Google IP addresses:
- For IPv4: 8.8.8.8 and 8.8.4.4.
- For IPv6: 2001:4860:4860::8888 and/or 2001:4860:4860::8844.
- Press return and exit Settings
That was easy but…
As noted above, it’s only one of the things you can easily do to make your Mac a little faster online. Click here for a tutorial on how to clear Safari’s caches and cookies. Need to switch back to your old DNS settings? To switch back to your old configuration, in the same window in which you specified the Google IP addresses, select the option to enable obtaining DNS server addresses automatically, and delete the OpenDNS or Google IP addresses. This option reverts your settings to using your ISP’s default servers.
Know a Mac or iPhone, iPad tip or trick? Share it with a link in the comments below…

Obsessed with tech since the early arrival of A/UX on Apple, Sudz (SK) is responsible for the original editorial direction of AppleToolBox. He is based out of Los Angeles, CA.
Sudz specializes in covering all things macOS, having reviewed dozens of OS X and macOS developments over the years.
In a former life, Sudz worked helping Fortune 100 companies with their technology and business transformation aspirations.







I was looking at what were the best Search Domains.
I have already had the DNS box filled with the best DNSs.