iPhone and iPad users have been enjoying the benefits of Screen Time for almost a year: usage reports, App Limits, Downtime. It’s a blessing if you want to gain control over your digital life, and it’s getting even better with Screen Time coming to macOS this year.
Those of us who spend most of the day on our Mac can finally learn where all the time goes. It’s only one of the great features in macOS Catalina, but it’s the one I’m most excited about.
So let me explain all there is to know about Screen Time, including how to set it up on your Mac for you or your kids.
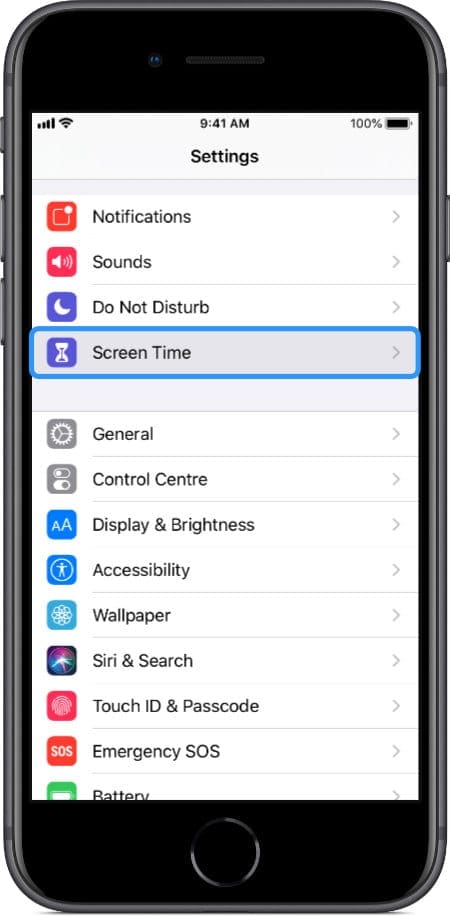
Screen Time has been an option in iPhone and iPad settings since iOS 12.
Last year Apple introduced Screen Time to iOS 12, allowing users to manage the time spent on their iPhone or iPad. In the Screen Time settings you can view usage reports, add time limits to apps, or schedule downtime to get off your devices completely.
It’s a powerful tool if you want to boost productivity or spend more time in the real world. But until now, Screen Time has had a gaping hole in it: No Mac support.
Users who work on a Mac can’t help but notice the enormous chunk of data missing from Screen Time’s reports. Fortunately, that’s all set to change when Apple introduces Screen Time to Mac this fall with the release of macOS Catalina.
About Screen Time on the Mac
In macOS Catalina you get the whole host of Screen Time’s features on your Mac; you even get Screen Time’s new Communicationoption to limit who can contact you during Downtime.
Just as Screen Time replaced the Restrictions settings in iOS 12, it also replaces the managed accounts and parental controls options in macOS. In Catalina, you need to use Screen Time to set restrictions for your kids. But now you can control them over iCloud.
What happens when my Screen Time runs out?
When Downtime is scheduled or when an App Limit is reached, Screen Time grays out and blocks the relevant apps. That isn’t the end of it though, you can choose to accept the screen time limitation or click a button to Ignore Limit.
From here you usually get a few different options:
One More Minute
Remind me in 15 minutes
Ignore limit for today
As you’d expect, One More Minute gives you that extra dash of time to save your documents, ship out an email, or make a note of what you need to do tomorrow. This is always an option, regardless of your settings.
Click Ignore Limit to see your extra time options.
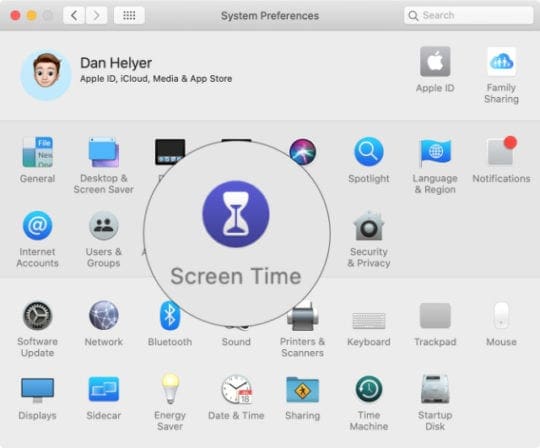
From the menu bar on your Mac, go to > System Preferences… > Screen Time.
Click Options at the bottom of the Screen Time sidebar.
In the top-right, click Turn On… to start using Screen Time on your Mac.
How do I share Screen Time with my other devices?
Many of us have multiple Apple devices, and Screen Time is most useful when it syncs data across all of them. That way you get the full picture of your technology use.
For this to work, you need to sign into the same iCloud account on each device and tell them all to share Screen Time data across devices. You Mac only collects data from other devices from the time after you turn this feature on.
Share Screen Time data from your Mac:
Go to System Preferences > Screen Time > Options.
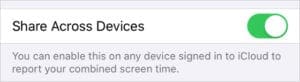
Check the box to Share across devices.
Share Screen Time data from your iPhone, iPad, or iPod:
Go to Settings > Screen Time.
Scroll down and turn on the button to Share Across Devices.
Make sure to turn the button on for each of your devices.
How do I create a passcode for my Screen Time settings?
Many of you will be reading this to set up Screen Time and its content and privacy restrictions for your child’s device. When this is the case, you need to secure those settings and limits with a Screen Time passcode, or your child can ignore them.
Go to System Preferences > Screen Time > Options.
Check the box to Use Screen Time Passcode.
If the passcode is for an administrator’s account, macOS prompts you to convert it to a standard account. You don’t need to.
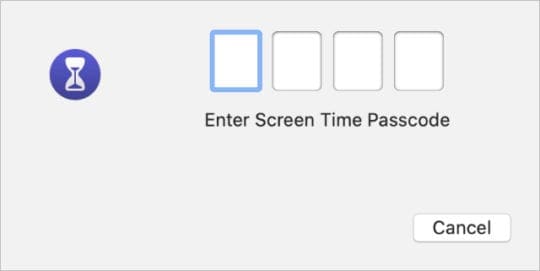
Create a 4-digit numeric passcode, ensure it’s memorable yet secret.
The passcode you create is shared across your other Screen Time devices.
Your Screen Time passcode is required every time you want to change settings or ignore time limits.
After you turn on Screen Time it begins to track how long you or your child spends on each device and what apps you use during that time. View this data to learn more about your digital habits and use it to inform the app limits and restrictions you set.
Your usage is immediately visible when you open Screen Time from the System Preferences. It’s split into three categories: App Usage, Notifications, and Pickups. For each, you can view the data from individual devices or see them all combined.
A simple graph outlines the usage this week; click Today to get a more detailed view of your usage through the day. You can also use the arrows to look back through previous days and weeks.
App Usage
This is the area most people focus on. It shows the total time spent on your devices along with how long you were on each app or website.
Your app usage is separated into color-coded categories.
Beneath the graph is a table showing each item, how long you were on it, and what Screen Time limits are set for it. When you select an item in the table, the graph updates to reflect your time on that particular app or website.
Click the hourglass icon that appears as you hover over each item to quickly set an App Limit for it.
You can also choose to view simplified categories instead of separate apps and websites. When you do this, items are automatically grouped into categories: Productivity, Entertainment, Reading & Reference, Social Networking, and more.
Notifications
Notifications are designed to drive us back to our devices and engage with apps again. They can certainly be useful — for things like phone calls and emails — but they also play a pivotal role in getting us addicted to our devices.
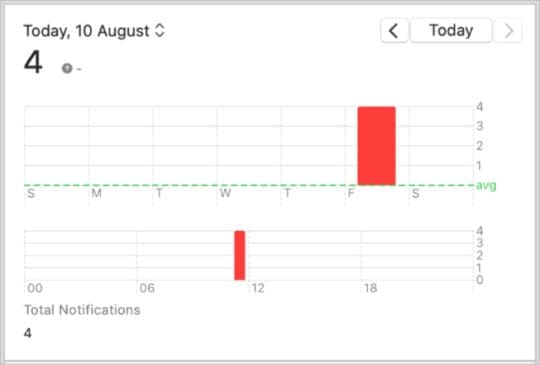
Take a look at how many notifications you get on each day and which apps they come from.
This report, available from the Screen Time sidebar in macOS System Preferences, shows how many notifications you received on your devices, and which apps they came from. You might consider editing your notification settings for particularly persistent offenders.
Pickups
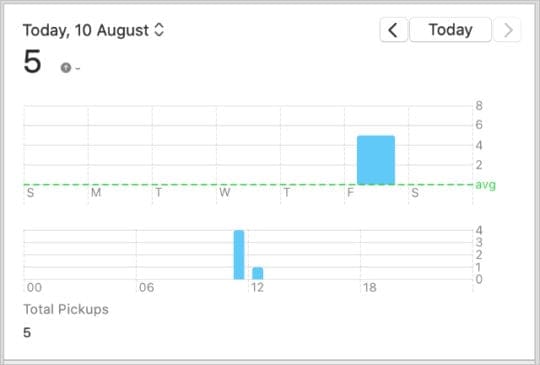
The final part of Screen Time’s usage coverage shows the numbers of times you pick up your device or wake up your Mac to start using it. It’s a useful illustration of how habitually we use our devices, and the numbers can be pretty surprising sometimes!
Since turning on Screen Time earlier today, I’ve woken my Mac to use it five times.
As we’ve come to expect, beneath the graph of your pickups, there’s a table showing the apps and websites you first used after picking up your device.
How do I set Set Screen time limits in macOS Catalina?
Screen Time offers a great deal of insight on how much you use your Apple devices, but it also gives you tools to regain control over that use. Each tool is available from the Screen Time sidebar on your Mac and syncs across your other devices as you set it up.
Downtime
This allows you to schedule daily periods of time when you don’t want to use your devices. You might turn it on when you should be asleep, an hour before bedtime, or while you’re at the work.
Set a regular daily schedule or choose custom schedules for each day of the week.
When Downtime is turned on, you can only use a selection of important apps and websites:
Everything else is blocked, with the option to ignore those limits. If you tick the box to Block At Downtime, the Screen Time passcode is needed to ignore the limits. We recommend doing this for your children’s accounts.
App Limits
App Limits let you set daily time limits for particular apps, websites, or categories of apps across all your Apple devices. For example, you can limit Facebook to 30 minutes a day. You could even limit all Social Networking apps and websites to that time.
To create App Limits, select it from the sidebar in your macOS Screen Time settings and click the plus (+) button to get started. A window appears with app categories, which you can open to view individual apps or websites.
Select the apps you want to limit and choose how long you want to spend on them each day.
Tick the box for each app, website, or category you want to limit. Use the search bar if you can’t find it. Beneath the list of apps, decide if you want the same limit every day or custom limits for each day of the week.
If you check the box to Block at end of limit, the Screen Time passcode is required to ignore the App Limits. We recommend doing this for your children’s accounts.
Click Done when you’re finished. You can add as many different App Limits for different apps or websites as you like.
Communication
The Communication option in Screen Time allows you to limit who can contact you — or who you can contact — using Phone, FaceTime, Messages, or AirDrop from your Mac or other Screen Time devices.
Choose who is contactable during Screen Time or Downtime, selecting from:
Everyone
Contacts Only
or Specific Contacts (Only available for Downtime).
If you choose Specific Contacts, use the Edit List button to select which contacts you want to allow during Downtime.
Always Allowed
As you’d expect from the name, Always Allowed lets you select apps, websites, and contacts that are always allowed. These items are still available during Downtime and aren’t affected by App Limits, they’re useful for emergency contacts or critical apps.
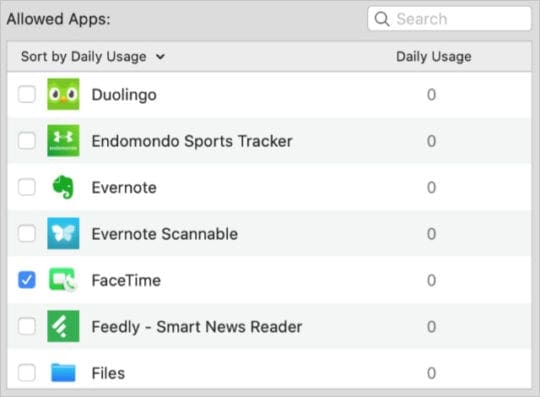
Edit the contacts as you would from the Communication page and tick the boxes next to whichever apps you want to keep available all the time. Whenever Downtime turns on, all of these items remain unblocked.
Tick the box next to apps you always want access to.
How do I set Parental Controls in macOS Catalina?
In macOS Catalina, Parental Controls on your Mac move into the Screen Time settings. You can find them under the Content & Privacy sidebar, which offers four tabs: Apps, Stores, Content, and Other.
Content & Privacy restrictions are available at the bottom of the Screen Time sidebar.
Unfortunately, there doesn’t seem to be a way to transfer existing Parental Controls to your Screen Time settings.
Turn on the Content & Privacy Restrictions and visit each tab to block apps, set age limits, lock the System Preferences and more. The Content & Privacy Restrictions you create are secured by your Screen Time passcode.
How do I set up Screen Time for my children?
Screen Time is an incredibly valuable tool for parents who want to gain insight or control over their children’s technology usage. There are a couple of ways you can set it up on their devices.
Screen Time for your kids works best with Family Sharing.
If you don’t use any Apple devices yourself, follow all the instructions above to configure Screen Time on your child’s Mac. Be sure to set a Screen Time passcode, and don’t let your child find out what it is — otherwise they can ignore your limits.
However, if you have your own Apple devices — or your own account on the same Mac — the best way to set up Screen Time for your child is using Family Sharing. This way, you can review and edit your child’s Screen Time settings from your devices.
Use Family Sharing to set up Screen Time for your children
Once you connect your child to your Family Sharing network, you can view their Screen Time usage and edit their settings from any of your Apple devices.
Edit your child’s Screen Time settings from a Mac:
From the menu bar, go to > System Preferences… > Screen Time.
Click your name in the top-left to see your other family members.
Select your child, then view and edit Screen Time as you normally would.
Use the Requests section in the sidebar to approve or deny requests for more time.
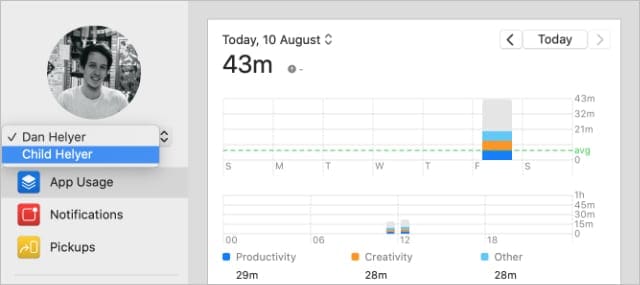
Select your child’s name in the drop-down menu to review their Screen Time.
Let us know your macOS Screen Time questions in the comments. And please tell us your thoughts on the feature! Do you like knowing how much time you spend staring at a screen? Or were you happier without knowing?
Dan writes tutorials and troubleshooting guides to help people make the most of their technology. Before becoming a writer, he earned a BSc in Sound Technology, supervised repairs at an Apple Store, and even taught English in China.
I already had screen time working on my child’s iphone, working fine most of the time. Today I also connected his Mac, and this was accomplished by simply having him log into his icloud account on the Mac. It immediately prompted him some messages about time limits he had reached, so the connection seems to be working. However, on my phone, only his iphone is listed in screentime under his devices. Normally the Mac should show up separately, right?
I use family share screen time with my daughter’s iPad controlled by my iPhone. I just ordered her a Mac and I’d like to have her log in to her own user account which is set up with the apple id she currently uses on her iPad. I’m fine with the Mac being used for 4+ hours a day while she does school work, but want the iPad to still have its 2 hours a day restriction. How will I set things up so that each device can be monitored and limited independently and still controlled from my iPhone (without creating multiple apple ids).


How do I turn off screen time without passcode
I already had screen time working on my child’s iphone, working fine most of the time. Today I also connected his Mac, and this was accomplished by simply having him log into his icloud account on the Mac. It immediately prompted him some messages about time limits he had reached, so the connection seems to be working. However, on my phone, only his iphone is listed in screentime under his devices. Normally the Mac should show up separately, right?
I use family share screen time with my daughter’s iPad controlled by my iPhone. I just ordered her a Mac and I’d like to have her log in to her own user account which is set up with the apple id she currently uses on her iPad. I’m fine with the Mac being used for 4+ hours a day while she does school work, but want the iPad to still have its 2 hours a day restriction. How will I set things up so that each device can be monitored and limited independently and still controlled from my iPhone (without creating multiple apple ids).
When screen time started on my mac, I can know longer see my kids screen time on my iphone?
can someone help me fix this?