How lucky you are to get a New-to-You iDevice! Learn how to set up your “new” used iPhone, iPad, or iPod
I too just received a “mature” used iPad from my sister, and though it’s not the latest iPad Pro or even one with a Retina Screen, there’s still a lot of life left in it for my family and me to take advantage of. I’m thinking of keeping it in the kitchen, so I can listen to music while cooking and at the same time check the exact measurements of ingredients for a new recipe.
And of course, having an extra iDevice comes in handy in those stressful at-home moments, to hand it off to my kids (and their friends) to play a game or watch a show when things get a little hectic around the house.
Hopefully, your iDevice’s previous owner thoughtfully prepared the iDevice for you, removing their personal information and clearing out all of their data. That really is ideal, so when that iDevice comes to you it’s ready for you to truly make it your own by doing all the fun stuff like installing your favorite apps, games, music, and so forth.
Just in case your iDevice DID NOT come well prepared for a new user like my New-to-You iPad that was literally dumped off untouched from my sister to me (I guess she trusts me with all that private data…) Let’s go through a detailed checklist of what you need to do to get this thing working for you and get rid of all that older user’s SH__.
So let’s get to it!
We really don’t want all that personal information from the previous owner clogging our New-to-You iDevice, so let’s get that information outta here.
And please remember that what you see if what you get—if that New-to-You iPhone/iPad/iDevice has a lot of apps you love and want to use, once you clean and clear it out, most of those will no longer be available to you—they are tied to the previous owner’s Apple ID.
So, if you really like some of those apps, take notes and remember that you’ll need to download and install them again (and pay for them via your own Apple ID if they cost anything.)
Everything has its price!
But in my world, it’s worth paying a few bucks for some great apps, when you are getting a fabulous iDevice for free (or for very little—just in case someone is charging you.)
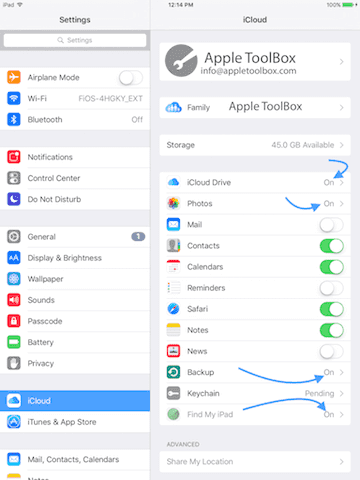
Step 1: Verify that iCloud, Photos, and Find My iPhone are turned OFF
It’s crucial when receiving a second-hand iPhone/iPad or another iDevice that we ensure the Apple ID is removed or can be removed.
Check that there is no Apple ID by tapping Settings > Apple ID Profile > iCloud and verifying that nobody’s name is listed.
If iCloud, Photos, or Find My iPhone are turned ON, you may need the previous owner to remove this device from their account. The good news is that they can do this remotely.
To Remove iDevice from iCloud Remotely
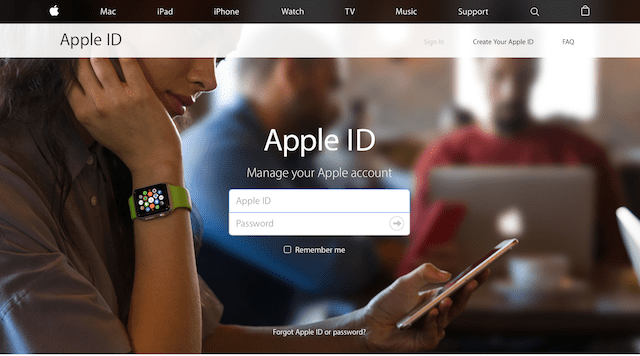
Sign in to iCloud’s website on a computer or iPad (using iPadOS) with their Apple ID
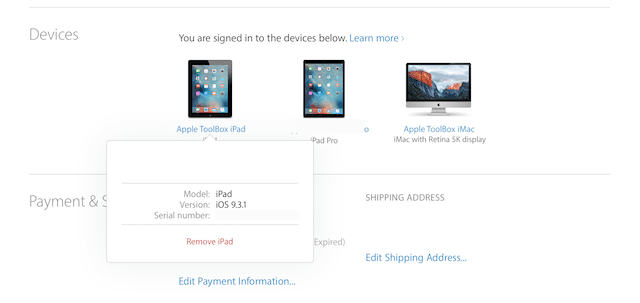
Go to Find My iPhone
Click All Devices at the top of the screen
Select the device that you want to remove from iCloud
If necessary, click Erase
Click Remove from Account
After the previous owner removes the device from their account, turn off the device and then turn it back on to begin the setup process.
If they use Apple Pay, they will need to remove your gifted iDevice from that too.
To Remove Apple Pay from iDevice Remotely
Ask the previous owner to go to iCloud’s website
Choose Settings to see which devices are using Apple Pay
Click the gifted iDevice
Click Remove next to Apple Pay
If for some reason, the person does not know their Apple ID or password, they can contact apple to go through a recovery process:
What if I don’t know the Apple ID and password and CAN’T get ahold of the previous owner?
This is Our Nightmare Scenario
Unfortunately, right now there is no way to remove an Apple ID from an Apple device if you do not know or have access to the password.
This is a security measure put in place by Apple to help combat the theft. And as far as I know, there isn’t a (legal) workaround.
Hopefully, the previous owner turned OFF both iCloud and Find My iPhone before you received your New-to-You iDevice.
Once you confirm these are OFF, we can now remove all that personal data, apps, and other preferences the previous owner used.
Step 2: Let’s Update the iPhone to the Latest iOS Version
It’s a really good idea to update your New-to-You iDevice’s operating software before performing a full erase.
A lot of folks have these older iDevices sitting around for a while accumulating dust, as one model replaces another.
So there is a very good chance that your New-to-You iPhone/iPad/iDevice is running an outdated version of iOS
You have nothing to lose at this point, no risk in losing YOUR DATA, so please let’s go ahead and upgrade to the latest version of iOS.
Apple makes it very easy to upgrade and we can all do it right on the iDevice itself, no computer connection required.
If you really want to connect to your computer, you can also do any of these iOS upgrades there using iTunes. Personally, I find it easier to upgrade directly through my iDevice.
As always, ensure your iDevice is connected to WiFi and Plugged into Power (not battery only)
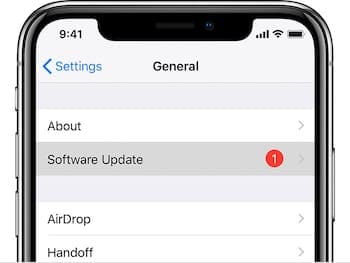
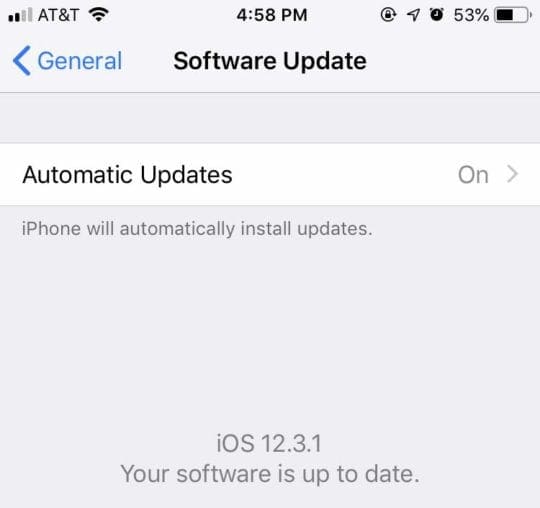
How to Upgrade iOS on iDevice
Open Settings > General
Go to Software Update
Install any updates listed
If you want iOS to install updates automatically rather than manually, turn on Automatic Updates
Updating to the latest software is always recommended.
The iPad I received as a gift from my sister was really lagging behind on iOS 7.1.1, and I just updated it to iOS 12.3.1—what a huge improvement along with a slew of great new features.
Now we’ll perform some Spring Cleaning on the iPhone, iPad, or another iDevice as a safety precaution to ensure that all the previous owner information is cleared out.
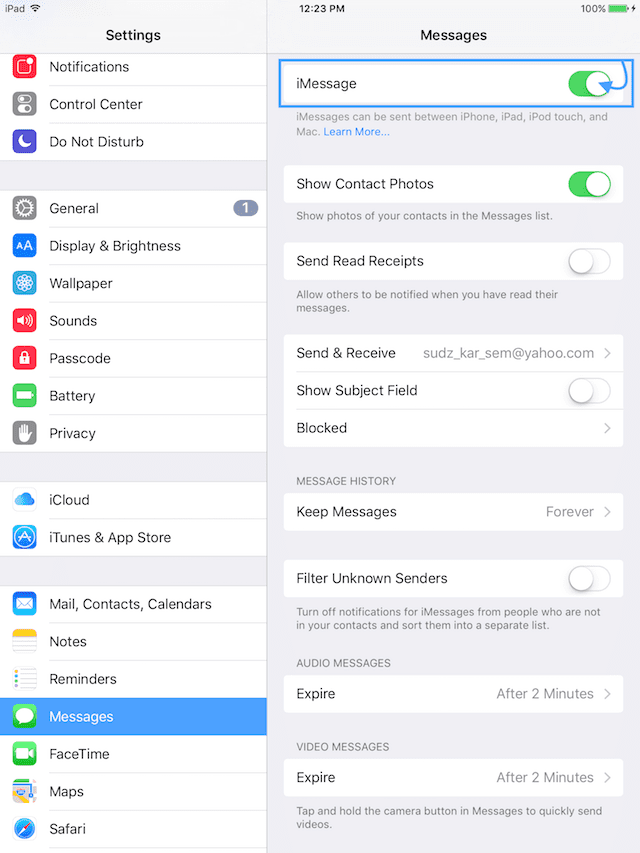
Step 3: Disable iMessage & Facetime
We will need to manually turn off the iMessage and iCloud services before performing a full erase and of course, we want to make sure that this New-to-You iDevice is disassociated from the previous owner and all their texts, private info, etc.
Go to Settings > Messages
Set iMessage to OFF by sliding to the LEFT (slider goes from green to grayed out)
Back in Settings, now go FaceTime
Set FaceTime to OFF by sliding to the LEFT (slider goes from green to grayed out)
Step 4A: Let’s Erase It Using the iDevice
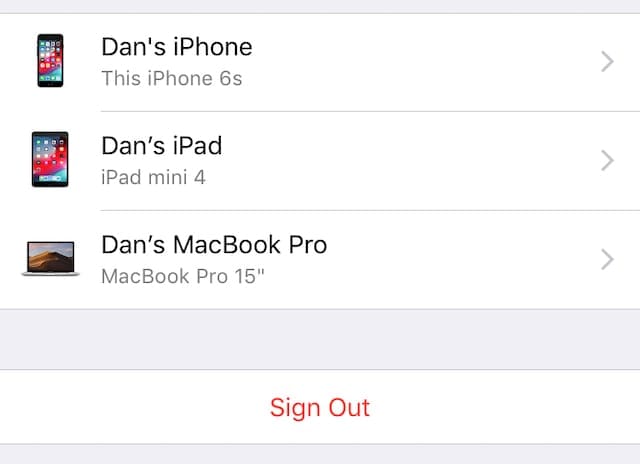
Tap Settings> Apple ID Profile
Scroll all the way down past all your connected devices (with same Apple ID) and tap Sign Out
If you see a message to turn off Find My, enter your Apple ID password and select Turn Off
For iOS 7 or earlier, tap Delete Account
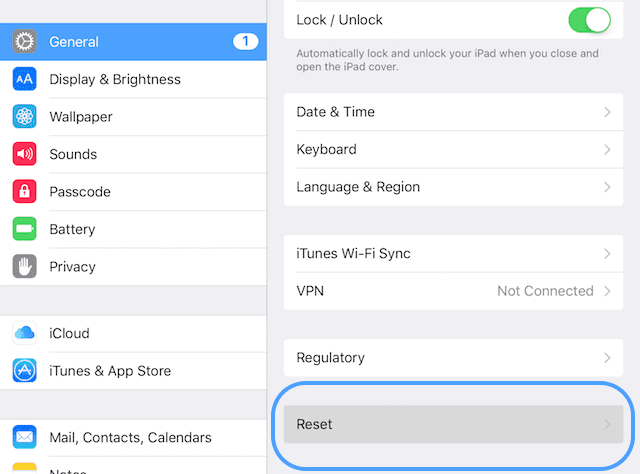
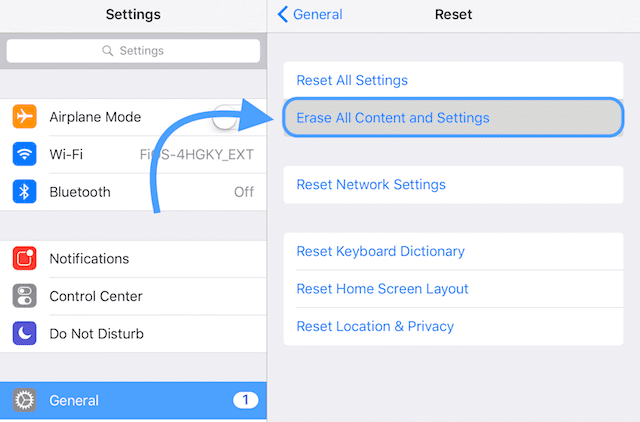
Tap Settings > General > Reset> Erase All Content and Settings
If iDevice has a passcode or Screen Time (Restrictions) passcode, you will need to enter it before you can tap Erase
Wait for the process to finish.
When the iPhone is done resetting to factory settings, it’ll reboot as if it was brand new!
Log into their account (need Apple ID and Password)
Locate the device they are gifting (selling) to you
Choose Remove
If you’re giving the iDevice to a family member especially someone who is in your family group, may choose not to do this but keep in mind that they will have access to your Apple Account, Support, and apps.
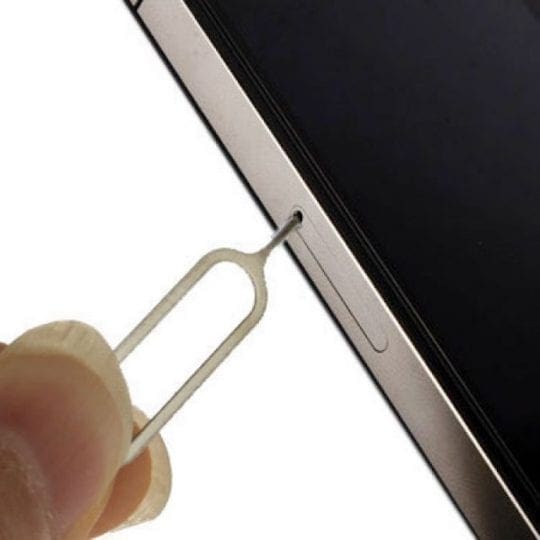
Step 6: Remove the SIM Card for iPhones/iPads
It’s important to remove that SIM card since it also stores some information.
Plus, you want to have the iPhone/iPad work on your network, not someone else’s network.
So if the previous owner did not remove the SIM Card, follow these steps:
Grab a paper clip or SIM Card Eject Pin
Turn the iPhone onto its side
Push the pin through the SIM hole
Pop the OLD SIM out
Put your SIM into the cardholder
Pop YOUR SIM into the phone
Keep the previous owner’s SIM card around (place into a small envelope and tuck away somewhere safe—away from magnets and other things that could erase it.)
These extra SIM cards can come in handy when repurposing iPhones into iPod Touches. And of course, that previous owner may need that SIM Card back. So play it safe rather than sorry!
Alright, so we cleared out all that old user junk and now we are finally ready to make that iDevice our OWN.
So let’s get to it (the fun part)!
Setting Up Our New-to-You iPhone, iPad, and iPod Touch—all our iDevices
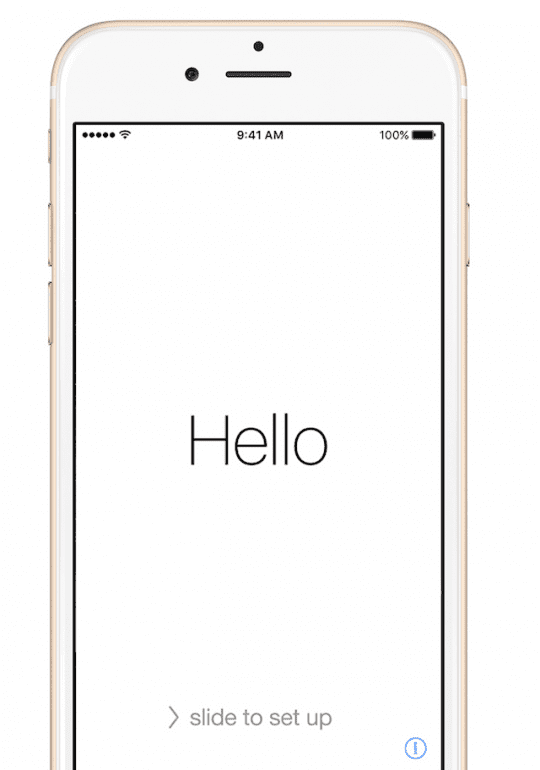
After all that time sorting through the digital junkyard that was your “gifted” iDevice, we should be greeted with a very friendly “Hello” from our new addition.
Turn on your New-to-You Device
It greets us with a nice “Hello” in a variety of languages
Choose your language and tap your country or region. This information impacts how information looks on your device, including date, time, contacts, and so forth
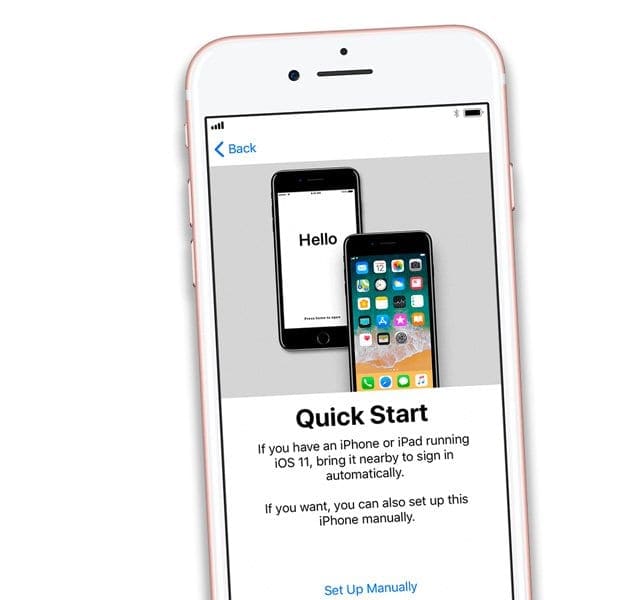
If you have another device that’s running iOS 11+, you can use it to automatically set up your new device with QuickStart
Bring the two devices close together, and then follow the instructions on-screen
If you don’t have another device with iOS 11 or later, tap Set Up Manually to continue
Connect to WiFi or Mobile Connection. You need to connect to a Wi-Fi network, a cellular network, or iTunes to activate and continue setting up your device
Tap a WiFi network or select a different option. If you’re setting up an iPhone or iPad (Wi-Fi + Cellular), insert your SIM card first
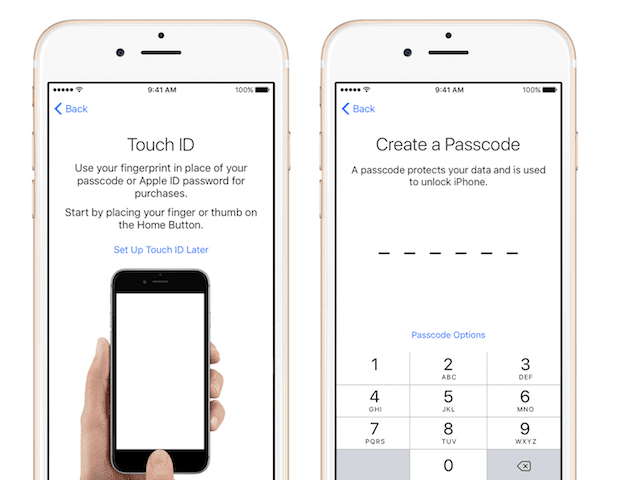
Set up your passcode and Face ID/Touch ID
You can skip this step but we don’t recommend that—your passcode/Touch ID/Face ID is your first line of defense
source: apple
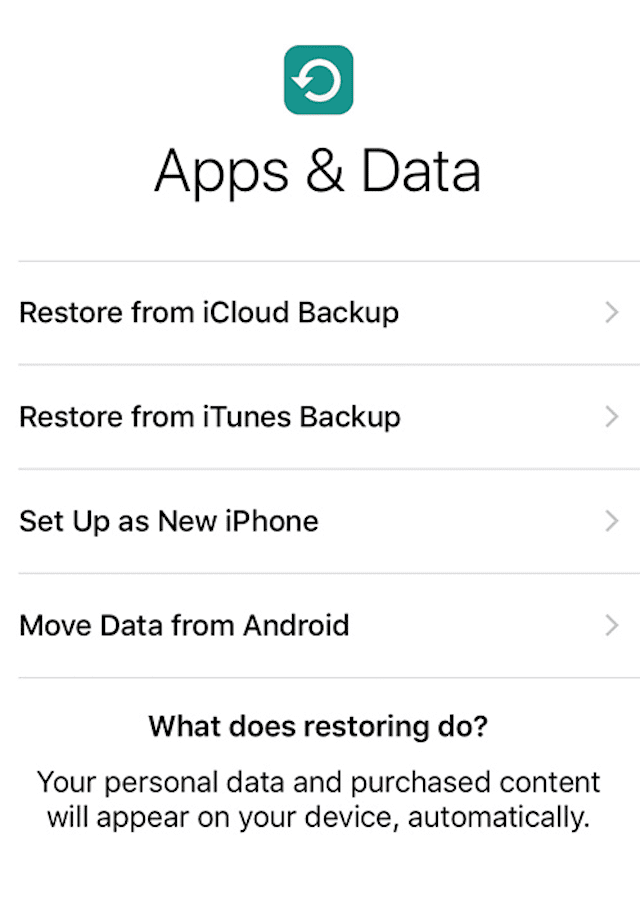
If you want to restore from a backup, you can do this here
You can even transfer from an Android phone—how cool is that!
Or you can set up as 100% new
Sign in to Apple ID or create a new Apple ID
You can skip this step too
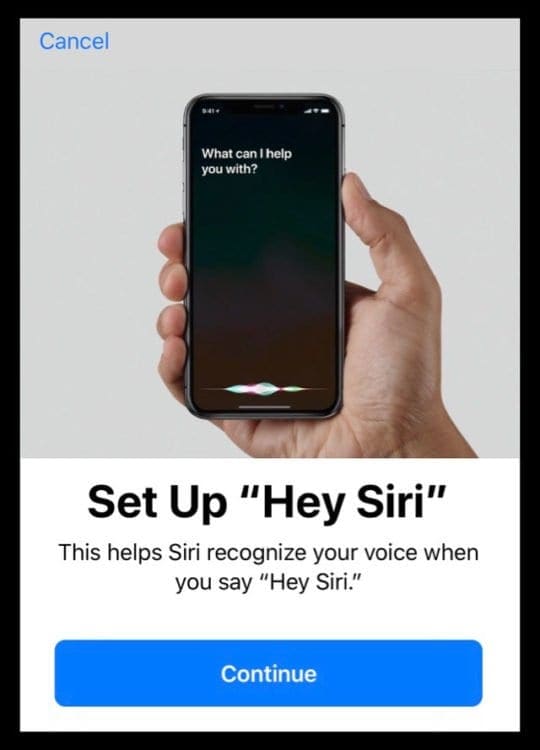
Set-up Siri
You can skip this step and set it up later (or never)
Decide if you want to set-up Screen Time or save for later (or never!)
Decide on app analytics, allowing iOS to update automatically, and turning on True Tone if your iPhone or iPad supports it
Do you want to share info with app developers or not?
Want to have your iDevice update automatically?
Choose Display Resolution
For certain iPhone models, you get to choose between standard res or zoomed (larger text and controls)
Finishing Up
Our iDevices are now ready to be our OWN rather than our New-to-You. Start using your iDevice and have some fun with it—installing apps, sending texts/emails, taking photos and videos, making calls via phone and facetime. And of course keeping track of all those calories, steps, and other personal data.
Congratulations on your New-to-You iDevice! It is now your device–use as you like. I wish you wonderful digital adventures–just the two (or three or four or however many) of you.
For most of her professional life, Amanda Elizabeth (Liz for short) trained all sorts of folks on how to use media as a tool to tell their own unique stories. She knows a thing or two about teaching others and creating how-to guides!
Her clients include Edutopia, Scribe Video Center, Third Path Institute, Bracket, The Philadelphia Museum of Art, and the Big Picture Alliance.
Elizabeth received her Master of Fine Arts degree in media making from Temple University, where she also taught undergrads as an adjunct faculty member in their department of Film and Media Arts.
I am having a problem installing apps on a gifted Iphone. When I try to download, I get the message, “”This Apple ID has not yet been used in the iTunesStore”. I enter my personal information, then have to do it all over again when I get another app. Why is this info not saved?
I was given an iPhone 5 by a family member. I inserted my own SIM and deleted the previous owners Appleid. This deleted their Outlook inbox for which they had no backups. My fault, apparently so no longer speaking.
The easiest way to start fresh with your new iPad is to create a new Apple ID on it.
You will need a different email than the one used for your previous Apple ID.
If you don’t have a second email address, consider creating one with Google, Yahoo, Outlook or your email provider of preference. Then just use this email address for your Apple ID and all other things related to Apple and your iPad.
My daughter gave me her I Pad, and she said she erased everything out, but it won’t take my ID or password to unlock it. She said she already did all she was suppose to do. What can I can do
to get it takes my Id and password.
I don’t know how to do it on ITunes there is nothing for me to click on. all I see is music.
Thank you
Sorry for the late reply–was under the weather. Anyway, if you don’t have any data yet on your iPad, ask your daughter to unlock the device using the iPad’s passcode (this is different than your Apple ID information) and then try the following:
Go to Settings > General > Reset
Choose Erase All Content and Settings
Select either Backup Then Erase or Erase Now (recommended if you don’t have data on the iPad yet)
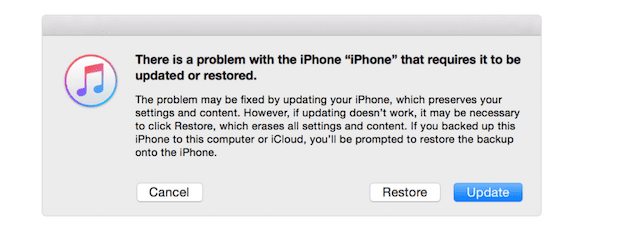
If you can’t unlock it–try using the default passcode of 1234 or 123456, depending on how many digits are required. If that still doesn’t work, you will need to use iTunes and enter Recovery Mode.
If you have a lot of data stored on iCloud, especially things like photos and videos, then it can take quite a bit of time to update and sync iCloud to the new device. And if your internet connection is slow or slower than usual, that also adds time.
Hopefully, your iCloud is now set-up and working as expected. If not, perform a restart (completely power off and then back on) and try again. Make sure you’re connected to your fatest WiFi connection if available (like 5Ghz instead of 2Ghz)


I am having a problem installing apps on a gifted Iphone. When I try to download, I get the message, “”This Apple ID has not yet been used in the iTunesStore”. I enter my personal information, then have to do it all over again when I get another app. Why is this info not saved?
I was given an iPhone 5 by a family member. I inserted my own SIM and deleted the previous owners Appleid. This deleted their Outlook inbox for which they had no backups. My fault, apparently so no longer speaking.
I got a new iPad.
I had an Apple 2nd generation and now I bought an Apple 6th generation iPad 128 GB.
I am giving my old one away and would just like to start out fresh with this new iPad instead of transferring everything over.
I can’t seem to remember my i tunes username and password.
How can I just erase everything and start over because there might be a few apps I might want to get.
And I would like to change my passwords so I have the same one for everything.
I know I am not supposed to do that but it is the only way I can remember it.
Thanks Kim
Hi Kim,
The easiest way to start fresh with your new iPad is to create a new Apple ID on it.
You will need a different email than the one used for your previous Apple ID.
If you don’t have a second email address, consider creating one with Google, Yahoo, Outlook or your email provider of preference. Then just use this email address for your Apple ID and all other things related to Apple and your iPad.
If you want to use your current Apple ID but cannot remember it, go to your Apple ID account page using a browser not an app and click Forgot Apple ID or password.
Keep us posted and let us know if you have any additional questions,
Liz
Very helpful. Thank you.
My daughter gave me her I Pad, and she said she erased everything out, but it won’t take my ID or password to unlock it. She said she already did all she was suppose to do. What can I can do
to get it takes my Id and password.
I don’t know how to do it on ITunes there is nothing for me to click on. all I see is music.
Thank you
Hi Sharon,
Sorry for the late reply–was under the weather. Anyway, if you don’t have any data yet on your iPad, ask your daughter to unlock the device using the iPad’s passcode (this is different than your Apple ID information) and then try the following:
Go to Settings > General > Reset
Choose Erase All Content and Settings
Select either Backup Then Erase or Erase Now (recommended if you don’t have data on the iPad yet)
If you can’t unlock it–try using the default passcode of 1234 or 123456, depending on how many digits are required. If that still doesn’t work, you will need to use iTunes and enter Recovery Mode.
Let us know if problems persist,
Liz
Have inherited iPad mini. Gone thru set up and has been updating icloud settings for over 1 1/2 hrs. Is this typical
Hi Pat,
If you have a lot of data stored on iCloud, especially things like photos and videos, then it can take quite a bit of time to update and sync iCloud to the new device. And if your internet connection is slow or slower than usual, that also adds time.
Hopefully, your iCloud is now set-up and working as expected. If not, perform a restart (completely power off and then back on) and try again. Make sure you’re connected to your fatest WiFi connection if available (like 5Ghz instead of 2Ghz)
Best of luck,
SK