Many of us have more photos on our computers than we have space for on our iPhones. Apple’s solution to this problem is iCloud Photos, a service that uploads your library to the cloud. But for many users, iCloud Photos could not be turned on with their device!
If you’re forever syncing new photos to your iPhone using iTunes, iCloud Photos could save you a lot of time. It’s available on any Apple device and you can also use it with your PC thanks to iCloud for Windows.
Rather than syncing and re-syncing photos or videos using iTunes, iCloud Photos uploads everything to iCloud so you can view it all from your device at the same time. It’s very similar to Google Photos, except iCloud never compresses your images.
However, you can’t enjoy this service if your device keeps saying “iCloud Photos Could Not Be Turned On.”When that happens, you can use the instructions in this post to fix it.
All the instructions in this article are still applicable for macOS Catalina users, despite the fact they don’t have iTunes. Just use Finder instead of iTunes to sync or un-sync your devices.
macOS Catalina replaces iTunes with Music, TV, and Podcasts apps.
Why can’t I turn on iCloud Photos?
Your iPhone, iPad, or iPod touch can either sync photos over iTunes or it can sync photos over iCloud Photos. But it can’t do both at the same time. Photos on your device that synced from iTunes interfere with turning on iCloud Photos.
Apple put this either-or system in place to avoid uploading duplicate photos and using too much iCloud space.
An alert shows how many photos need to be removed to use iCloud Photos.
After turning on iCloud Photos, you might have received a message explaining “Photos and Videos Synced from iTunes will be Removed.” It also tells you how many photos or videos will be removed.
Tapping the option to Remove Photos and Videos — which you should only do if you’re certain you still have a copy of them on your computer — doesn’t always work.
For many users, the photos and videos remained on their device, which is why they got a second message saying “iCloud Photos Could Not Be Turned On.”
The solution is to remove those photos yourself by re-syncing your device with iTunes. If you’re certain there aren’t any iTunes photos on your device, click here to skip this section.
How do I remove iTunes photos from my device?
Use the cable that came with your iPhone, iPad, or iPod touch to connect it to a computer running iTunes.
Open iTunes on the computer and select the iPhone, iPad, or iPod touch icon that appears in the top-left.
Click on Photos from the sidebar.
Uncheck the box to Sync Photos (or ensure there are no albums selected below).
Click Apply and Sync your device.
Wait for the sync to complete, then eject your device.
Make sure you don’t sync any photos from iTunes to your device.
Before trying to turn on iCloud Photos again, you should restart your device and make sure the iTunes photos and videos are gone. You can do this by looking for them in the Photos app.
What if I still can’t turn on iCloud Photos?
Despite removing iTunes photos and videos from their device, some users still can’t turn on iCloud Photos. If this happens to you, try the troubleshooting tips below.
1. Update the software on all your iCloud devices
Out-of-date software can cause all manner of problems. If one of the devices you use iCloud Photos with isn’t up-to-date, it might interfere with iCloud Photos on your other devices.
Make sure each of your iCloud devices is running the latest available software.
How do I update the software on my iPhone, iPad, or iPod touch?
Use Wi-Fi to connect your device to the Internet.
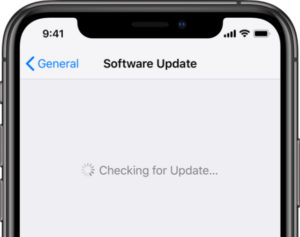
Go to Settings > General > Software Update.
Download and install any available software updates.
Make sure you’re running the latest available software on your devices.
How do I update the software on my Mac?
Make sure your Mac connects to the Internet.
From the menu bar, go to > System Preferences… > Software Update.
Download and install any available software updates.
If an update is available, click Update Now to install it.
Download and install any available software updates.
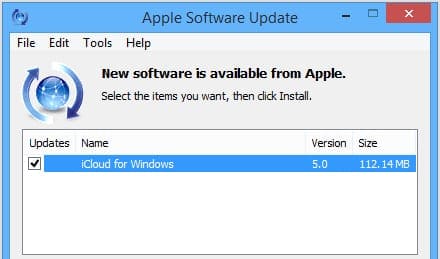
Apple Software Update finds updates for Apple software on your PC, like iCloud for Windows or iTunes.
2. Check you have enough iCloud storage
A lot of photos and not a lot of storage can lead to problems turning on iCloud Photos. You need to make sure you’ve got enough available iCloud storage to save all the photos from your device.
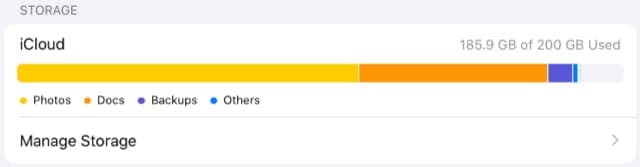
Find your available iCloud storage at the top of the page.
Make sure you’ve got enough free iCloud storage to store all your photos and videos.
How much storage do I need for my photos and videos?
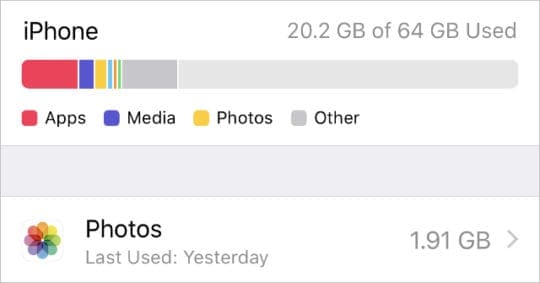
Go to Settings > General > [iDevice] Storage.
Find Photos in the list to see how much storage your photos use.
Find out how much storage you need for your photos from the Settings app.
3. Add a new photo from iTunes, then remove it again
There may be an iTunes photo on your device without iTunes realizing it’s there. To fix this, you should sync at least one new photo to your device, then un-sync it again. This ensures iTunes removes all the photos.
You should also turn off iTunes Wi-Fi sync so your device can only sync to iTunes when you physically connect it.
How do I turn off Wi-Fi sync in iTunes?
Use the cable that came with your iPhone, iPad, or iPod touch to connect it to a computer running iTunes.
Open iTunes on the computer and select the iPhone, iPad, or iPod touch icon that appears in the top-left.
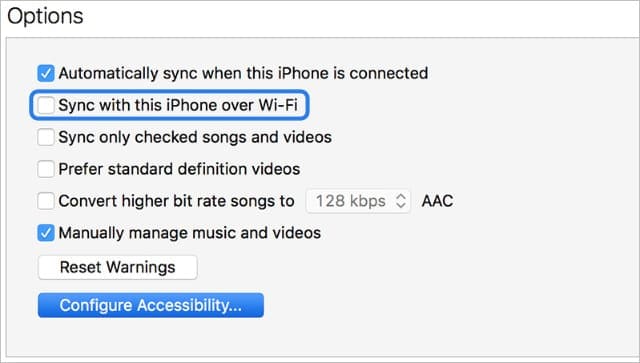
Click on Summary from the sidebar.
Under the Options section, uncheck the box to “Sync with this [iDevice] over Wi-Fi.”
Click Apply in the bottom-right.
Don’t let your device sync to iTunes over Wi-Fi.
How do I sync a new photo to my device?
Use the cable that came with your iPhone, iPad, or iPod touch to connect it to a computer running iTunes.
Open iTunes on the computer and select the iPhone, iPad, or iPod touch icon that appears in the top-left.
Click on Photos from the sidebar.
Check the box to Sync Photos, then select the radio button to sync Selected albums.
Check the box next to at least one photo or album from your computer.
Click Apply and Sync your device.
Wait for the sync to complete, then eject your device.
Choose to sync photos to your device one time, then remove them again afterward.
4. Restore your device to factory settings
If you already have a copy of your photos elsewhere, for instance on a computer, you could try restoring your device to factory settings to turn iCloud Photos on.
In this situation, you’d need to upload your entire library to iCloud Photos from another device. For instance, you could upload everything to iCloud Photos from a computer that has a copy of your photos and videos on it.
How do I restore my iPhone, iPad, or iPod touch to factory settings?
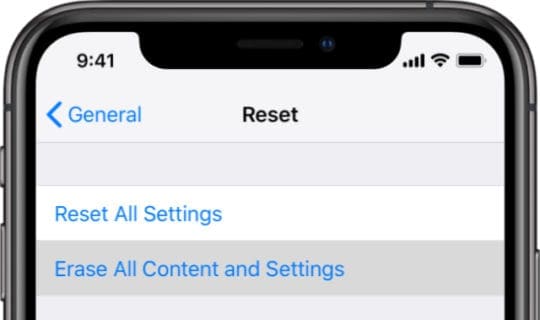
Go to Settings > General > Reset.
Choose to Erase All Content and Settings.
If prompted, enter your Apple ID password to turn off Find My [iDevice].
Confirm you want to reset your device.
When the device restarts, follow the setup prompts until you reach the Apps & Data page.
Choose to Set Up as New [iDevice].
When you sign in to your Apple ID on the restored device, you should be able to turn on iCloud Photos and download your photo library.
Make sure you back up your device before you erase it.
Let us know in the comments below how you got on with this post. We’re eager to know which tip worked for you so we can keep working to improve it for future readers. Or if nothing worked, check out this post to get in touch with Apple directly!
Dan writes tutorials and troubleshooting guides to help people make the most of their technology. Before becoming a writer, he earned a BSc in Sound Technology, supervised repairs at an Apple Store, and even taught English in China.

 Follow these quick tips to fix the “iCloud Photos Could Not Be Turned On” error message or read the full instructions further down:


Write a Comment