You’ve probably been in situations where you’ve needed to use your iPhone’s flashlight. Maybe you were looking for something in the basement or beneath the sofa, and perhaps you’ve needed to use the flashlight in public. I can remember many times when it’s been too dark to see while out, and the iPhone flashlight was the only option.
If your iPhone flashlight isn’t working, you can run into several problems at times you’d prefer not to. For example, you may find that you’re unprepared for an unexpected power outage. The solution to this issue is normally straightforward, though.
Today, you’ll discover over a dozen potential ways to fix issues you may have with your iPhone flashlight not working. Let’s dive in and check them out.
While many of the solutions in this guide are associated with settings you can change on your iPhone, none of them will work if your flashlight has significant physical damage. Check to see if your device has any broken glass or the like, especially if you recently dropped your iPhone. For example, my iPhone 8 flashlight broke after I dropped my device on the bathroom floor (which also cracked the screen and destroyed one of my cameras).
One good way to check if the physical damage has impacted your iPhone flashlight is to open the Camera app and turn on the flashlight icon. If you can take flash photos, you should also be able to use the flashlight.
If you can’t use the flashlight, take your iPhone to a repair store as soon as possible. But if you’ve verified that it’s possible via your Camera app’s flash feature, move on to the following steps.
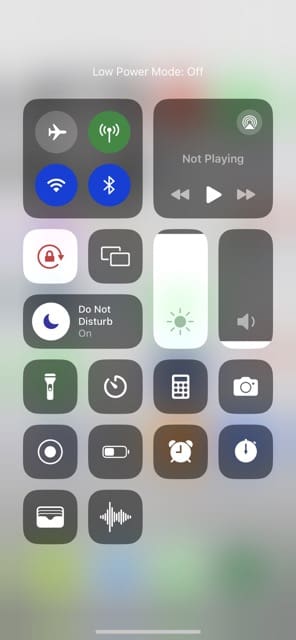
Turn Off Low Power Mode
Low Power Mode disables many features on your iPhone, including the flashlight. So, if you have the tool switched on, but it isn’t necessary, consider turning off Low Power Mode and assessing whether your iPhone is now able to work as it should.
The easiest way to switch off Low Power Mode is via the Control Center. Simply tap the battery icon so it’s no longer yellow.
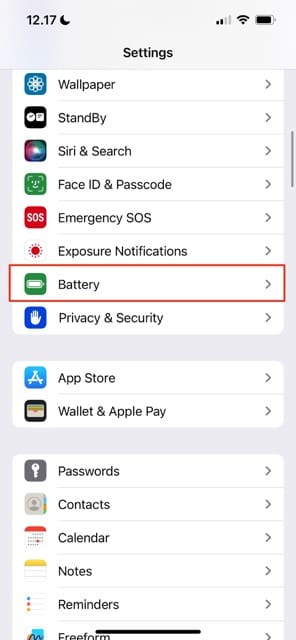
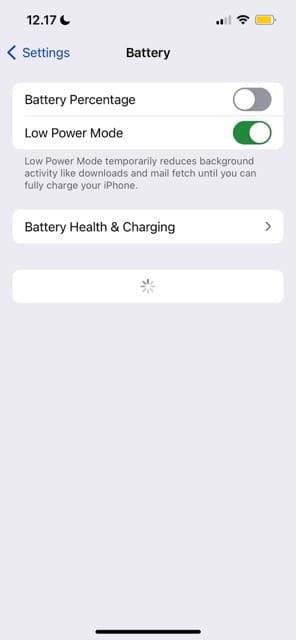
If you don’t have Low Power Mode in the Control Center, go to Settings > Battery and toggle Low Power Mode off there instead.
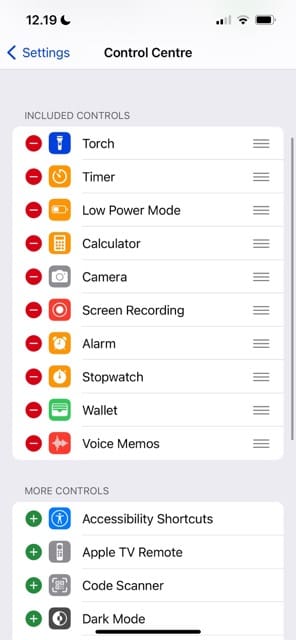
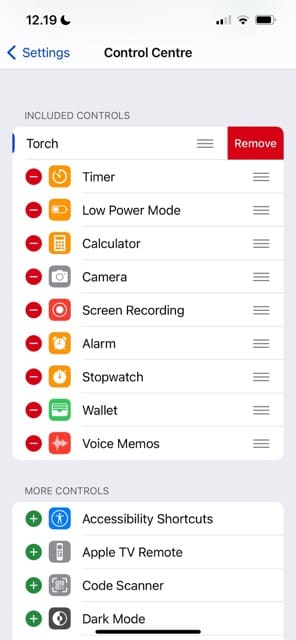
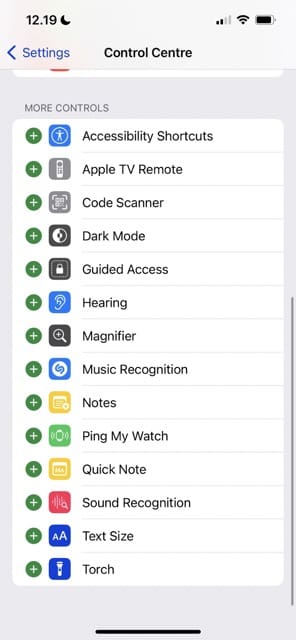
Remove and Re-Add Your Flashlight to the Control Center
If you’re still having trouble with using your iPhone’s flashlight, remove and re-add the feature in the Control Center. Follow these instructions:
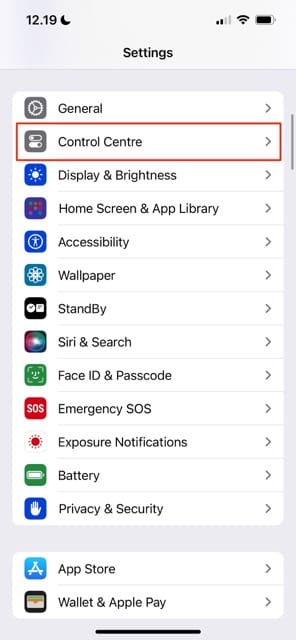
Go to Settings > Control Center.
Tap the – icon next to Torch.
Select Remove when the option appears.
Go down to More Controls and tap the + icon next to Torch.
Swipe down to reveal your Control Center and ensure that the feature is there again. Then, tap the Torch icon to turn it on.
Close Your Background Apps
Other apps might interfere with the iPhone flashlight. The Camera app is one, since it uses the same light for flash photography. But to stop any other potential issues, you should close all of your background apps to experiment with the flashlight issue.
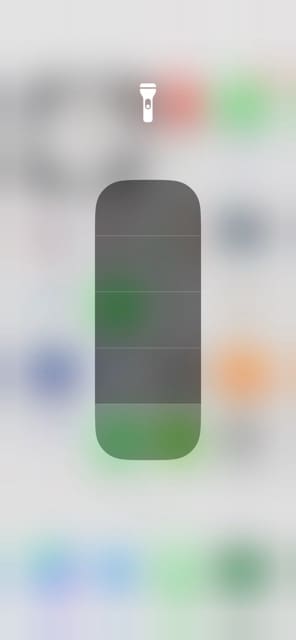
Simply swipe up on your device and close all of the background apps. Then, go to the Control Center and tap the Torch icon. You can open the apps again after verifying that your iPhone flashlight works.
Check Your iPhone Flashlight Brightness Settings
In many cases, you might not actually have a problem with your iPhone flashlight. Instead, the brightness might just not be high enough. You can easily check this via the Control Center by following the steps below.
Open the Control Center.
Press and hold on to the Torch icon.
Tap the bar level for which you want your flashlight’s brightness strength to be. Alternatively, move your finger upwards to increase the intensity.
Tap anywhere on your screen to return to the Control Center before tapping again to return to your Home Screen.
Switch on Flash Mode in Your Camera App
If your iPhone didn’t have physical damage and you didn’t try turning on your camera’s flash mode, you should attempt this step if nothing has worked so far. Simply open the Camera app and tap the flash icon so that the icon is yellow.
Turn Camera Mode Off and On Again
You can also adjust specific settings for the iPhone Camera app if you’re having problems with your flashlight not working. Follow these instructions to do that:
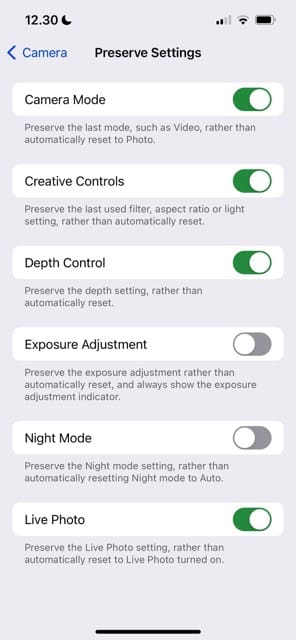
Open the Settings app and go to Camera.
Select Preserve Settings.
Toggle Camera Mode, Creative Controls, Exposure Adjustment, and Night Mode off.
Test your iPhone flashlight. You can turn the Camera settings back on if you’ve verified that the flashlight works and you want to use some of these.
Turn Your iPhone Off and On Again
We’ve all had problems with our iPhones that we have then easily solved by turning our devices off and on again. The flashlight is no exception, so you should implement this step if you’re still having trouble using your torch.
iPhones with Face ID: Hold one of the volume buttons and the standby button until you see the slide to power off option. Turn off your iPhone and hold the standby button to switch it back on. You can let go when you see the Apple logo.
iPhone without Face ID: Hold the standby button until you see the option saying slide to power off. Turn off your iPhone and hold the standby button to switch it back on. You can let go when you see the Apple logo.
You can also try force restarting your iPhone.
iPhones with Face ID: Tap both volume buttons before holding the standby button. Let go when the device has switched off and the Apple logo reappears.
iPhones with a Home Button: Hold the standby and Home Button until your device turns off and back on. Let go when you see the Apple logo.
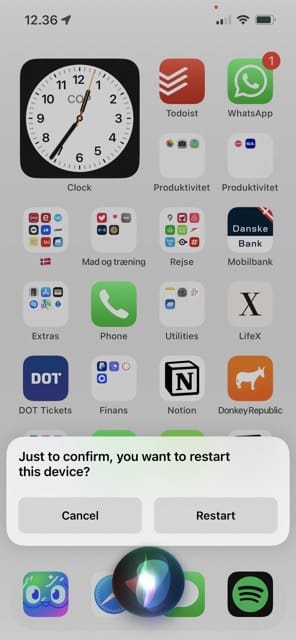
You can also restart your iPhone with Siri. If your iPhone has a Home Button, hold this until the Siri icon appears. If your device uses Face ID instead, hold the standby button until you see Siri. Then, say:
“Siri, please restart my iPhone”
You may need to confirm your choice, but you’ll see a prompt on your screen if this is the case.
Has Your iPhone Been Water-Damaged Recently?
iPhones are much more resilient to water and moisture these days, but they can still impact the functionality of your flashlight. So, if you’ve recently dropped your iPhone in water – or used your device outside in heavy rainfall – it’s worth taking the steps to fix your device.
lease refer to this guide if you think that you’re having problems with your iPhone flashlight due to water damage:
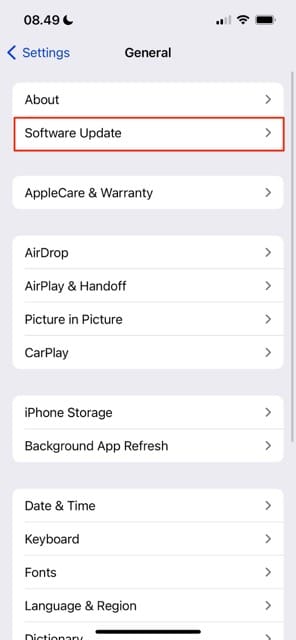
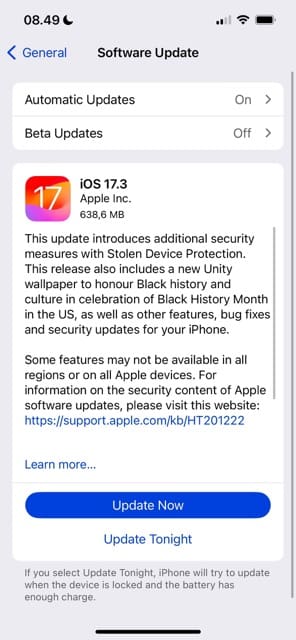
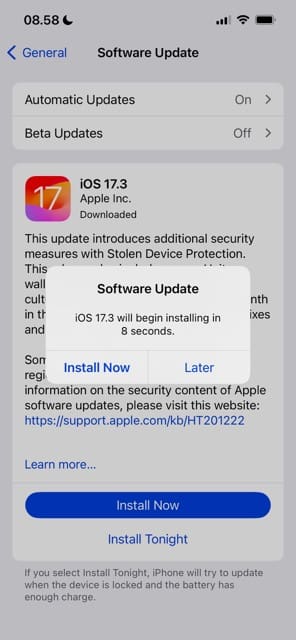
Sometimes, your iPhone flashlight may stop working because of a glitch with your iOS software. When this happens, it’s worth checking to see if you can perform an update on your device.
Go to Settings > General > Software Update and wait for your iPhone to check for updates. If you need to update your device, follow the remaining instructions on your phone screen.
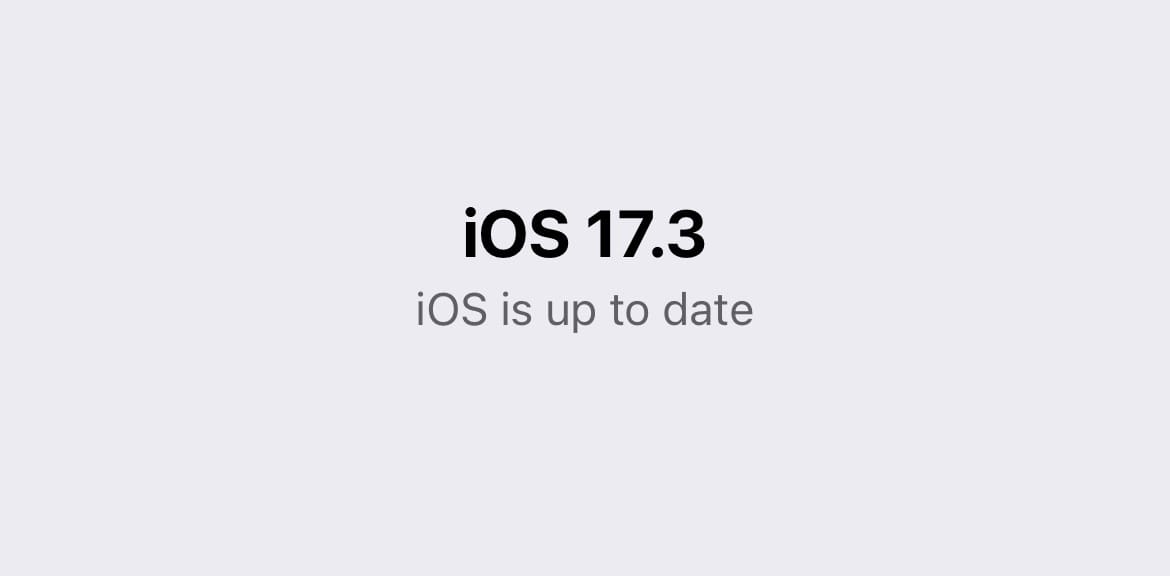
If your iPhone software is up to date, you’ll see the following message:
Take Your Finger or Hand Away From the Flashlight
Another easy fix for your iPhone flashlight not working is to take your finger or hand away from the torch. It’s very easy to forget about this, and it can cause you needless stress. Once you’ve moved your hand and/or finger away from the torch, try again and confirm whether it’s now working as it should.
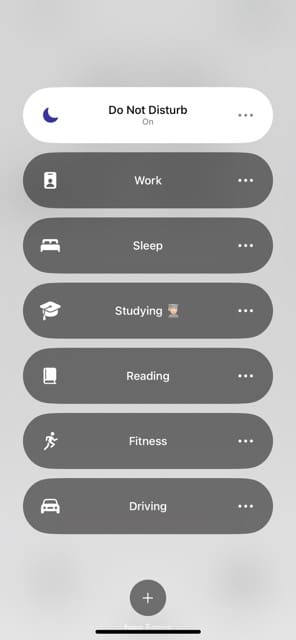
Turn Off Your Focus Mode
Some Focus Modes can stop features like your flashlight from working. You shouldn’t experience this with Do Not Disturb, but it’s worth trying – regardless of whether you use DND or something else.
To turn off your current Focus Mode:
Lock your iPhone and wake up your screen. Either tap your screen twice, click on the standby button, or – if you have Rise to Wake enabled – raise your iPhone upwards.
Tap and hold on to the Focus Mode at the bottom of your screen.
Tap once on the Focus Mode to turn it off.
Reset or Restore Your iPhone
Resetting your iPhone settings will restore anything that you’ve saved, such as Wi-Fi passwords – so it’s quite a dramatic step that you should try to avoid if possible. Meanwhile, restoring your iPhone will wipe your device back to factory settings.
>How to Reset Your iPhone Settings
Before you reset your iPhone settings, make sure you’ve made a note of all your passwords and whatnot. Then, follow these steps.
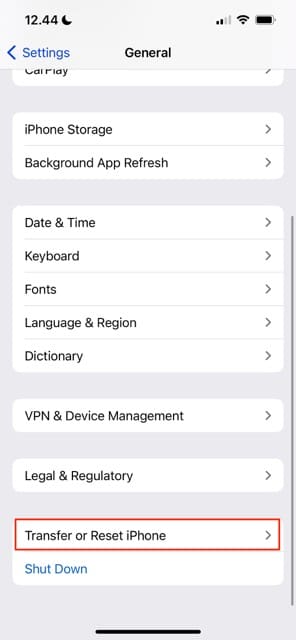
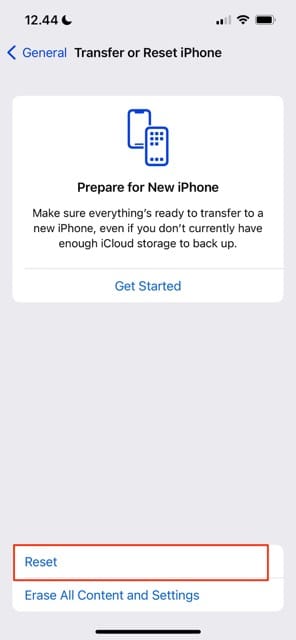
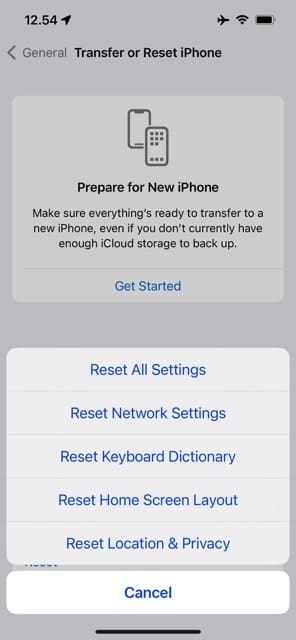
Go to Settings > General > Transfer or Reset iPhone > Reset.
Select Reset All Settings.
How to Restore Your iPhone
Before restoring your iPhone, you need to perform a backup if you don’t want to lose important data – such as photos and notes. Here’s how to do that:
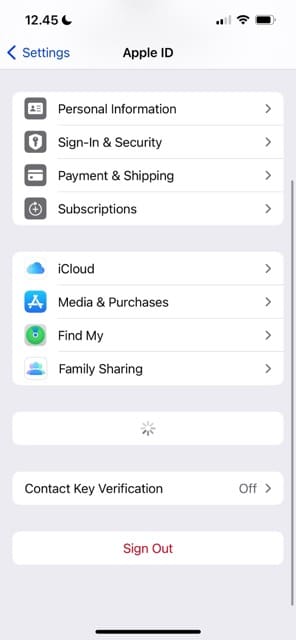
Go to Settings > Apple ID > iCloud.
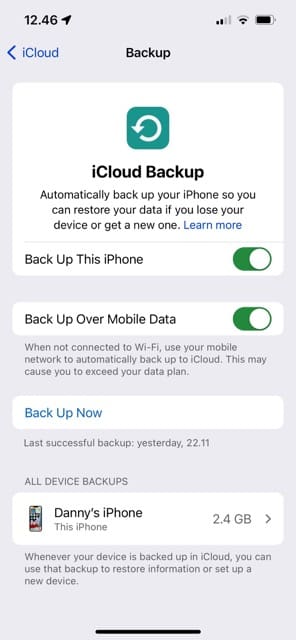
Under Device Backups, tap iCloud Backup.
Toggle on Back Up This iPhone if you haven’t already. Then, select Back Up Now.
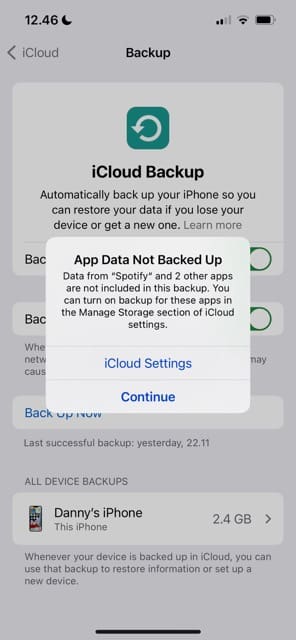
A pop-up window might appear. Select Continue if it does.
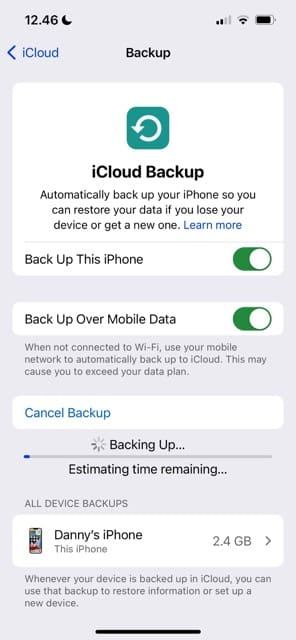
Wait for your iPhone to complete the backup.
Once you’ve backed up your iPhone, follow these steps to completely restore your device.
Go to Settings > General > Transfer or Reset iPhone.
Select Erase All Content and Settings.
Tap Continue and follow any remaining steps that your iPhone asks you to do.
Get a Replacement Flashlight if Needed
In some cases, you might still find that your iPhone flashlight is still not working. When that happens, you should try and get a replacement.
It’s worth taking your iPhone to an Apple Store so that someone can look at your device and potentially provide assistance. Whether you need to pay for your replacement – and how much you need to pay – will likely depend on whether you’re still within the warranty period or if you use AppleCare+.
To contact Apple and have them look at your iPhone flashlight and understand your coverage status, please read these guides:
Use These Tips to Fix Your iPhone Flashlight if It Isn’t Working
If your iPhone flashlight isn’t working for whatever reason, it can be incredibly frustrating – especially in those situations where using it is a necessity. Fortunately, you can toggle multiple settings on your iPhone to determine whether the torch on your device is beyond saving or not.
From changing your flashlight settings in the Control Center to checking for physical and water damage, we hope that these steps helped you solve the problem. If they haven’t, you should contact Apple Support and see whether they can help you further.
If you have any questions, please let us know in the comments section. You can also leave your advice for other iPhone users if you fixed the problem yourself.
Danny has been a professional writer since graduating from university in 2016, but he’s been writing online for over a decade. He has been intrigued by Apple products ever since getting an iPod Shuffle in 2008 and particularly enjoys writing about iPhones and iPads. Danny prides himself on making complex topics easy to understand. In his spare time, he’s a keen photographer.


")


Write a Comment