The number one secret to keeping your iPhone and iPad healthy and safe is to install the latest iOS updates as soon as they’re out. The newest iOS versions pack many useful system improvements, as well as new features. If you use iTunes to update your iOS devices, you may occasionally get an annoying error message that says “The iPhone/iPad update server could not be contacted“. Let’s explore how you can get rid of this error.
iTunes Couldn’t Contact the Software Update Server for iPhone or iPad
Go to Settings, select General, and then tap Software Update. Check if you can update your iOS devices without iTunes. Normally, you’d use iTunes if you’re locked out or your iPhone is in Recovery mode.
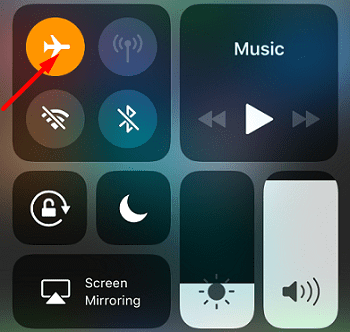
First things first, let’s make sure your Internet connection is not the culprit. Disconnect your iPhone or iPad from your computer, enable Airplane mode on your mobile device, and restart it.
Then, unplug your router and restart your Mac. Wait for two minutes, plug your router’s power cable back in, and power up all of your devices. Connect your iPhone or iPad to your computer, launch iTunes and check if you can update your iOS version now. If the issue persists, switch to a different network connection, if that’s possible.
Check Your Date and Time Settings
If your devices fail to contact the update servers, this may indicate your date and time settings are incorrect. As a quick reminder, the update servers automatically check the date and time settings on your iOS and macOS devices for security reasons. If your settings are inaccurate, you won’t be able to download the latest updates.
Disconnect your devices and close iTunes.
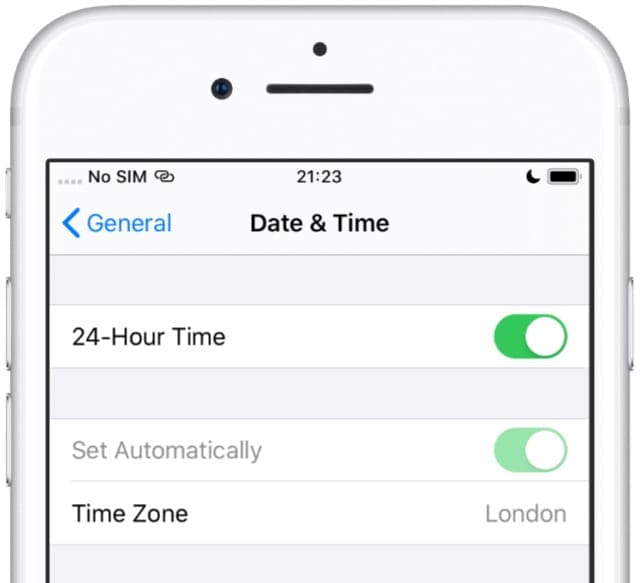
On your iOS device, go to Settings, select General, and tap Date and time.
Set your date and time automatically to make sure they’re correct.
Allow your device to automatically set the date and time based on your time zone.
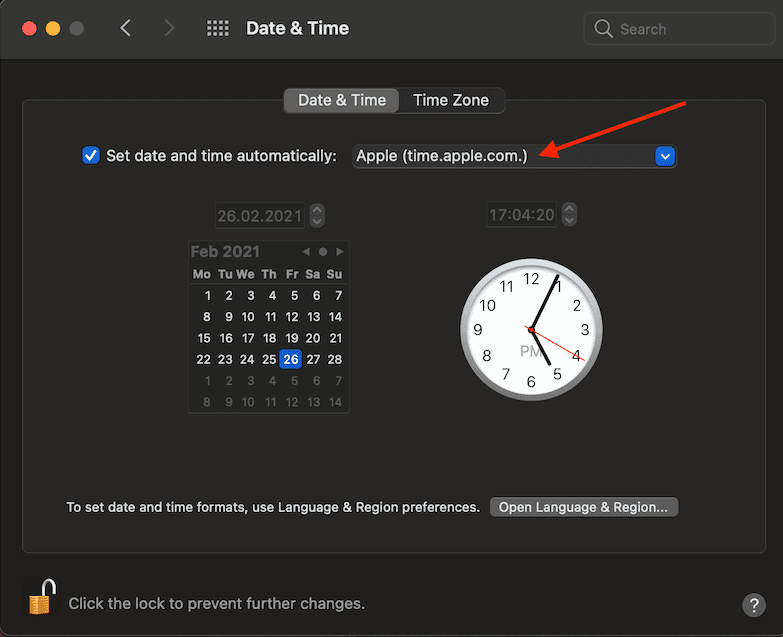
Then, on your computer, go to System Preferences, and click Date & Time.
Allow your machine to set the date and time automatically.
Do the same for your Time Zone settings.
Disable your antivirus, if you’re using one.
Connect your iOS and macOS devices, launch iTunes, and check if you can install the latest updates.
Remove the Update That Failed to Install
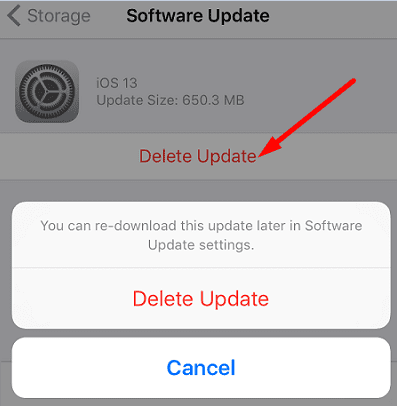
Go to Storage, and delete the update that failed to install. Failed or unfinished updates may block future update attempts.
Navigate to Settings, tap on General, and go to Storage.
Go to your list of apps, and locate the update that failed to install.
Tap Delete Update, and restart your iPhone.
Then, go to Settings, select General, and tap Software Update.
Reset Your Host Files
Launch Finder, go to Applications, select Utilities, and launch Terminal.
Then, run the sudo nano /private/etc/hosts command to open the host files.
Enter your password, and use the arrow keys to check if any of the host file lines includes apple.com.
If this is the case, then add # and space to the beginning of the line.
Press Control-O to save the changes. Then, press Control-X to exit Terminal.
On the other hand, if you’re using iTunes for Windows 10, go to Microsoft’s support page for step-by-step instructions.
Conclusion
If iTunes says it couldn’t contact the iPhone or iPad update server, check your Internet connection and restart your router. Then, make sure your date and time settings are correct. Additionally, remove the update that failed to install on your iOS device, and reset your computer’s host files. Hit the comments below and let us know which of these four solutions did the trick for you.
Madalina has been a Windows fan ever since she got her hands on her first Windows XP computer. She is interested in all things technology, especially emerging technologies — AI and DNA computing in particular.


Write a Comment